Rivets
A few basic types of rivets are used when making jewelry. Each type of rivet (and eyelet) requires different tools and techniques. First I’ll show what each looks like and describe key features. In the second section, I’ll explain how to use them.
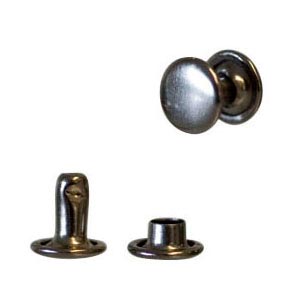
2-part Rivet Sets
(or Compression Rivets):

2-Part Rivets
- Thicker than most wire rivets
- Generally used with leather
- Require the fewest tools
- Easiest to set
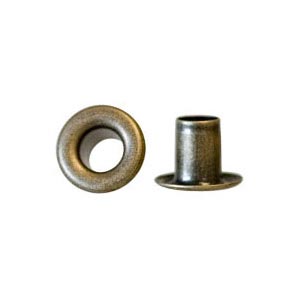
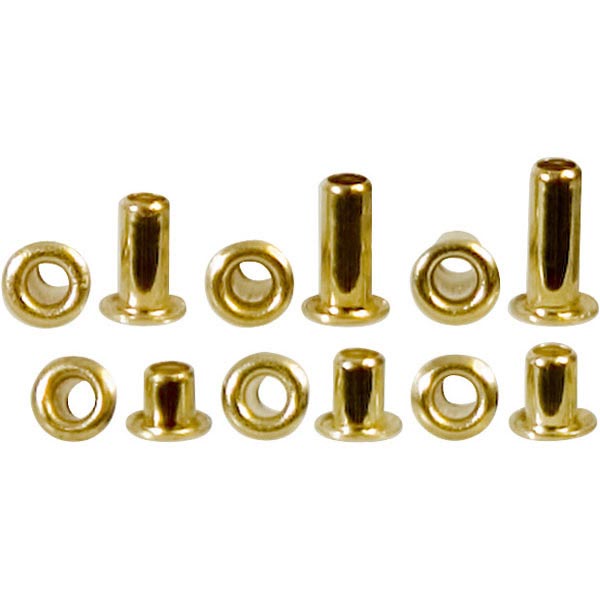
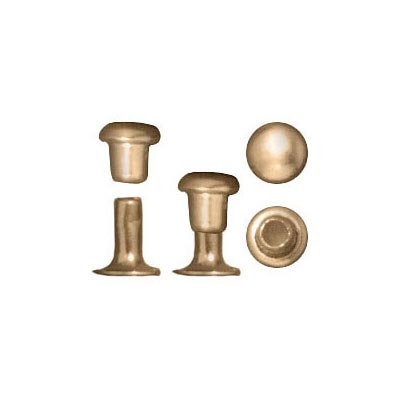
Semi-tubular Rivets:
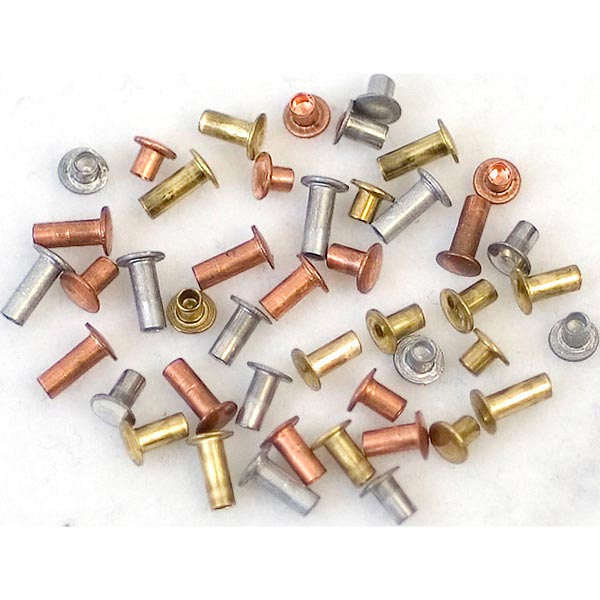
Semi-tubular rivets
- Available in over 100 lengths, diameters and materials!
- Look like the “cap” portion of 2-part rivets
- Fast and easy to use
- Designed to be set with the Crafted Findings riveting system
- Can be set by hand, using the same technique as wire rivets
Wire Rivets:
Classic “old-school” wire rivets are simply wire — they can be made from any gauge of malleable wire, in any length you need. This is a wonderful skill, but time-consuming to do properly.
Nail-head rivets and fancy wire rivets are half as much work as wire rivets, because one end is already finished for you.
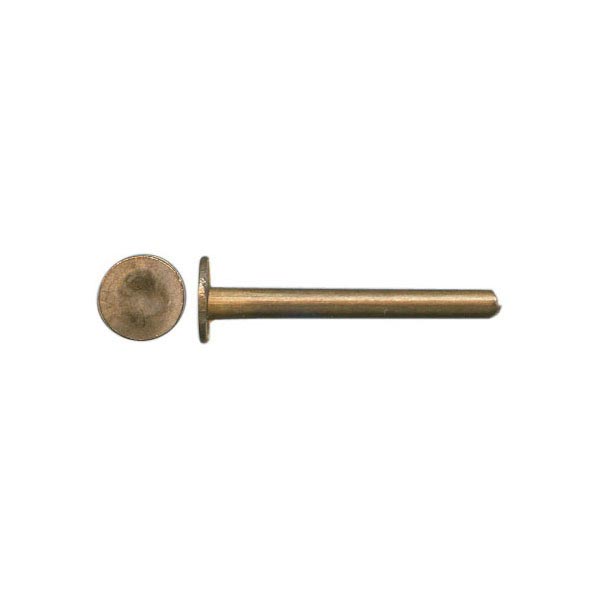
Nail-Head Rivets
Nail-Head Rivets:
- Natural brass color
- Approx. 1.5mm-diameter post
- Basically a wire rivet with one end pre-finished
- Fairly simple to cut to length, and set with a hammer and block
Fancy Wire Rivets:
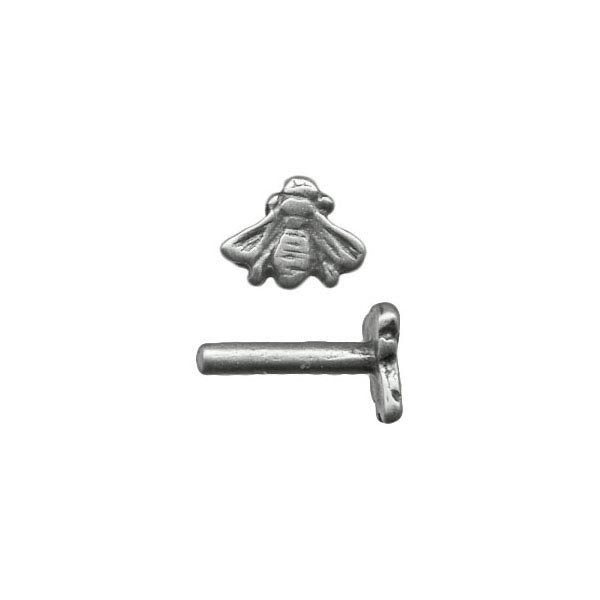
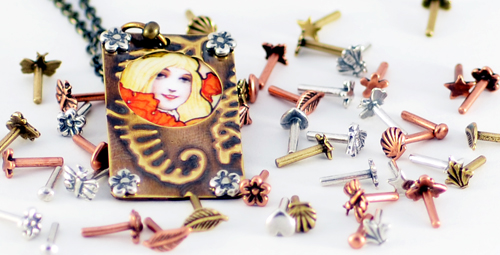
Fancy Rivets
- 3 colors
- Great designs (bumblebees, stars, hearts…)
- Approx. 1.5mm-diameter post
- Basically a wire rivet with one end pre-finished in a fancy design
- A little tough to set (hammer and block), but worth the effort!
Eyelets:
Eyelets are tubes with flared ends. One end of a rivet sometimes looks like an eyelet. The main difference between a rivet and an eyelet, is that you can see all the way through an eyelet after you set it, but at least one end of a rivet is always solid. If the eyelet is large enough, you can also run wire, chain or a jump ring through the resulting reinforced hole.
3/16″ Eyelet
- 3/16″ eyelets
- Largest (widest) eyelet carried by Rings & Things
- 3/16″ diameter, and fits up to roughly 3/16″ (almost 5mm) thick leather or stacked materials.
- Generally used with leather
- Flare with easy-to-use inexpensive tools
3/32″ Eyelets
- Crafted Findings 1/16″ and 3/32″ (diameter) eyelets
- Fast and easy to use — Designed to be set with the Crafted Findings riveting system
- Can also be set by hand
- Used with metal, plastic, leather, and even fragile materials like ceramic
- Available from 1/16″ to 1/4″ long
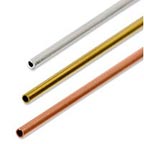
3/32″ tubing
- Make your own eyelets from tubing — any length!
- 3/32″ tubing (copper, brass or sterling) is cut to length with a jeweler’s saw, and must be riveted by hand.
- Crafted Findings’ sterling silver tubing (1.5mm and 2.25mm diameter) up to 12mm long can be set with the Crafted Findings riveting system, but must be cut to length with a jeweler’s saw.
*
Now you know the difference between a rivet and eyelet, and the main differences between types of rivets. Next…
*
How to set rivets!
This brief overview explains how to set each type of rivet and eyelet, with links to detailed step-by-step riveting tutorials … a few of which aren’t written yet, but will be by the end of May (notice I didn’t specify May of which year…). If you have questions about any of these short & sweet instructions, post your questions in a comment on this blog.
*
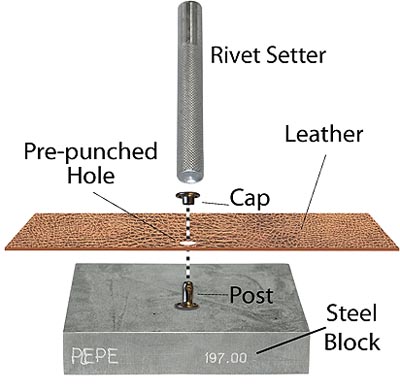
To use 2-part rivets:
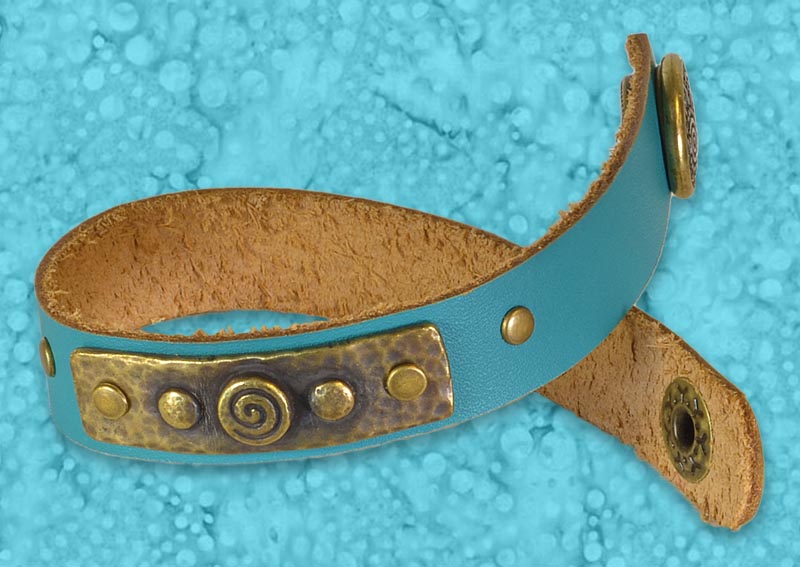
Leather bracelet with TierraCast 2-part rivets. (See Spiral Lagoon tutorial.)
- Pick a style and size of 2-part rivet:
1/4″ or 5/16″ Rapid Rivets
Double-Cap Rivets
TierraCast
- Get a metal block, rivet setter and brass hammer.

How to set compression rivets
- See our “Riveting with TierraCast” blog article for full directions (and fun supplies).
*
To use Crafted Finding’s semi-tubular rivets:
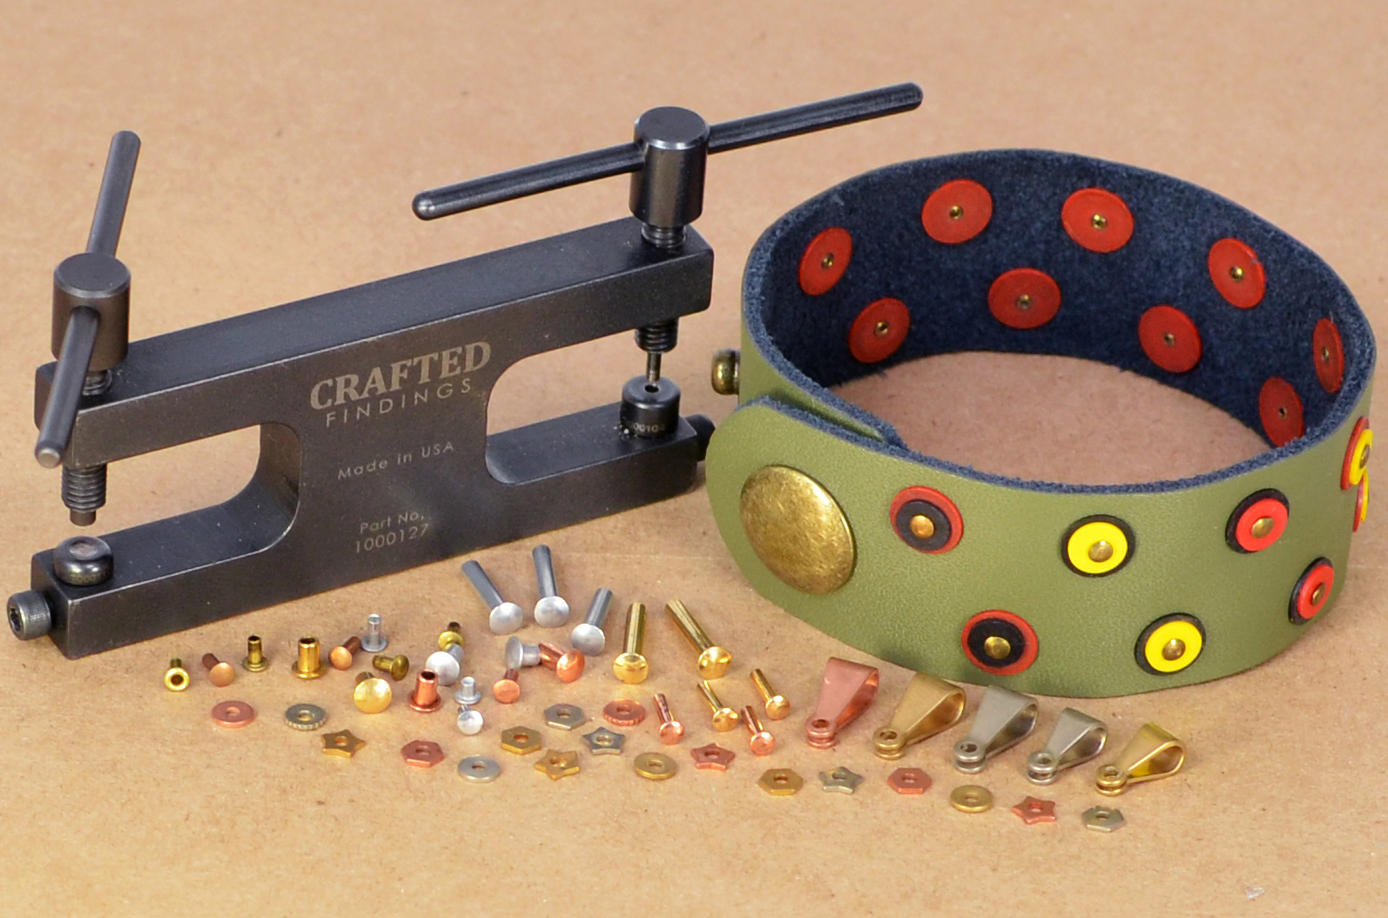
Semi-tubular rivets and accessories, Crafted Findings riveting tool and Tschinkel’s Circles riveted leather bracelet (see Tutorial).
- Choose 1/16″ or 3/32″ diameter rivets and accessories.
- Choose an Original or Long Reach base. The Original tools set rivets up to 9/32″ (a bit over 1/4″); the Long Reach tools set rivets up to 15/32″ long (almost 1/2″).
- For help choosing options, download our Crafted Findings Technique sheet — 4 pages of tips, comparisons and explanations for each tool and accessory.
- Use one end of the Crafted Findings riveting system tool to pierce a hole.
- Select a rivet approximately 1mm longer than the total thickness of the pieces you are are riveting. (Assorted packs are handy – choose Short, Medium or
Long.) - Assemble the components, and use the other end of the Crafted Findings riveting tool to set the rivet. (See video.)
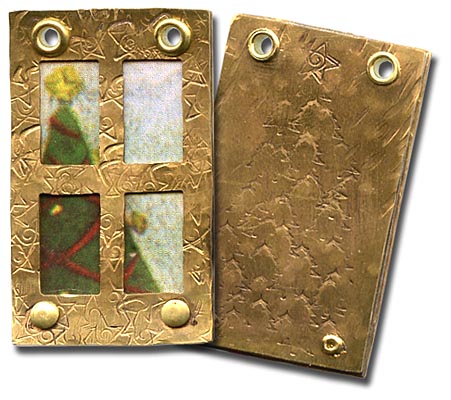
In the video and examples here, notice how tiny the back end of the rivet is, on the finished semi-tubular rivets. fyi ~ You can click most of the jewelry images to enlarge. It is a very clean look, and holds tightly when you are riveting metal to metal (or any non-stretchy media).
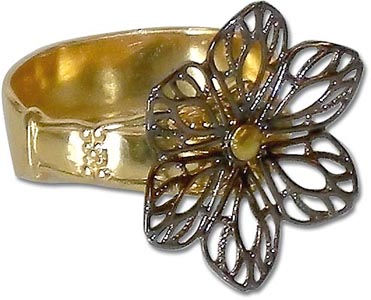
Alpine Lily – riveted ring

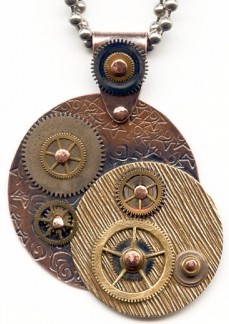
Christmas Tree Window – riveted charm
What if you want to use these rivets on leather? Leather stretches… and a tiny rivet could work its way out. The solution is to use a washer or spacer of some type, such as these rivet accents. Or, the African vinyl heishi beads in Tschinkel’s Circles (olive green leather bracelet above) are colorful and inexpensive. And this Palomita leather bracelet uses 2 of my favorite “washers” (stars and flowers):

Palomita bracelet with Bali-style flower spacer bead and TierraCast star spacers. (See Full tutorial)
You can quickly convert almost any thin brass, copper, sterling, plastic/vinyl or cast metal spacer bead into a washer/stopper, by using the cutting end of the Crafted Findings tool to cut the hole to the proper size needed for their rivets.
*
To Make and Use Wire Rivets
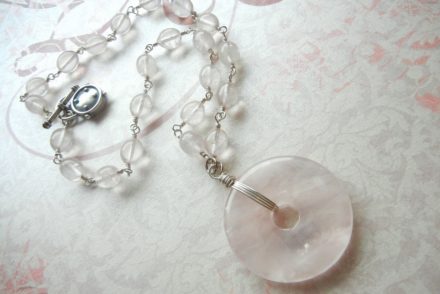
Cognitive Resonance Necklace, made with classic wire rivets
You can make classic “old-school” wire rivets from any gauge of wire (generally copper, brass, nickel, sterling or karat gold), in any length you need. This is a wonderful skill, but time-consuming to do properly.
A short summary of the process:
- Drill or punch holes the correct size for your wire.
- Make sure the end of the wire is smooth, and filed flat.
- Fit wire through the components. Depending on the wire gauge, about .5 to 1mm of wire should stick out at each end.
- Set item on a steel bench block and keep the components centered on the wire. Use a riveting hammer to tap a few times on the top of the wire, then flip the piece over and tap a few times on the other end of the wire. This starts mushrooming the wire.
- Hammer gently around the edges of the wire on one end, then flip over and repeat.
- Keep flipping over and repeating the steps on each side until both ends are domed and smooth to the touch.
- See more detailed version here.
To learn more:
- Download this free riveting technique sheet, or
- Pick up a book such as Metal Style: 20 Jewelry Designs with Cold Join Techniques by Karen Dougherty, or
- Take a class. If you can’t find a local class, then see if you can wrangle a trip to one of the BeadFests (Santa Fe is my favorite, but Philadelphia is fun too), or the Bead&Button show (permanently canceled as of 7/2020).
*
To use Nail-Head Rivets
Finish nail-head rivets basically the same way as a wire rivet:
- Drill or punch holes the correct size for your rivet’s post.
- Fit rivet through the components, and mark where to cut. Depending on the wire gauge, about .5 to 1mm of wire should stick out at the back.
- Cut to the proper length, and file flat.
- Set item on a steel bench block, rivet-head down. Use a riveting hammer to tap a few times on the top of the wire, to start mushrooming the wire.
- Hammer gently around the edges of the wire, until it is smooshed down into a nice smooth dome. See the “How to Use Fancy Wire Rivets” blog tutorial for detailed instructions (except you don’t need the wooden block or piece of leather).
*
To use fancy wire rivets:
- See the full tutorial in our April 5th, 2013 blog: How to Use Fancy Wire Rivets.
*
Bonus Riveting Tip:
As promised above, you can use the “hammer and block” technique for Crafted Findings semi-tubular rivets.
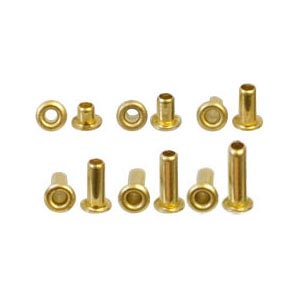
Semi-tubular rivets
- Assortment packs (1/16″ or 3/32″ diameter) offer a nice variety of lengths.
- Cut or drill 1/16″ or 3/32″ holes using the tool of your choice, such as the EURO TOOL “helicopter” metal punch, EURO TOOL 3-hole punch (1/16″, 3/32″ and 1/8″ holes), drill press, or the cutting end of the Crafted Findings piercing/setting tools.
- Important: The hole must be precisely 1/16″ or 3/32″ (depending on which size of rivets you selected). If the hole is too large, everything will fall apart.
- Stack components on the rivet and make sure you have 1-2mm sticking out the back.
- Place the stack rivet-head down on a metal bench block.
- Hammer with a riveting hammer or a light-weight ball-pein hammer. Hammer gently so you get a nice round shape. If you’ve formed traditional wire rivets before, you’ll be surprised at how fast this goes when setting a semi-tubular rivet!
- Run your finger across the rivet; if it is rough, keep hammering until it is smooth.
*
Pshew … I think that’s all the types of rivets.
You don’t really want to know how to set Eyelets too, do you?
Just kidding, I have a fresh hot cup of tea, so here we go!
*
The main difference between setting eyelets and setting rivets, is you need to make sure the eye stays round and open, so eyelet setters have slightly different shaped tools than rivet setters.
*
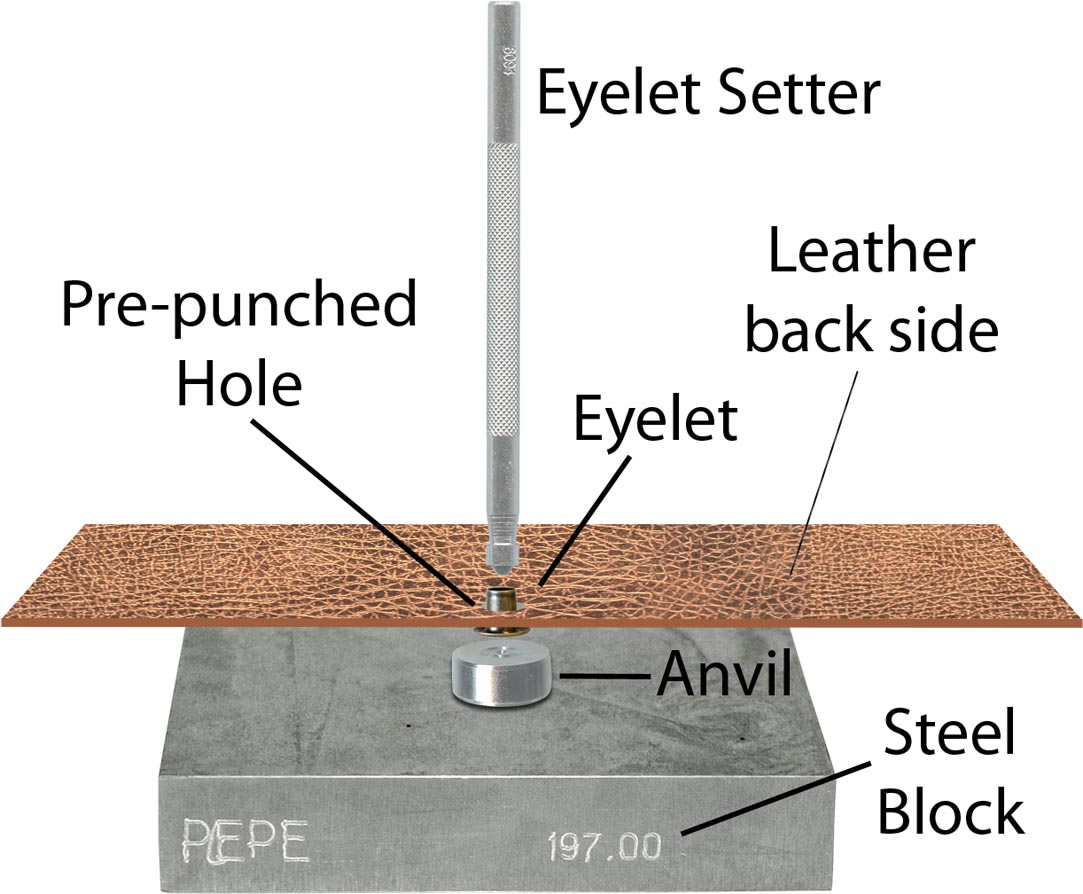
How to Set 3/16″ Eyelets:

3/16″ Eyelet
- Punch 3/16″ hole in leather.
- Set anvil portion of eyelet setter on a sturdy surface (wooden block, Poundo board, heavy leather, etc.)… preferably something quieter than the steel block pictured below.
- Assemble components and place large end of eyelet on anvil.

Setting 3/16″ Eyelets in Leather
- Place eyelet setter into eyelet and tap eyelet setter firmly with a brass hammer until the eyelet curls/compresses down to desired height.
*
How to set Crafted Findings Eyelets
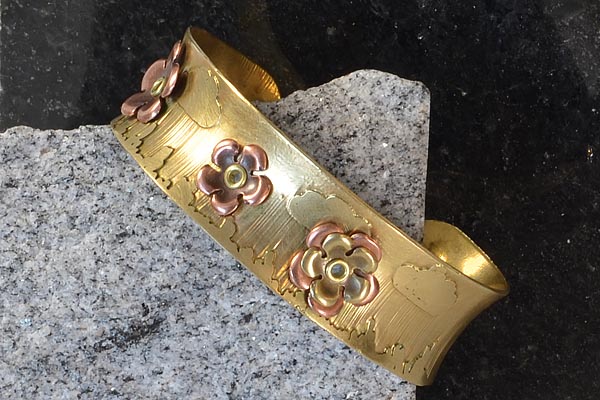
Cities in Bloom – etched bracelet with 3/32″ eyelets
- Choose a size. The 1/16″ eyelets have a petite hole — very cute, but not many things fit through it. I recommend 3/32″ eyelets if you want to put jump rings, chain or cord through the eyelet when done.
1/16″ Eyelets
3/32″ Eyelets
- Switch out Crafted Findings tool accessories if necessary (the default tool comes with a riveting attachment, which you switch out using the included allen wrench for an eyelet flaring attachment).
- Assemble the components, and use the eyelet flaring end of the Crafted Findings tool to flare the eyelet. (It’s fast and easy – See video.)

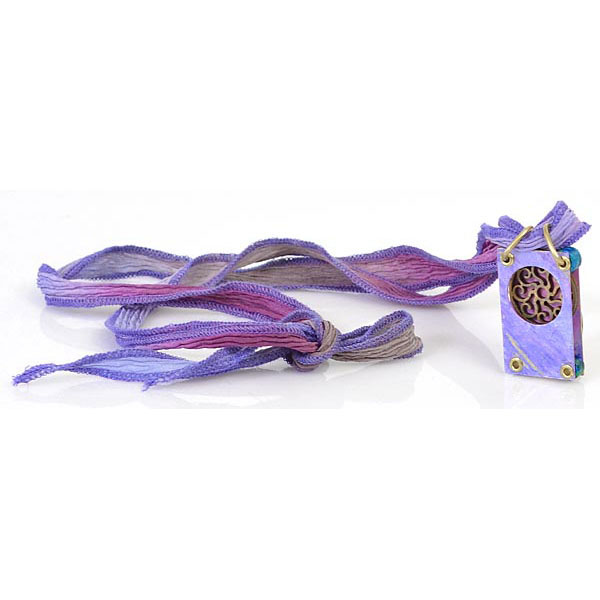
Spiris Necklace – When used with a delicate touch, the Crafted Findings riveting system allows you to sandwich fragile ceramic beads between layers of metal! (Alternate Image)
*
How to Make Your Own Eyelets from Tubing
This is a little trickier, and deserves its own blog article, so I’ll be brief for now and expand on this in a future article.
- Fit the tubing through your components. Use an extra-fine-point marker to mark the length. (About half the wire diameter should stick out on each end. With 3/32” tubing, this is about 1mm on each side. With 1/8” or 9g tubing, it is about 1.6mm on each side.)
- Make sure the end of your tubing is smooth and flat – not angled. File flat if necessary (before cutting).
- Take components off tube, and hold tubing in tube-cutting jig.
- Use a jeweler’s saw to cut the tubing, making sure to keep the cut very straight and flat, not angled.
- File end of tubing flat if necessary.
- Insert tubing through components. Set item on steel bench block, and keep the components centered on the tubing. Put a very wide center punch (at least ¼” wide) into the center of the tube. Don’t let your components slide down to the bottom of the tube!
- Give 3 taps with a brass hammer. Turn piece over and repeat. This begins to gently splay the tube rivet outwards. If you were too gentle at first, then repeat this step on both sides. You should see a slight curve outwards.
- Use a riveting hammer or the pein side of a 4oz ballpein hammer to tap in a circular pattern around the outside edges of the rivet, with an outward and downward motion. Push the metal outwards, not just down. Flip piece over and repeat on other side. Do a little on each side (about 8 taps), to make sure the tube doesn’t bend and the components don’t slip. (If they slip, you’ll have a tiny flimsy rivet on one side and a huge lumpy rivet on the other side.)
- Watch for a future blog for more details, or download our Riveting Technique Sheet.

Crafted Findings sterling tubing for eyelets
I haven’t actually used sterling tubing with the Crafted Findings system (yet), but they’ve done such a great job testing and perfecting their other products, that I expect it to go quite smoothly when I do, and to work much like this:
- Cut the tubing to length using a jeweler’s saw like above.
- Use a 1/16″ eyelet flaring attachment for the 1.5mm sterling tubing, or use a 3/32″ eyelet flaring attachment for 2.5mm sterling tubing.
- Be sure to use this tubing, because if the walls are too thick, it won’t work with their nifty system.
- If using tubing over 1/4″ long (and up to 15/32″ aka 12mm), use the long reach tool. Otherwise, you can use the standard tool.
*
In summary…
That’s a LOT of variations, but each serves a special need.
I use the Crafted Findings system the most, because I can do 20 rivets (or more) in the time I can do one nice wire rivet by hand. Or I can do 30 eyelets in the time it takes me to make one nice 3/32″ tube eyelet by hand. I also like their reverse riveting accessory, because it allows me to rivet rings and bracelets, keeping the nice rivet head on the outside (try doing THAT by hand…!). I promise I’ll explain that cryptic comment more thoroughly, with good illustrations, in another blog post.
But at the same time that I love the speed and precision of the Crafted Findings system, I also love the look of a nice hand-tooled rivets and eyelets, and the soothing tap-tap-tap that reminds me of Santa’s elves. “Cognitive Resonance” is my favorite piece that I’ve made.
For bigger bolder designs in leather, you will probably go with the TierraCast or other 2-part rivets, perhaps in conjunction with the 3/16″ eyelets. Plus, I really like the idea of upcycling old bits of leather and making custom-length leather bracelets with TierraCasts’s full Leather Findings Collection of rivetable clasps, strap tips and links.
I’m sure I glossed over a few things in this lengthy article, so feel free to post questions!
~Polly
Editor’s note:
Awesome new tools for hand-setting rivets came out about a year after this article was written. Some of them are here; others are the 3-hole and 4-hole punches here (sized perfectly for common sizes of wire and tubing). One of us here at R&T will post new tutorials as soon was we can. (Riveting is fun, but a bit hard to describe and show.) ~Polly


2 Comments
Please help I bought these rivets and they are perfect they are 5 mm long and about 1 mm and thickness no hole in the center and have a flat top do you have anything of the sort I’m looking for many different metals
Hi Penni,
Most rivets are measured by fractions of inches rather than mm (which I admit is a pain – it’s a lot easier to measure them in mm).
Common diameters are 1/16″ (1.59mm) and 3/32″ (2.38mm).
So there is a pretty good chance yours are 1/16″ diameter.
Lengths are in fractional inches too. 5/32″ is the longest in our “short” assortment @ http://www.rings-things.com/Products/Best-Selling-Rivets-Eyelets-and-Setting-Tools/Crafted-Findings-Assorted-Rivets-1-16-Sample-Pack.html
It’s about 4mm, so a bit too short.
The medium assortment is single colors: http://www.rings-things.com/Products/Best-Selling-Rivets-Eyelets-and-Setting-Tools/Crafted-Findings-Copper-Rivet-1-16-Sample-Pack-Medium.html
3/16″ long is 4.76mm, so almost 5mm. (3/16 * 25.4 = 4.76mm)
7/32″ long is 5.56mm.
We have both sizes in aluminum, copper and brass here: http://www.rings-things.com/Products/1-16-Inch-Diameter-Semi-Tubular-Rivets/
These have a flat top, but they are semi-tubular, meaning they are partially hollow. You’ll see what I mean if you take a close look at the images.
We also have this Vintaj brass nail-head rivet: http://www.rings-things.com/Products/Vintaj-Natural-Brass-Beads-and-Findings/Vintaj-Natural-Brass-Nail-Head-Rivet-1-4.html
It’s 1/4″ long (6.35mm), and 16-gauge wire, which is about 1.3mm.