
Hello bloglandia! Tiffany here. I just recently returned from a fabulous week on the Oregon Coast with my family. While there, I succumbed to one of those touristy penny smashing machines. For some silly reason, I can never resist those machines! Perhaps they remind me of being a kid again and smashing pennies on the railroad tracks. Well anyway, upon my arrival home, I found myself with a pocketful of pennies stamped with fish and boat images. I was about to throw them into one of my many junk drawers to be lost forever when I had an epiphany! I thought to myself, aren’t you a jewelry maker? and couldn’t you possibly make something wearable with these souvenir pennies? Well, since the answer to both of these questions was yes, the Souvenir Penny Bracelet was born!
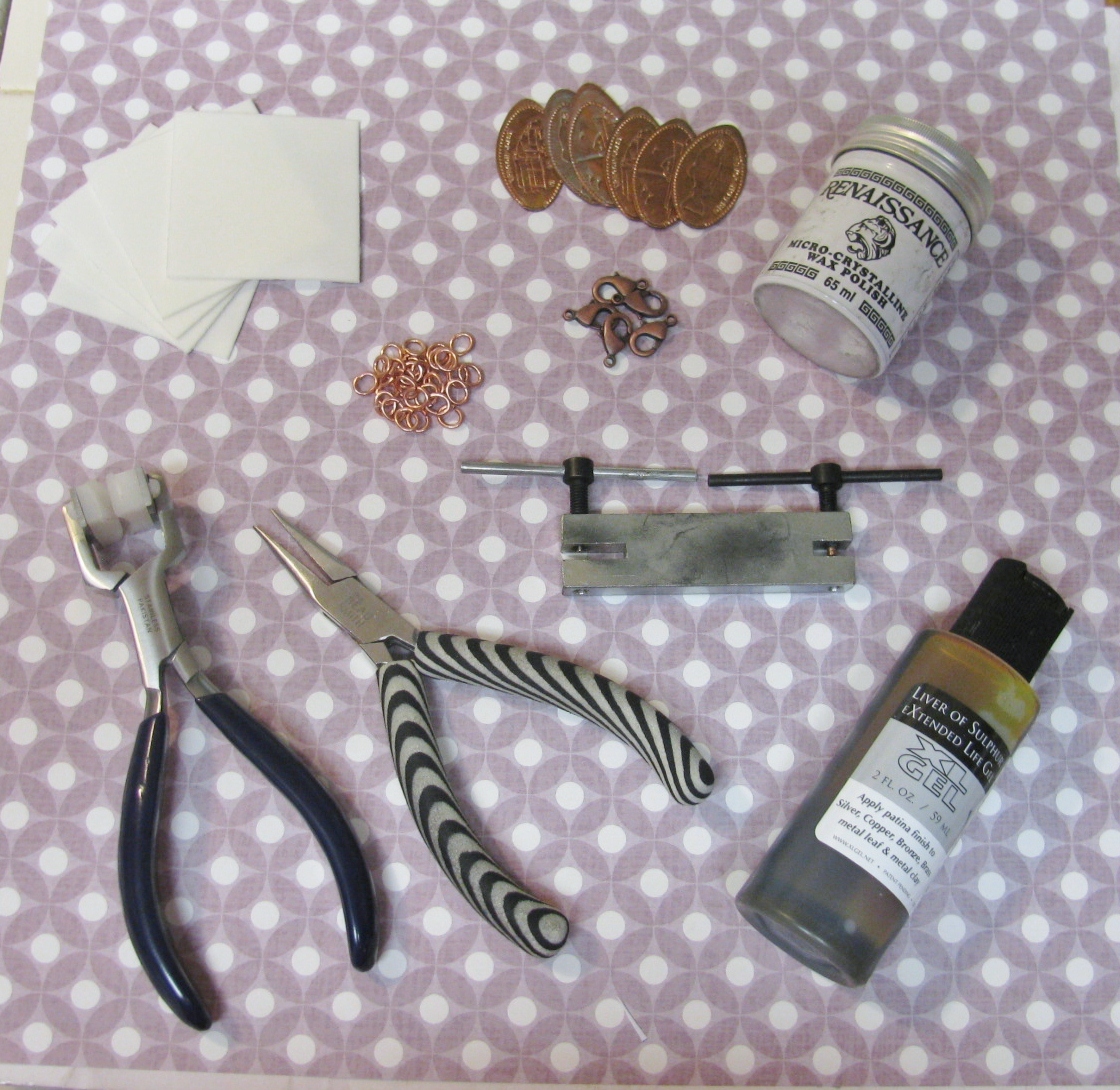
Everything needed to make the Souvenir Penny Bracelet. Look below for close-ups of all these items.
This bracelet is really easy to make. To get started you need the following items:
- five smashed souvenir pennies
- a lobster claw clasp, in either antique copper, copper plated or solid copper
- oval copper jump rings
- a metal hole punch
- liver of sulfur
- polishing pads
- Fine grit (“0000”) steel wool, available at any hardware store
- bracelet shaping pliers
- Renaissance wax
- Chain nose pliers
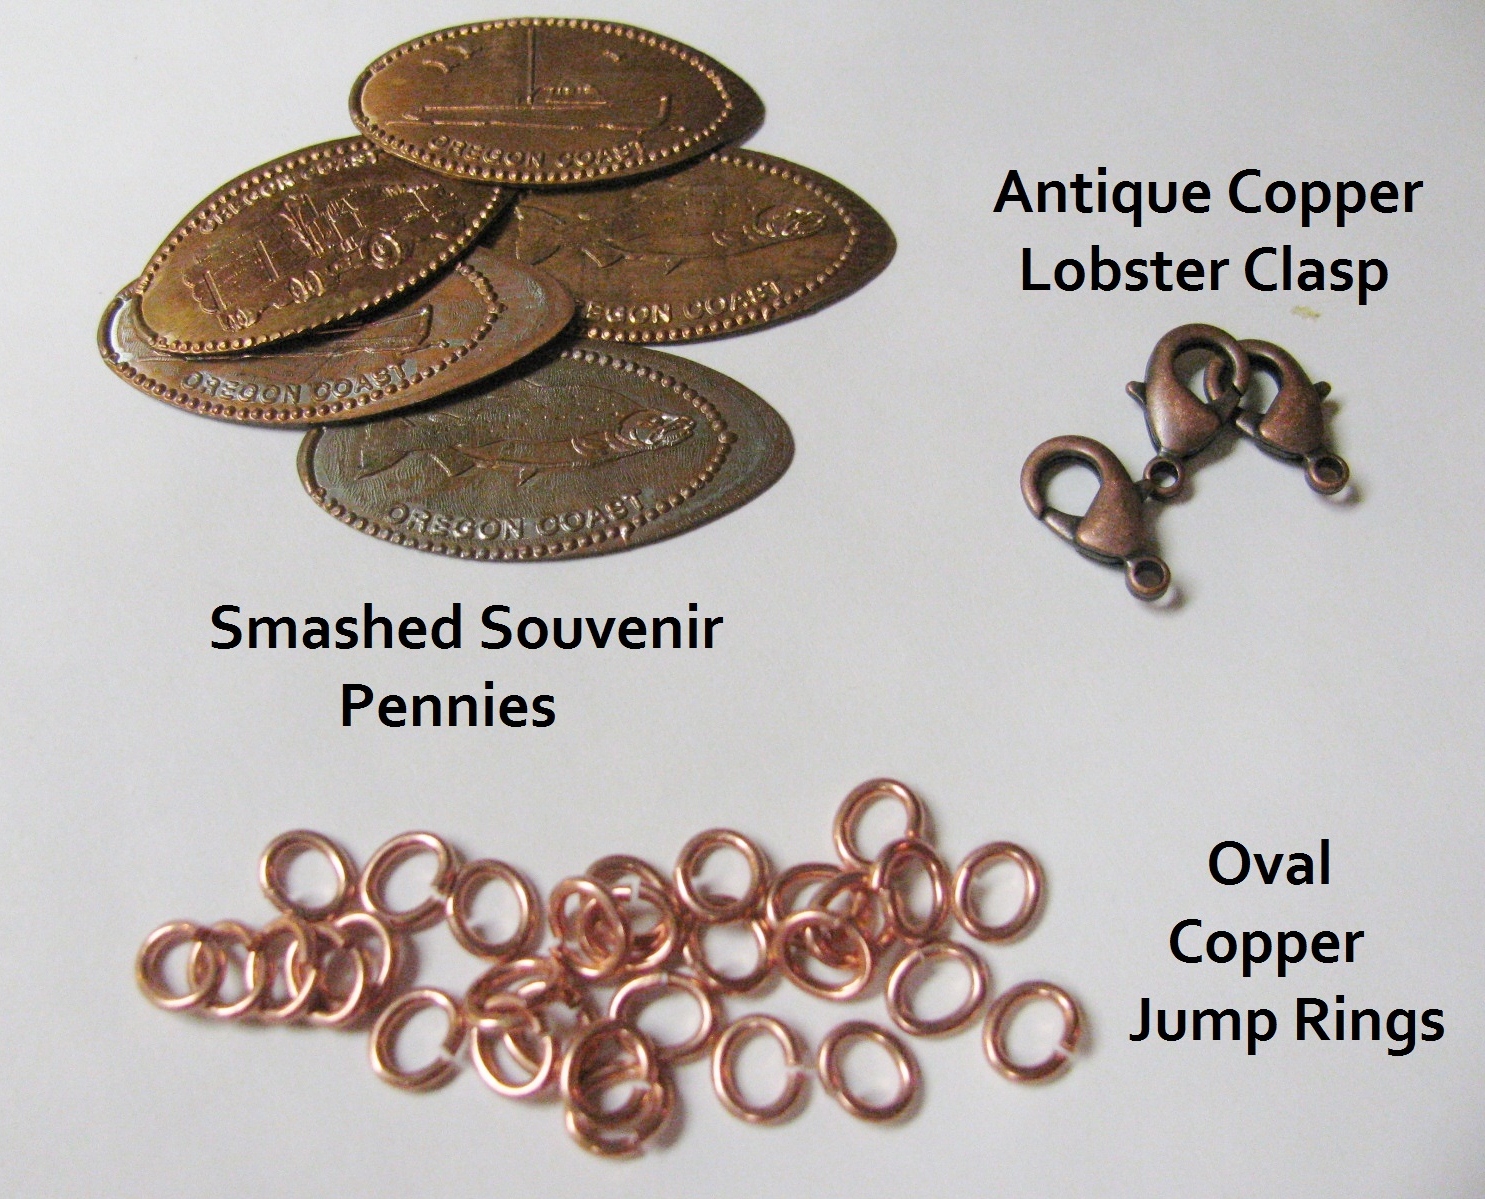
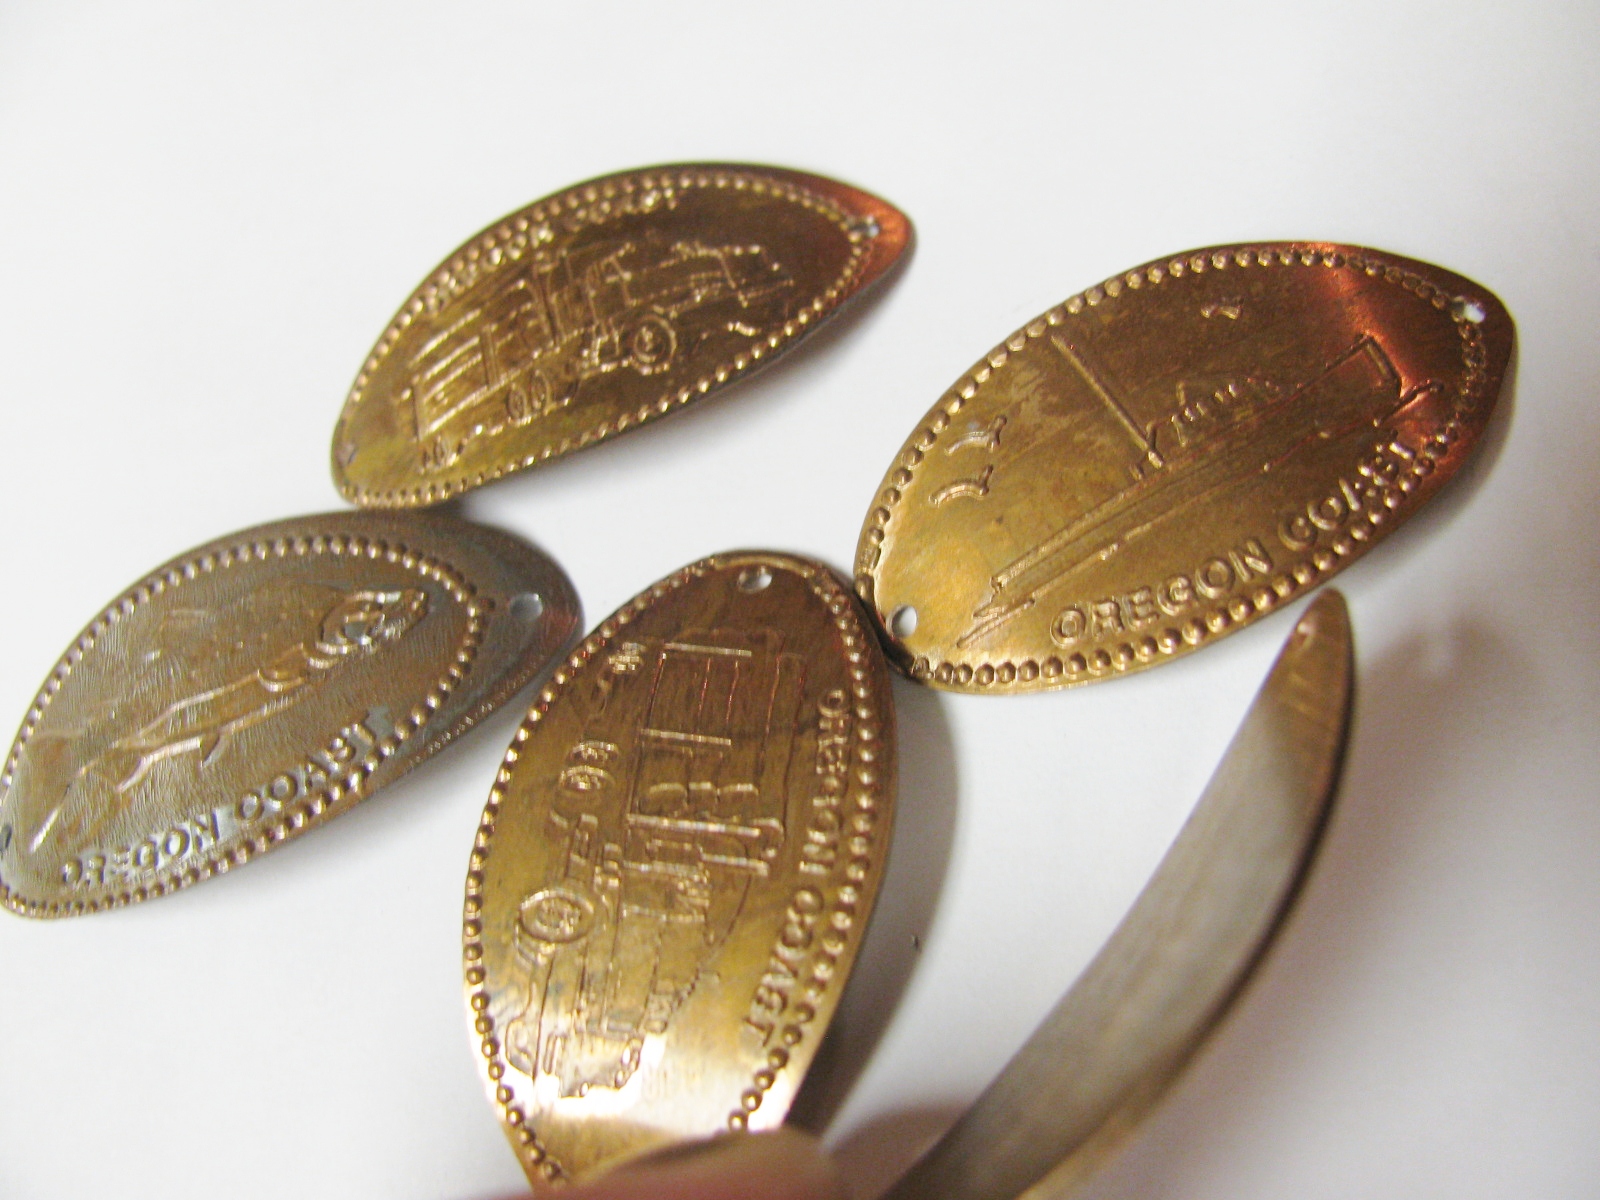
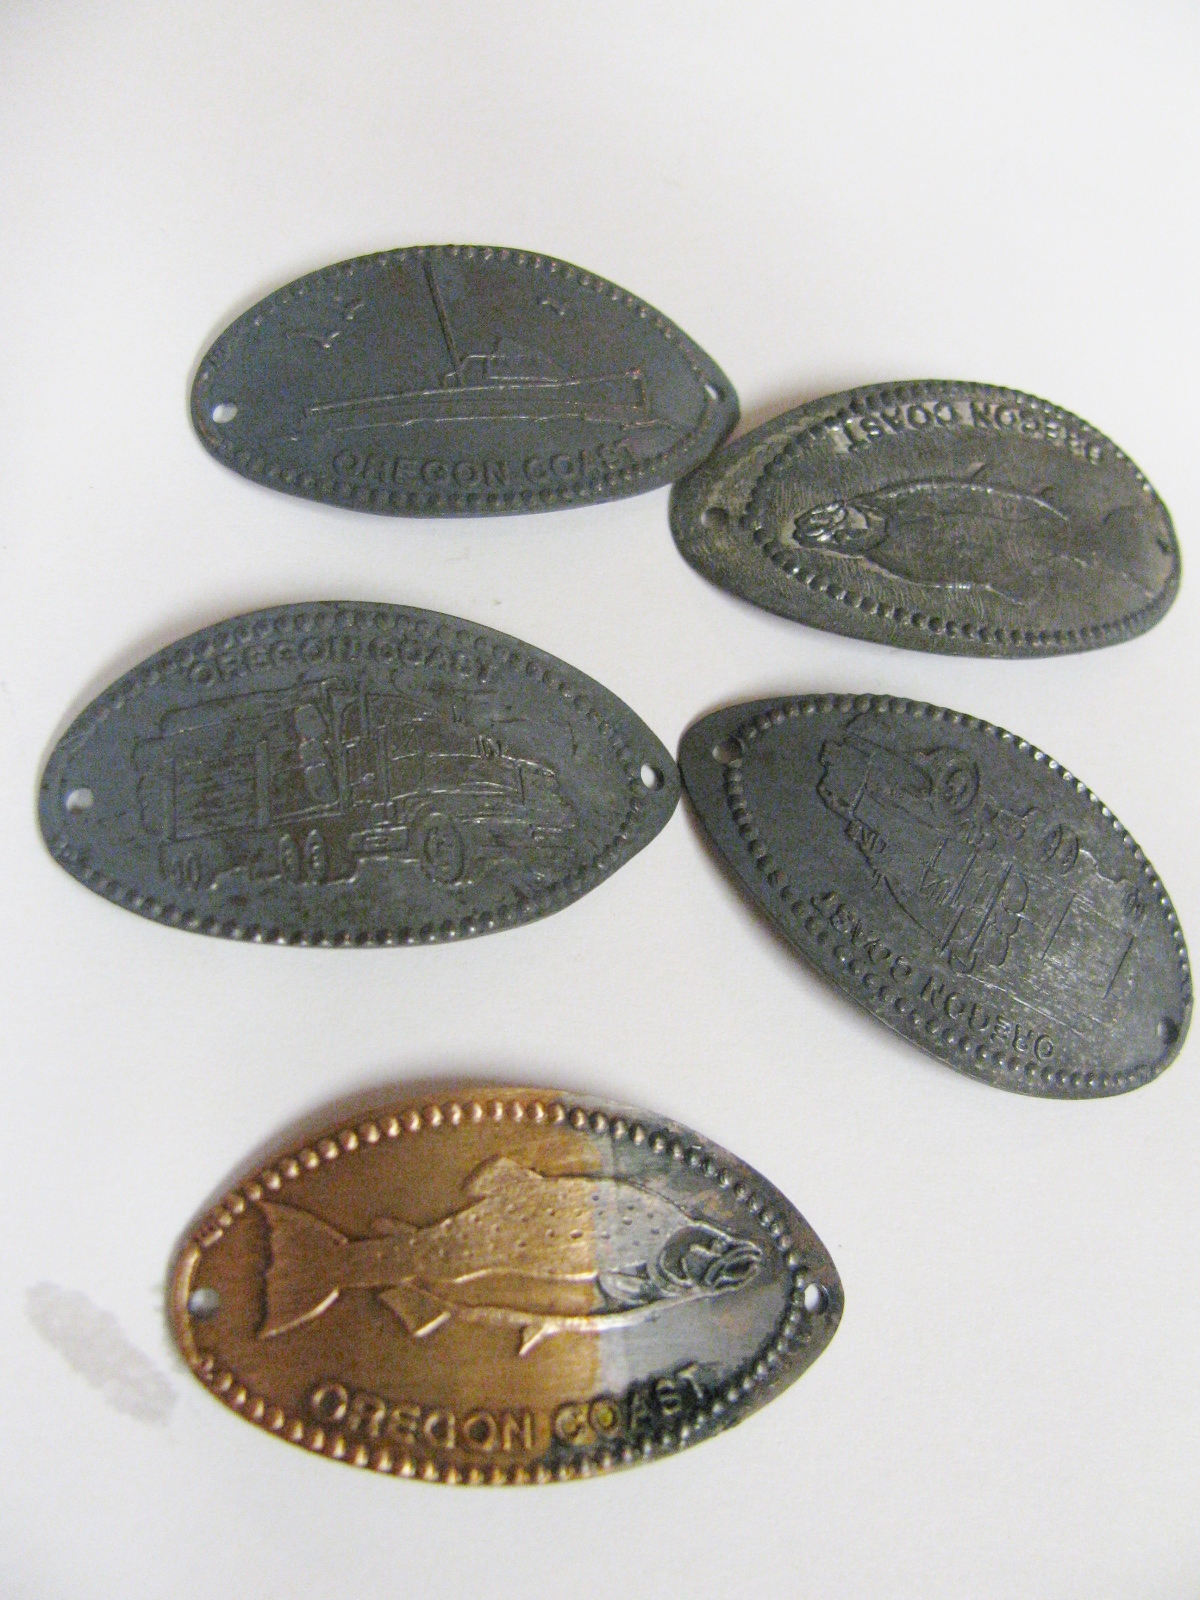
Smashed pennies, copper oval jump rings, and antique copper lobster clasp. When smashing the pennies, try to pick pennies that are older than 1981, because they are solid copper. The solid copper will take to the patina better.
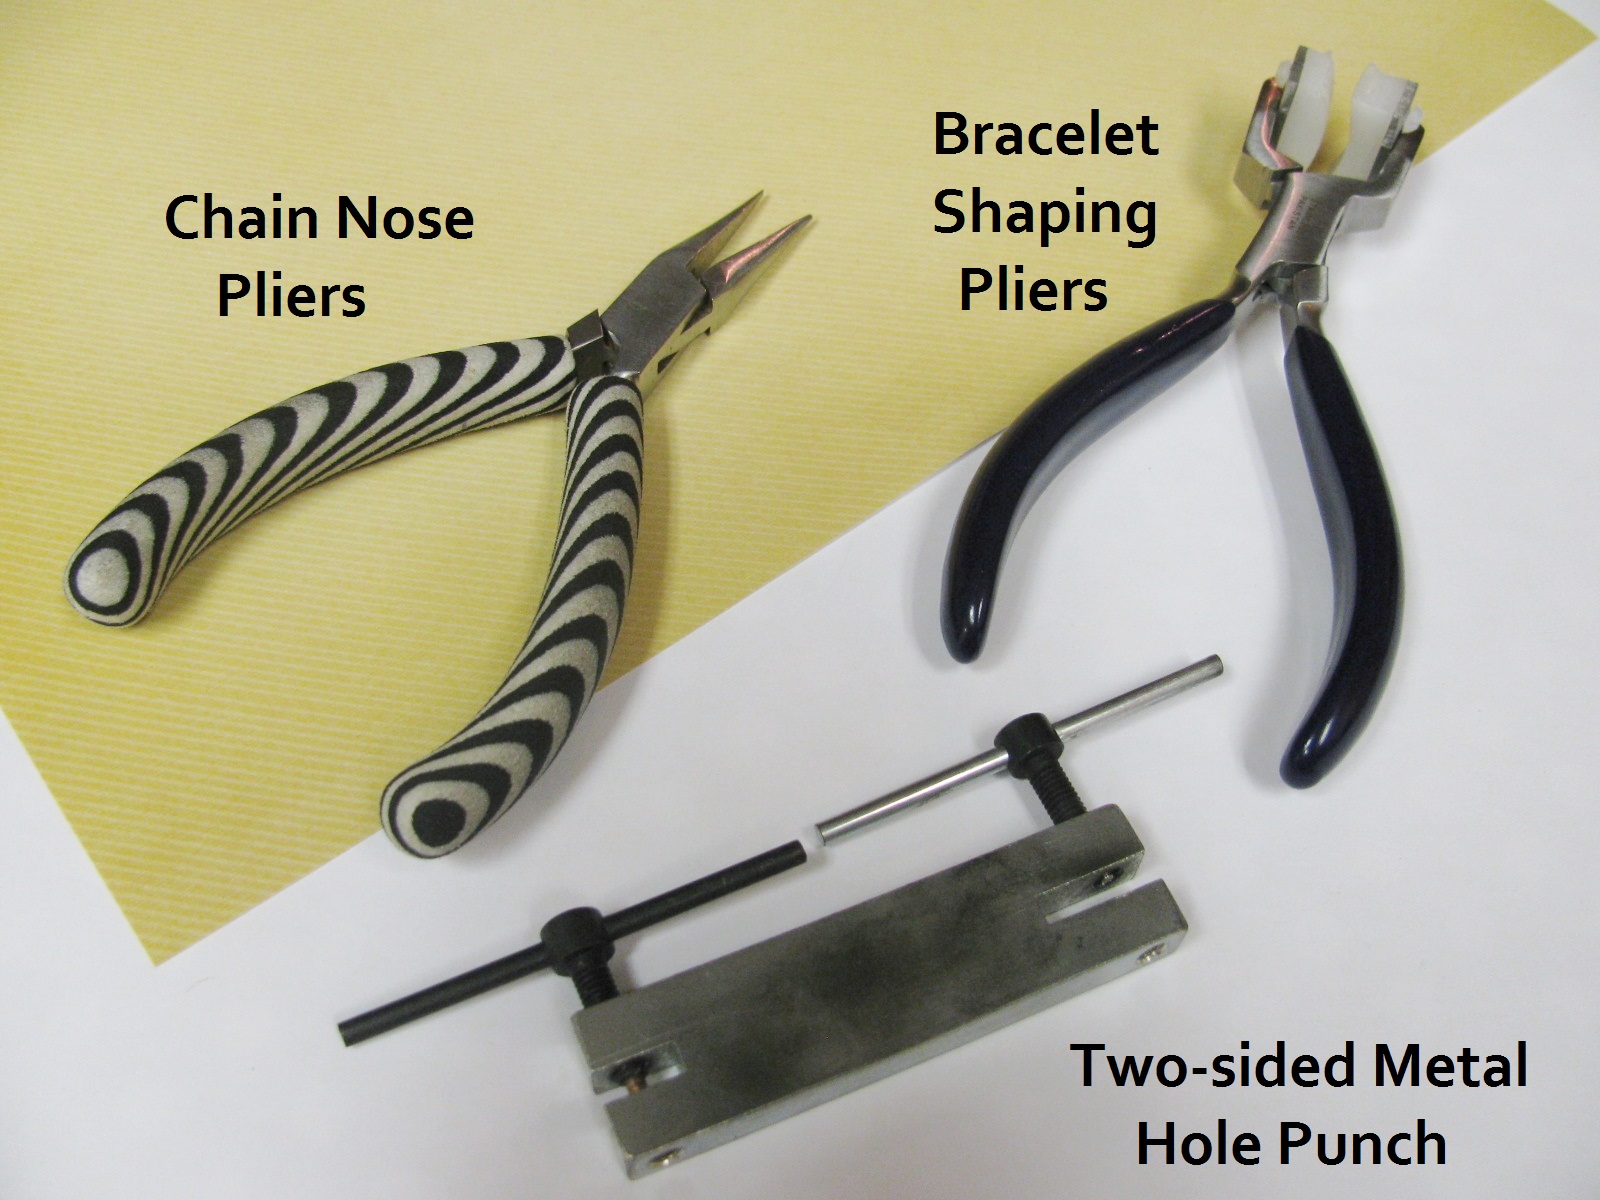
Tools for making the bracelets. Chain nose pliers, bracelet shaping pliers, two-hole metal punch. The bracelet shaping pliers are optional, but they really create a great shape.

Renaissance Wax for sealing the copper. Polishing pads for buffing away patina. Liver of Sulfur for blackening the copper.
Now that you have all the tools and supplies, there are a few easy steps to follow.
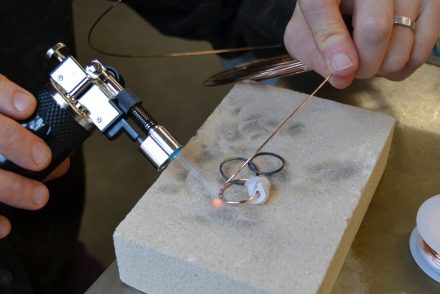
1. Punch holes in the pennies.
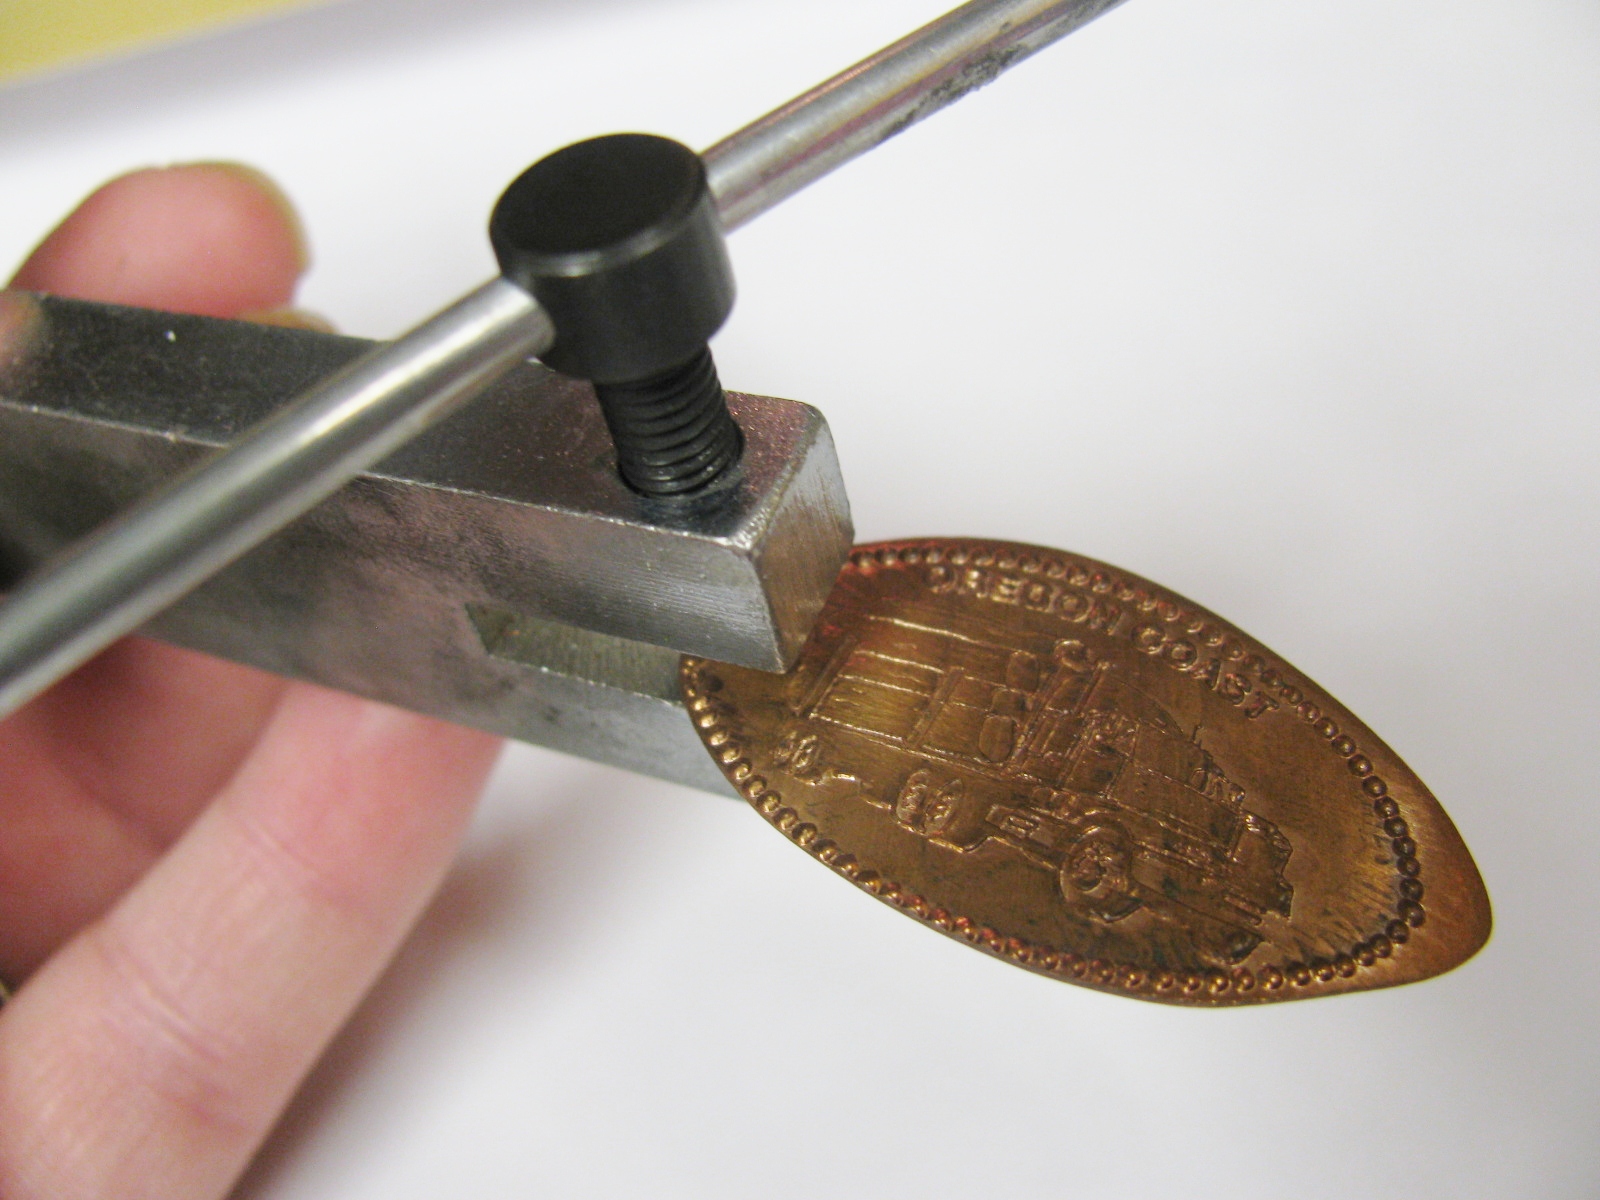
Just twist the handle on the top of the punch to make the holes. There are two sizes, I prefer the smaller size.
2. Use the bracelet shaping pliers to bend the pennies into a curved shaped. This will help the pennies shape to your wrist better and give the bracelet a polished, professional look.
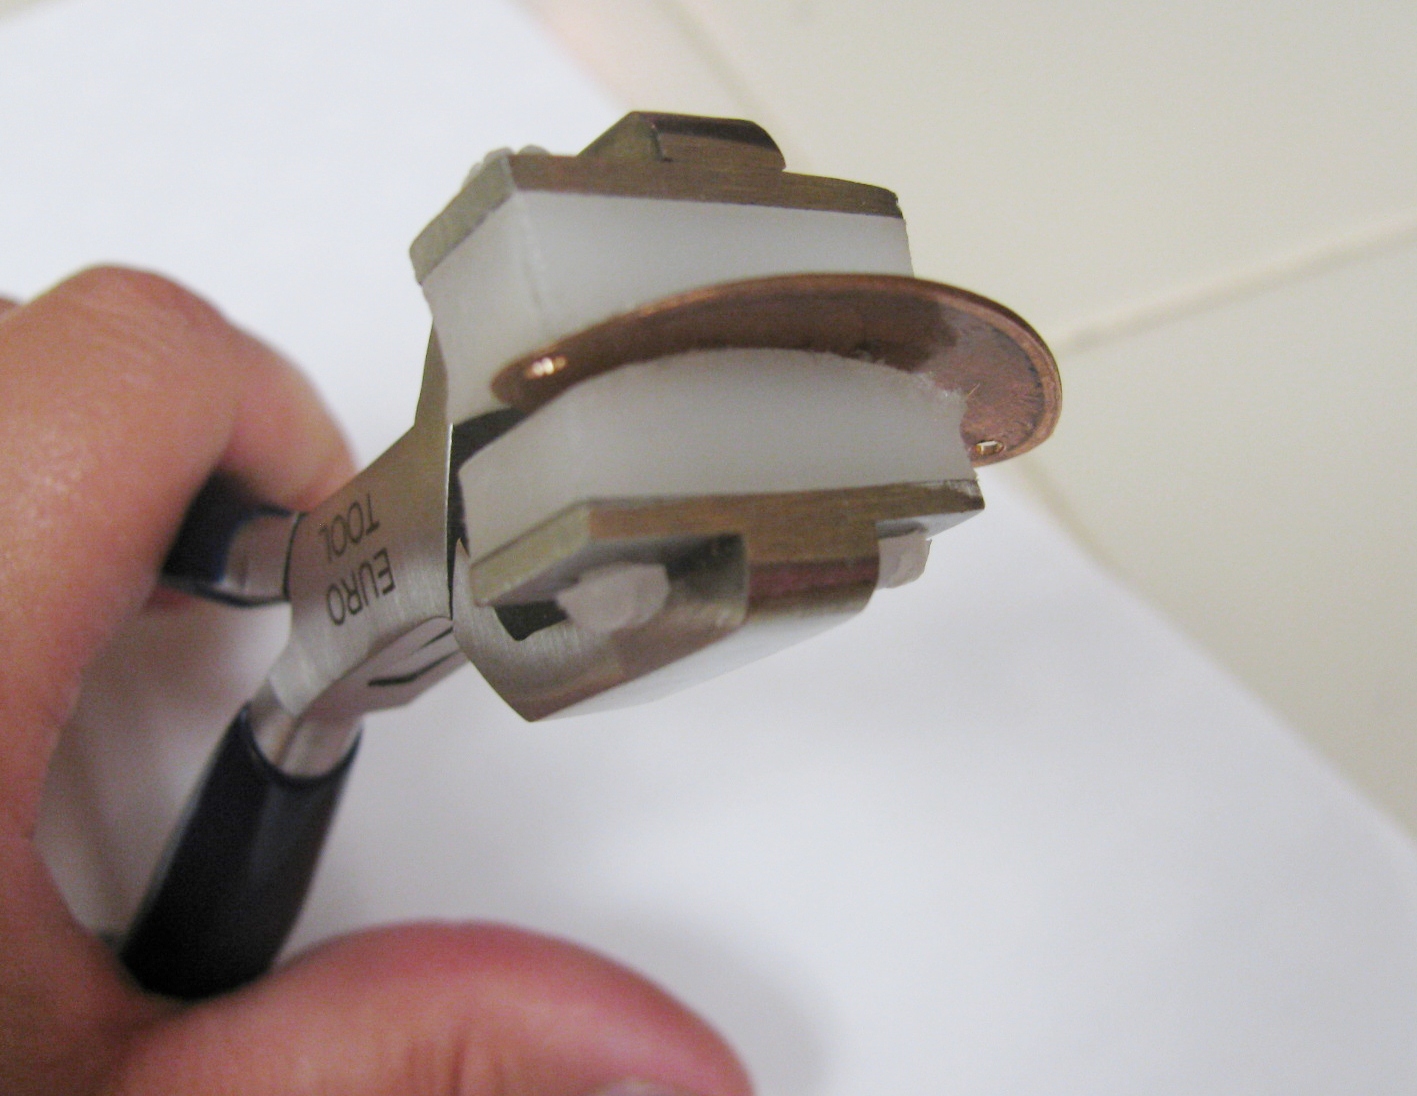
Simply place the pennies in the pliers and they will do the work for you! Sorry mine are kind of worn looking, I use them a lot!
Use the pliers to bend all the pennies. This will help them to lay better on your wrist!
3. Antique the pennies and jump rings. I like to use liver of sulfur, though there are several antiquing solutions that will work on copper.
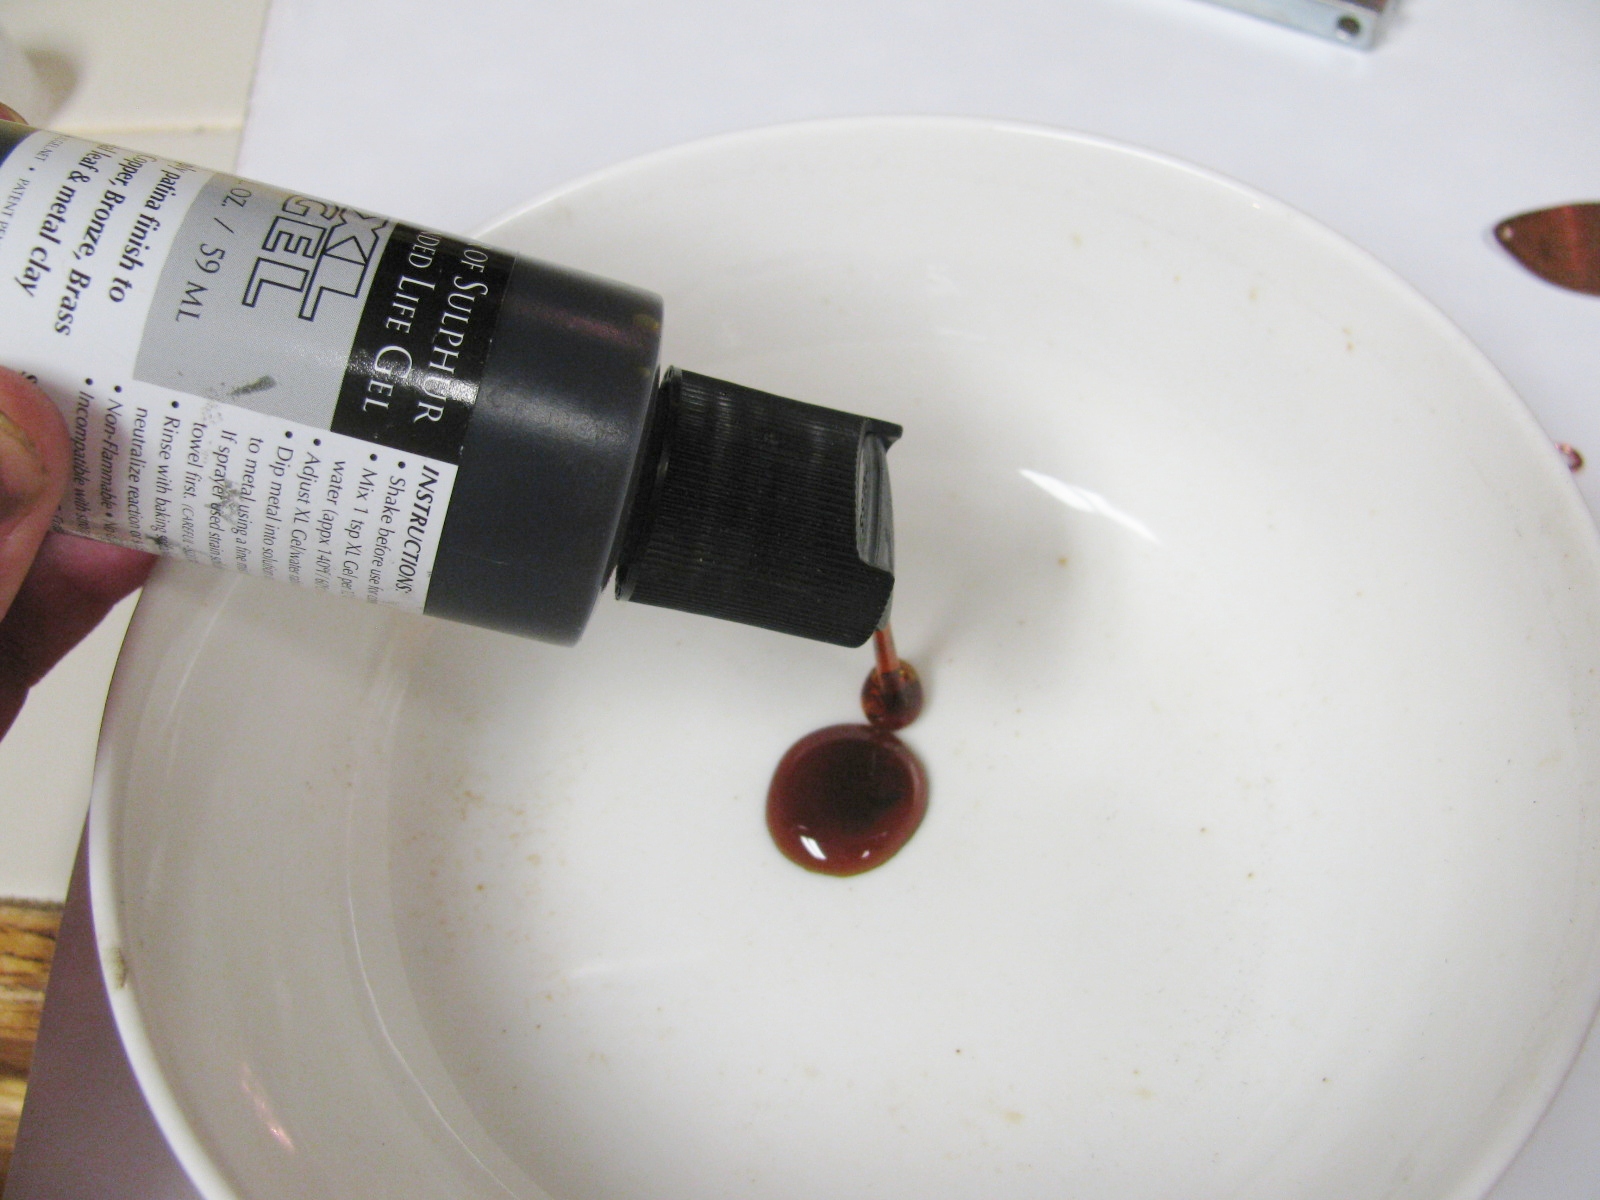
Squeeze a small amount of Liver or Sulfur gel into a small container. I use a small glass bowl as my designated antiquing container.
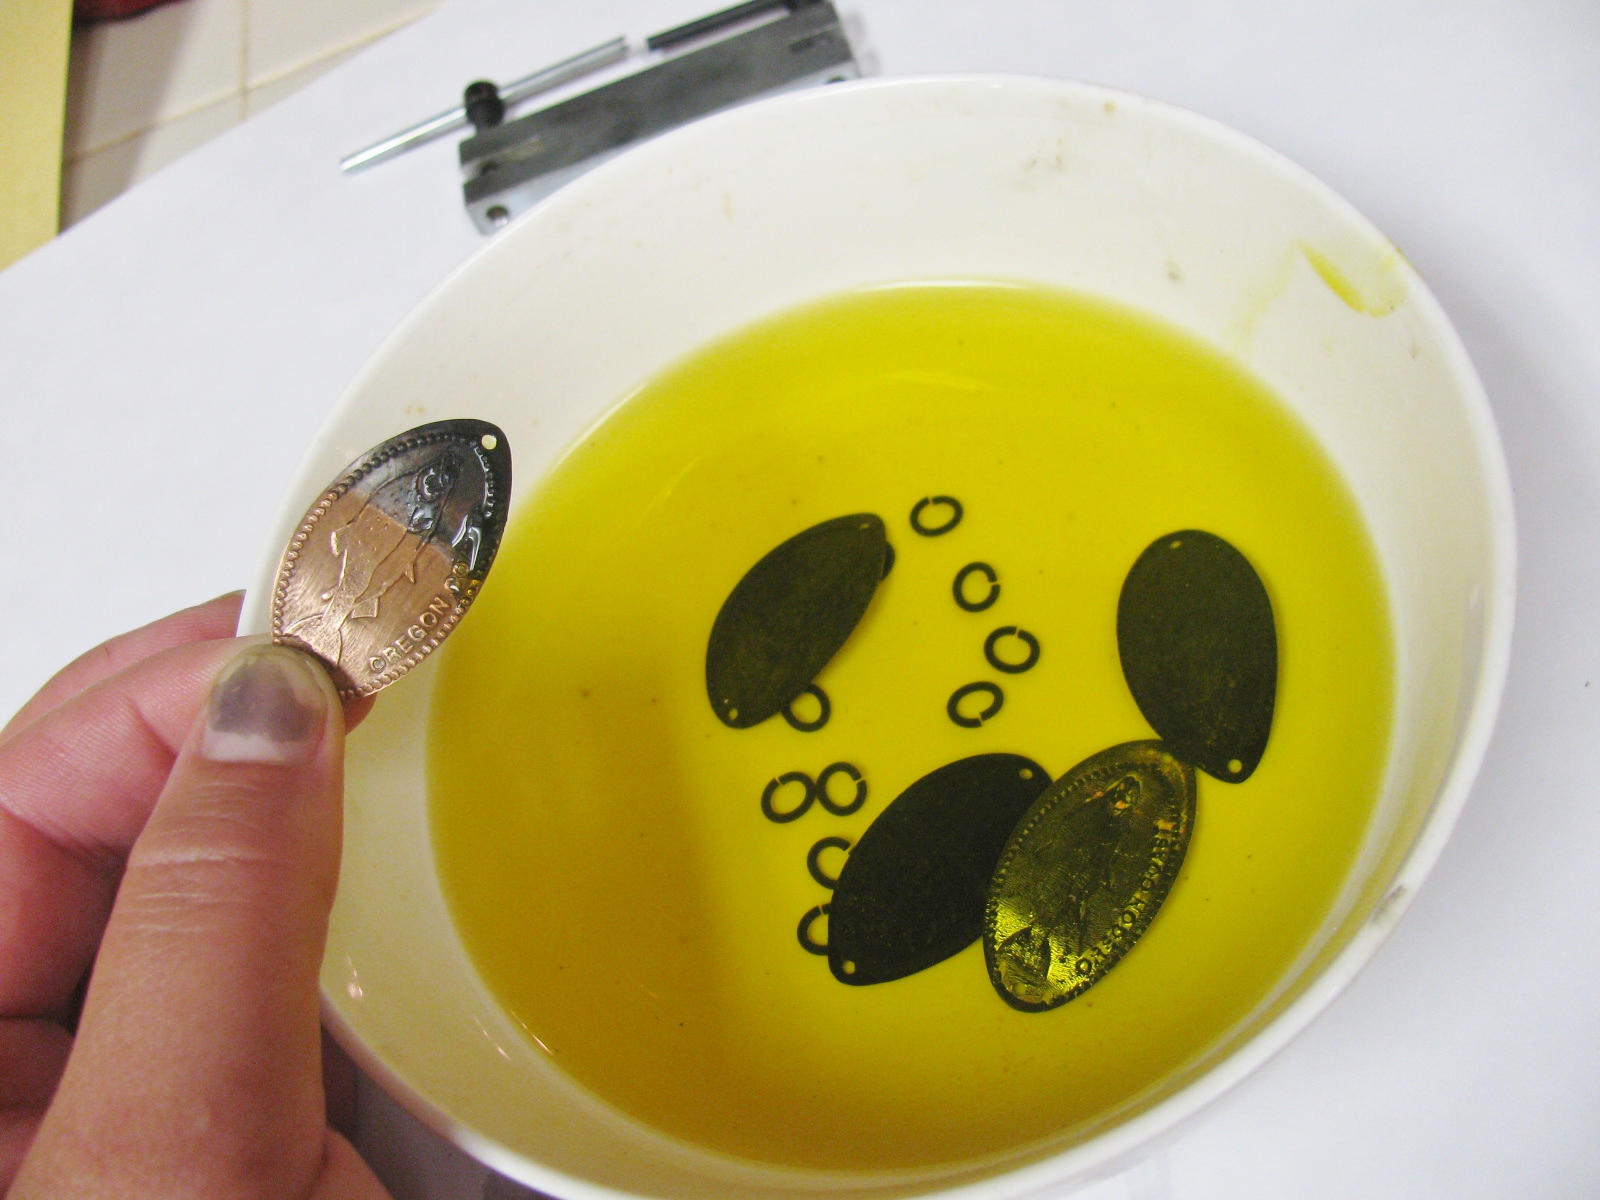
Add warm water to the liver of sulfur gel and stir the mixture. It will stink like rotten eggs. Place your smashed pennies and copper jump rings in the solution. You may need to clean the surface of the pennies and jump rings with some fine grit steel wool. This will take off any oils, dirt, or coatings that will keep the patina from penetrating the copper.
After a little bath in the liver of sulfur, the pennies will turn black. You can see on the last penny, the difference a patina makes.
4. Buff and polish the pennies.

Use the steel wool first to remove the majority of the patina. Then use the polishing pads to make the copper shiny. The patina helps to make the images and lettering really stand out.
5. Seal the pennies with the Renaissance wax.
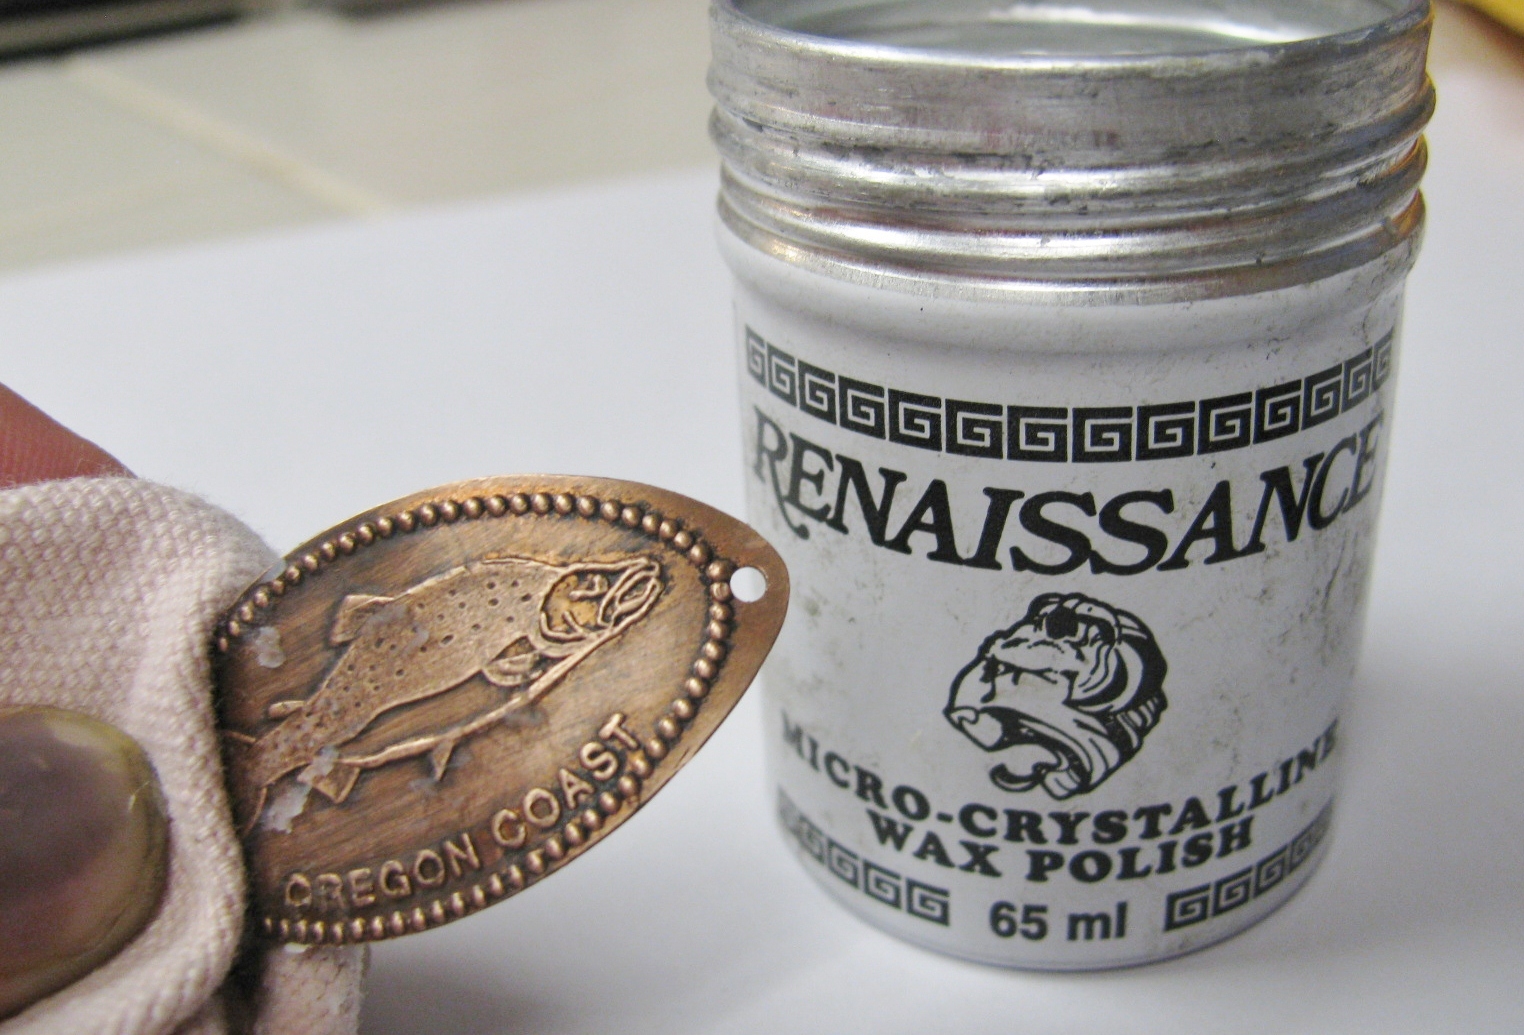
Rub a layer of wax on with either a paper towel or soft cloth. This will seal the patina, prevent further tarnishing and protect your skin from any possible reaction with the copper.
6. Assemble the bracelet.
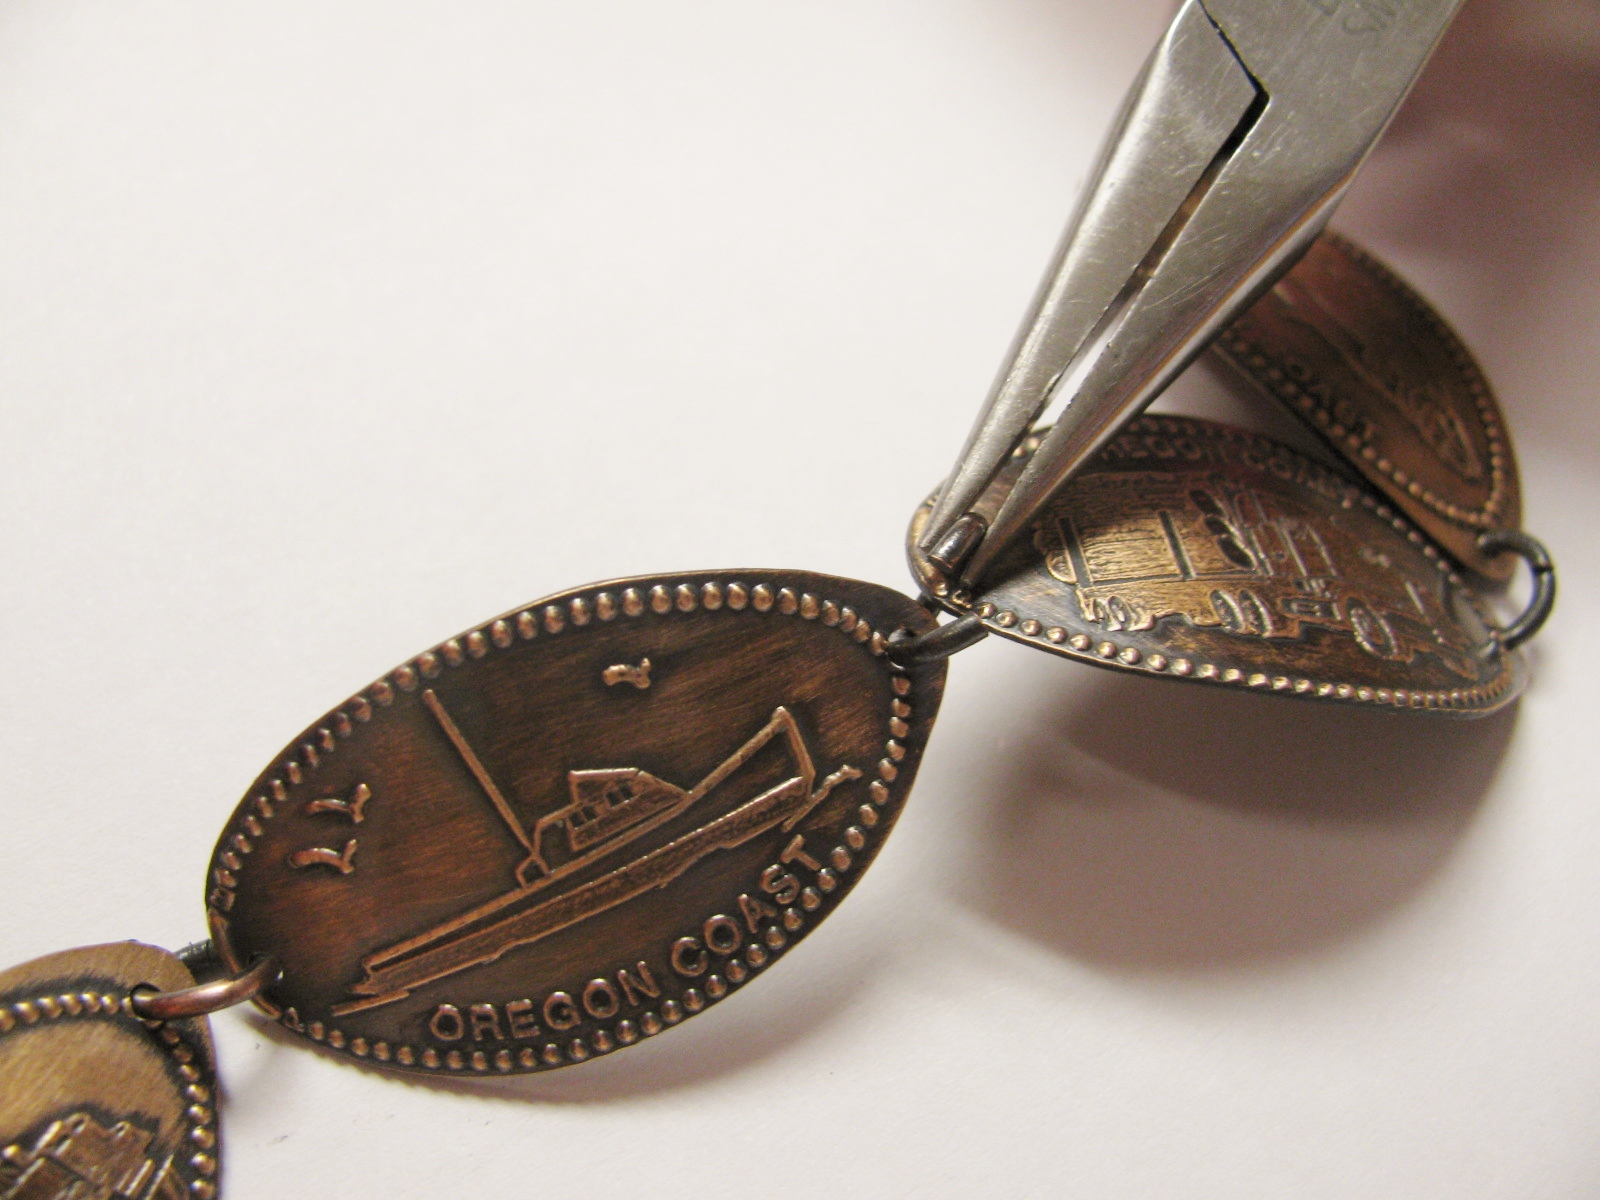
Use the chain nose pliers to attach the pennies together with oval jump rings. In between two of the pennies add a lobster claw clasp. Remember to always open your jump rings by pulling them apart sideways.
7. Enjoy your new bracelet!
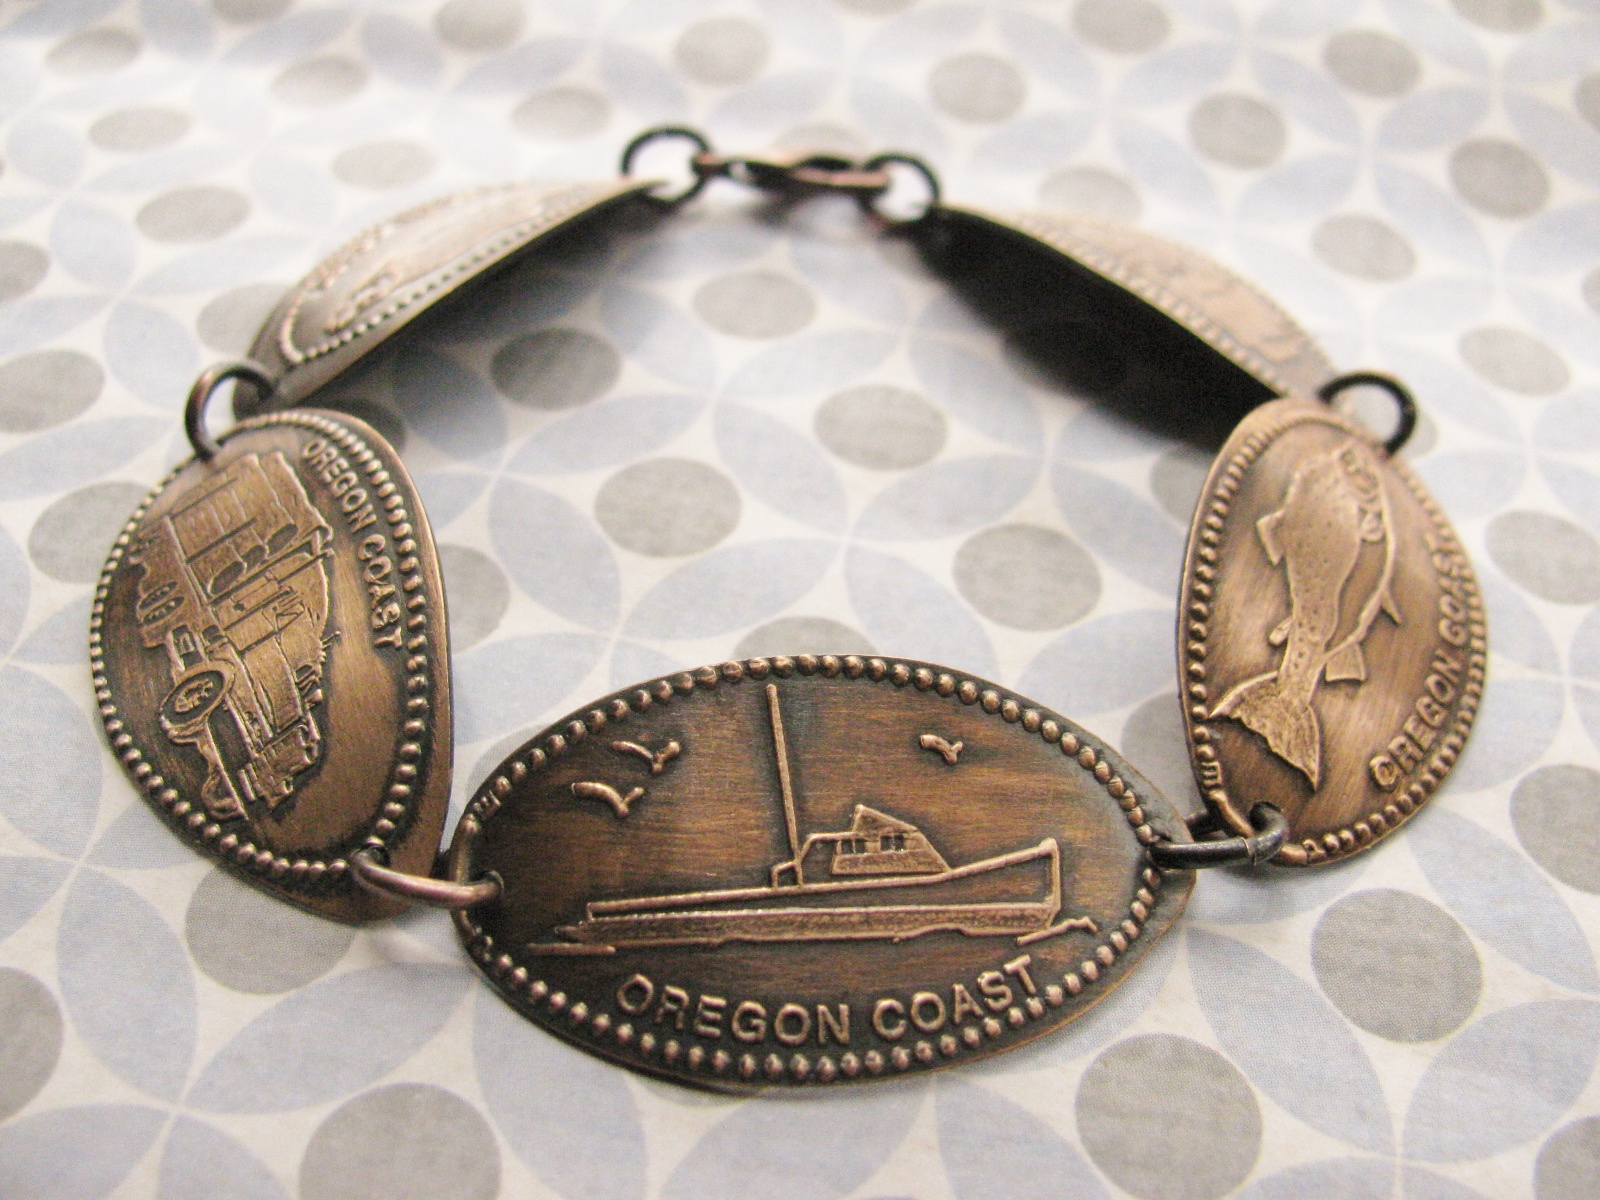
Now that your bracelet is all done, the only thing left to do is wear it and wait for the compliments!
Hopefully I have inspired you to make something fun with all your smashed souvenir pennies! Happy travels!
~~Tiffany

24 Comments
Absolutely beautiful. Thank you for sharing. I haven’t seen one of those penny smashing machines in the last 40 years. I wonder if a rolling mill will flatten them?
Placed I’ve found the penny smashers in the last few years are:
* Santa Fe (central area near the museums.)
* Smithsonian Aerospace Museum in DC
* New Orleans – French Quarter – one in the Riverwalk Mall, another near the Audubon Imax tickets near the Aquarium. I don’t have any pennies right now, but plan to get some and will post pix when I can!!
* I’m pretty sure there were some in Yellowstone park too, probably near Mammoth Hot springs, but not sure.
A rolling mill will definitely flatten pennies – you just don’t get the fun Oregon Coast or zoo, etc. patterns. However, with a rolling mill, you can get an infinite variety of home-made patterns using all types of found items … wire mesh, plastic mesh, sturdy leaves, even lace! (fyi ~ It generally warps or destroys the item you use for a pattern).
Catherine,
I am not sure. I find that the best place to find these machines is at Zoo’s and Aquariums. When I came across this one on vacation, I was so excited that I made a whole pocketful of them! There was a line of kids waiting behind me! You could always hammer them out more with a hammer and steel block.
Tiffany
What a wonderful idea. Now, where are all those pennies? I’ll be looking for the machines during my next vacation or trip.
Here is a good website to find those machines http://www.pennycollector.com/AreaList.aspx
I went on vacation with my family to Disney World and saw tons of these machines. I probably have 15 of them just from Disney, I’ve been seeing a lot more of them. I love them.
I think there is a resurgence in the popularity of these machines. I’ve been working on a collection of them from Vegas, and getting friends to make them for me when they have a chance. I’m sure a rolling machine would flatten the penny, but I believe the “tourist” dies are specific to the coin-op machines.
Such a unique and beautiful idea! Thank you for the inspiration!!
What a unique idea. Love the tutorial and it turned out fantastic. Sharing on my FB today.
this is the best idea i’ve seen in a long time! thank you for sharing.
Love this idea. I’ve been collecting these for years, and this is a terrific way to be able to use them instead of just stashing them.
pennycollector.com has a listing of all US machines.
Hello,love the bracelet! Can you tell me where I can find the shaping tool?
Allison you can get the pliers at Rings & Things. I will attach the link to them. They are one of my favorite tools! I use them to make cuff bracelets all the time!
~~Tiffany
I found your project via Pinterest. Your project inspired one of my own. I linked back to you. You can view my project at http://leelasmoments.blogspot.com/2013/01/souvenir-penny-necklace.html
Thanks for the inspiration!
I find the best places for the penny smashers are tourist locations and theme parks. I have an album I got at Disneyland that holds the smashed pennies. By the way Disneyland has several smashing machines throughout the park. Now I can pick some of my favorites from the album and make the bracelet. Maybe even a matching necklace?
What a FANTASTIC idea!! I have been collecting these from our trips for years. I can’t wait to try this. Thank you for posting!!
Beautiful! The finished bracelet is lovely! Thank you for sharing the instructions, photos, and supply list. I have thought of linking some of my smashed pennies into a bracelet but it would never have looked as professional as yours with the curved coins and the lovely patina! Can’t wait to try some projects on some of my pennies! Thanks again!
I ran across some of these in my junk drawer just last week. I think I might have to try these, great idea !
This is a great tutorial! Absolutely love it, my daughters have tons of these pennies I will have to make them each a bracelet with their favorite ones.
You can have custom pennies made by Business Cents or you can choose from a variety of stock pennies.
I found that the wax melts right off when wearing on a warm day, any other suggestions for coating the pennies?
[…] rings-things […]