
It’s February, and snow and ice are covering every surface… which means I’d really like to fly away to someplace warm for the winter.

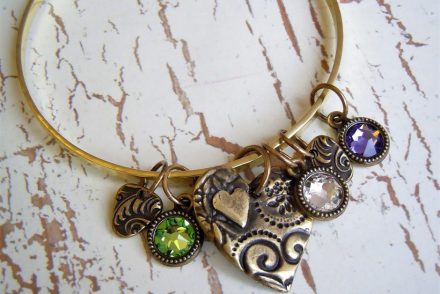
Wire wrapped bird nest bracelet with freshwater pearl beads and Vintaj bird charms.
But I don’t have wings, so the next best thing is having Kayla explain how she makes these adorable wire bird’s nests. She made this sweet bracelet by creating 3 wrapped nests with different shades of freshwater pearls, then added swooping Vintaj bird charms. (The chain is one of our favorites: antiqued brass ring & connector chain.)
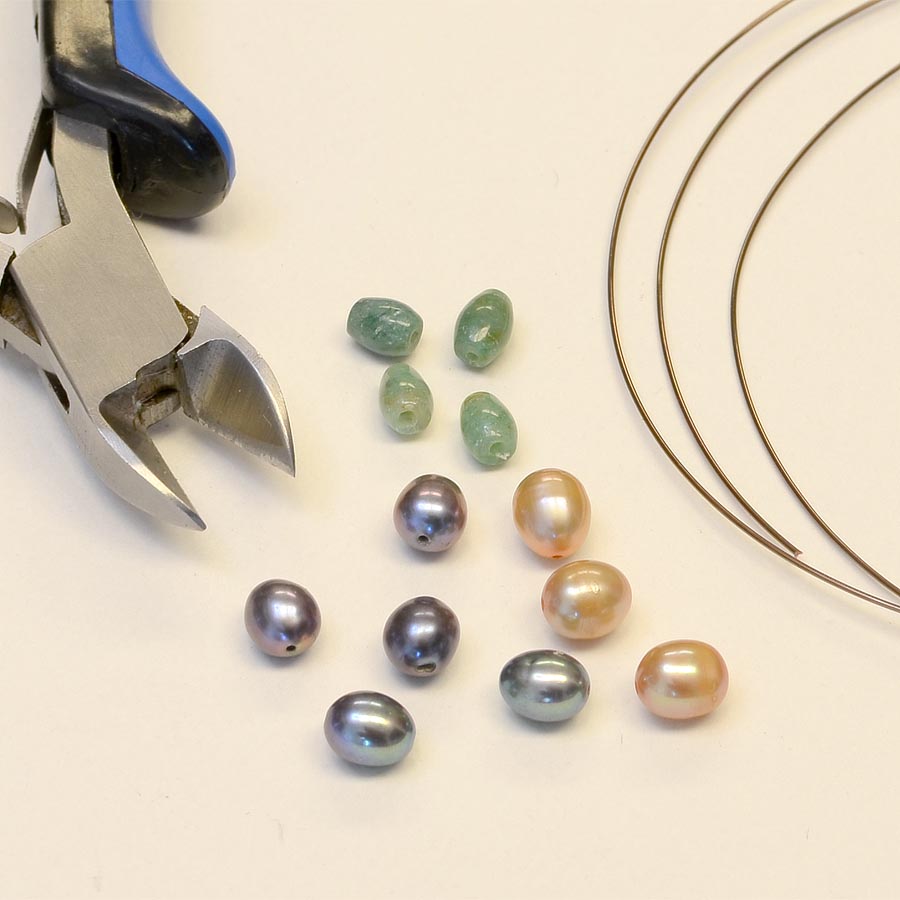
Gather supplies for the wire bird nests.
These wire nests use only a few supplies:
- 25-30″ of 24-gauge Artistic Wire or 22-gauge Artistic Wire.
- 3 oval beads (pearl, gemstone, Swarovski crystal pearl, etc)
And a single tool:
- Wire cutters (preferably tapered flush cutters)
Warning: Pearls often have tiny holes, so if you’re following this design using different pearls than the ones we’ve linked, you may need to use 26-gauge wire instead.
Wire Bird Nest Instructions:

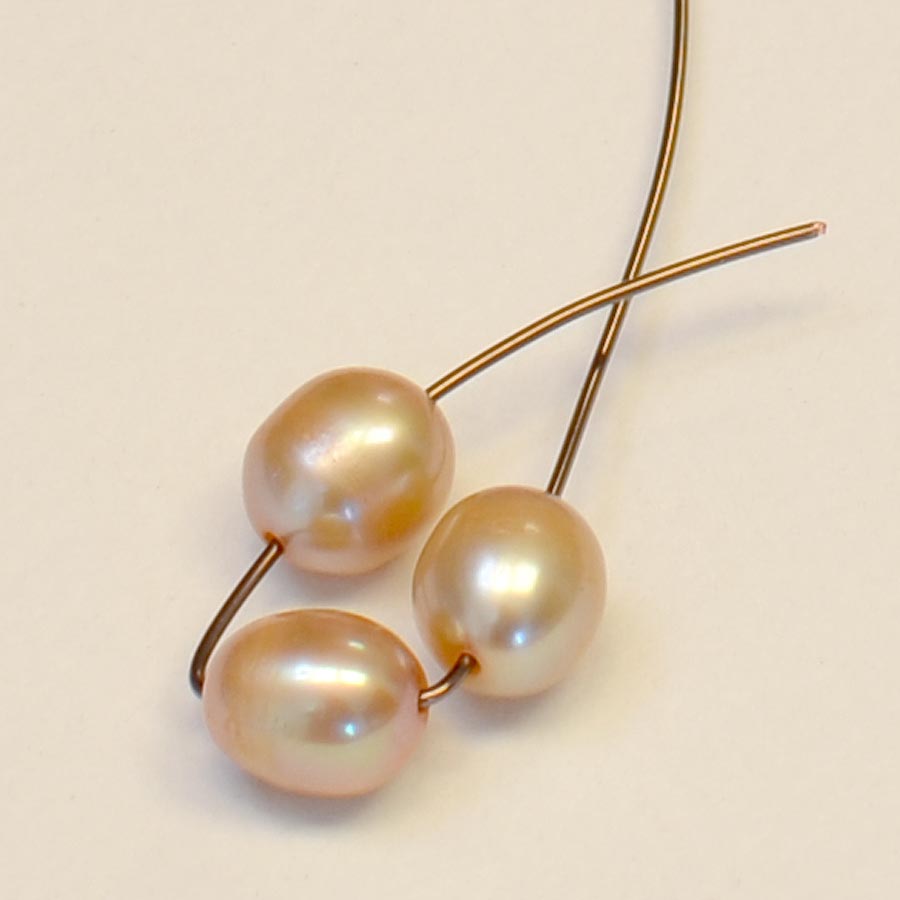
Step 1.
Feed 3 beads onto the wire. Leave about 3/4″ tail.
Step 2. Begin curving the egg beads into a circle.
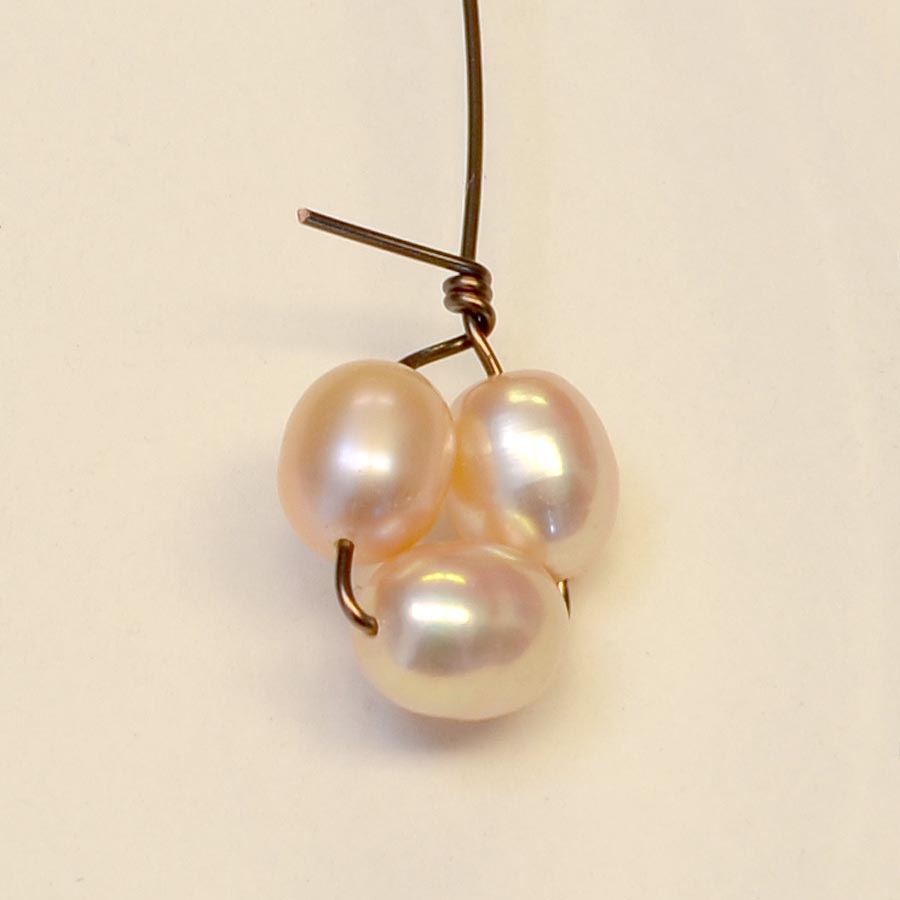
Step 3. Take the wire tail and wrap it around the longer end a few times. Use your fingers, not pliers, so you don’t mar the wire or scratch the pearls.
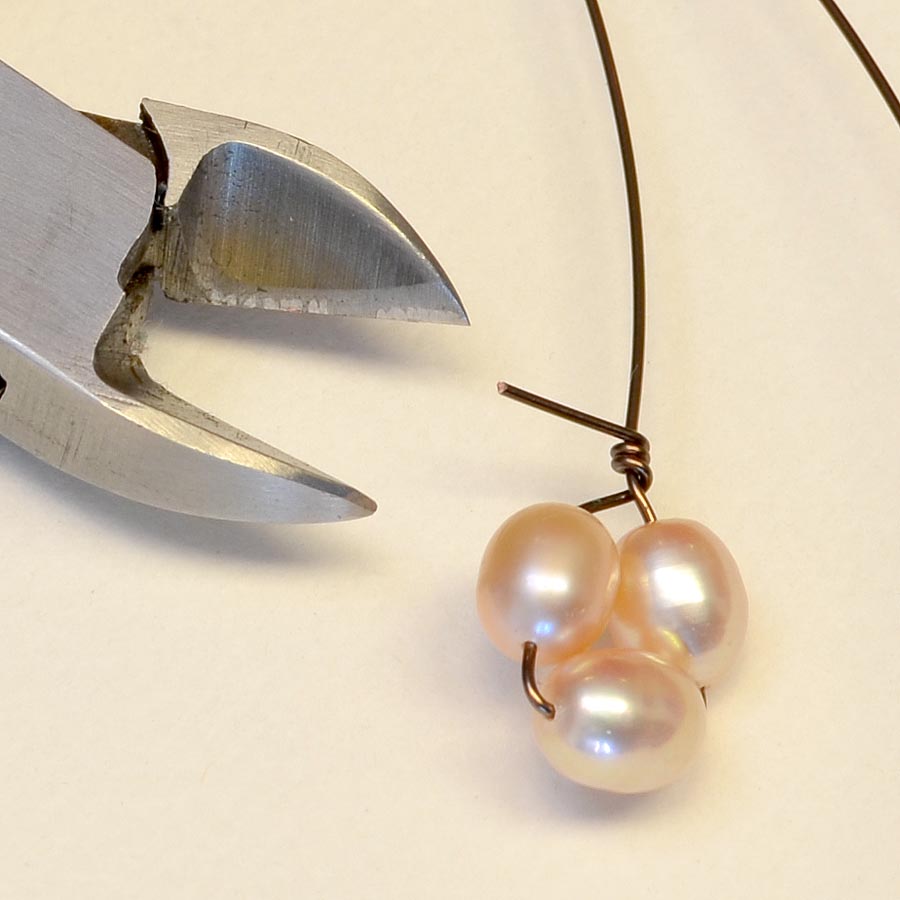
Step 4. Trim excess wire. (Remove the short tail.)

Step 5. Wrap the wire 5-6 times around the pearl beads. Don’t try to be too perfect — this style of wire wrapping is supposed to be a bit messy.
For a thicker nest, just wrap a few more times around the beads.

Step 6. Feed the wire all the way down through the nest.

Step 7. Wrap two times around one side of the nest, then go about 1/3 of the way around the nest, feed wire through, wrap two times, go 1/3 of the way around and feed the wire through a final spot.

Step 8. At the final spot, wrap three times, and trim excess wire. This is where narrow-tipped flush cutters are nice, because it’s best if you can trim the wire inside of the nest so it won’t snag.
Finished: Perfectly messy & sweet Springtime wire-wrapped bird’s nests!
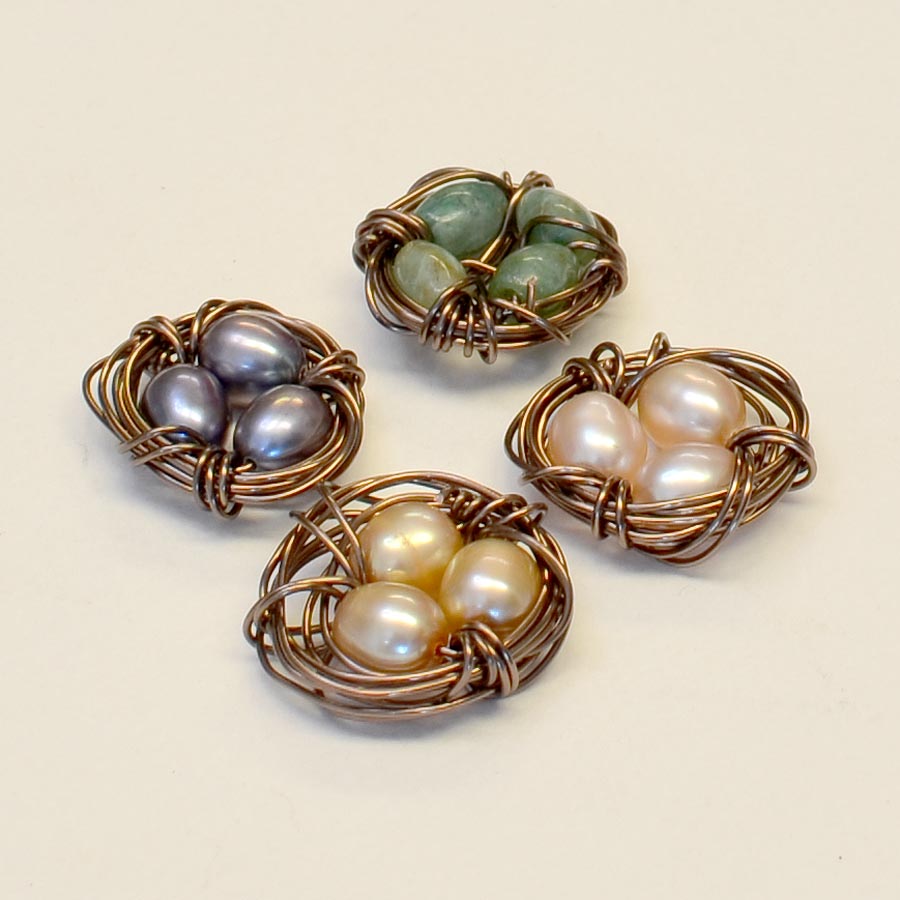
The beads in the image above are (clockwise from top):
- 4x6mm green aventurine oval beads
- 5-8mm pink freshwater pearls
- 5-8mm champagne freshwater pearls
- 5-8mm dark blue freshwater pearls
The wire is 22-gauge Antique Brass Artistic Wire.
Want more options? Try these egg-shaped gemstone beads, or Swarovski crystal rice pearls, other colors of oval freshwater pearl beads. And once you make a few of these in colorful Artistic wire, you might want to branch out into sterling silver wire or gold-filled wire!
")
Flying the Nest – Bracelet Tutorial (with full parts list for bracelet)
~ Polly & Kayla
Note: This style of wire-wrapped birds nest “baskets” work great for bracelets, earrings and pendants, because they don’t have a closed-off back — you can see the pretty egg-shaped pearl or gemstone beads from both sides of the charm.
Here is the perfect bird’s nest earring project:

Nesting Earrings Tutorial
Created by Rings & Things designer Rita Hutchinson. Visit Rings & Things Design Gallery for a complete list of the supplies and tools needed to make this project.

2 Comments
A spring and Easter project in one to me and cute and fanciful!
[…] Wire Wrapped Bird’s Nests: While many wire wrapping projects require decently (or immensely!) advanced skills in this field […]