null

Tools

Find jewelry making tools: pliers, cutters, jewelers saws, bench blocks, punches, drills (manual and power), soldering supplies, riveting tools, jewelry resin, cleaners, magnifiers, ring and bracelet tools...
Filters
  • Product
  • Qty in Cart
  • Quantity
  • Price
  • Subtotal
  • See Related Products links (below) for similar items and additional jewelry-making supplies that are often used with this item.Questions? E-mail us for friendly, expert help!

    Gray Plastic Clipcard, Blank, 1.5x2" (100 Pieces)

    $5.95
    See Related Products links (below) for similar items and additional jewelry-making supplies that are often used with this item.Questions? E-mail us for friendly, expert help!
    Qty in Cart: 0
    Quantity:
    Price:
    $5.95
    Subtotal:
  • See Related Products links (below) for similar items and additional jewelry-making supplies that are often used with this item. Questions? E-mail us for friendly, expert help! See Related Products links (below) for similar items and additional jewelry-making supplies that are often used with this item. Questions? E-mail us for friendly, expert help!

    Penny Brite Copper Gel (Each)

    $5.16
    See Related Products links (below) for similar items and additional jewelry-making supplies that are often used with this item. Questions? E-mail us for friendly, expert help!
    Qty in Cart: 0
    Price:
    $5.16
    Subtotal:
  • Make quick and easy bracelets and necklaces!        String your beads, then glue on a memory wire end, or use  durable round-nose pliers to twist each end into a loop. (Optional:  Add dangling beads or charms to looped ends.)    Make lacy netted chokers with seed, "E" and PRESTIGE Crystal crystal beads hanging from a single coil of necklace wire.    See Related Products links (below) for similar items and additional jewelry-making supplies that are often used with this item.

    22ga Beadalon Stainless Steel Memory Wire Coil, Necklace, 1oz (ounce)

    Beadalon
    $6.49
    Make quick and easy bracelets and necklaces! String your beads, then glue on a memory wire end, or use durable round-nose pliers to twist each end into a loop. (Optional: Add dangling beads or charms to looped ends.) Make lacy netted chokers...
    Qty in Cart: 0
    Quantity:
    Price:
    $6.49
    Subtotal:
  • See Related Products links (below) for similar items and additional jewelry-making supplies that are often used with this item.Questions? E-mail us for friendly, expert help!

    Black Plastic Clipcard, Blank, 1.5x2" (100 Pieces)

    $5.60
    See Related Products links (below) for similar items and additional jewelry-making supplies that are often used with this item.Questions? E-mail us for friendly, expert help!
    Qty in Cart: 0
    Quantity:
    Price:
    $5.60
    Subtotal:
  • See Related Products links (below) for similar items and additional jewelry-making supplies that are often used with this item.Questions? E-mail us for friendly, expert help!

    Gray Plastic Clipcard, Surgical Steel Print, 1.5x2" (100 Pieces)

    $5.25
    See Related Products links (below) for similar items and additional jewelry-making supplies that are often used with this item.Questions? E-mail us for friendly, expert help!
    Qty in Cart: 0
    Quantity:
    Price:
    $5.25
    Subtotal:
  • Polymer Clay Basics      Polymer clays are man made modeling materials that, once heat  cured, become permanent and will not return to their original  state. All are composed of the same basic components: plasticizers,  resins, fillers and colorants.     Before using polymer clay it must be conditioned... kneading by  hand until the clay is soft and pliable or fold and roll through a  pasta machine. Inadequate conditioning will result in weakened  finished items and weakened piece to piece adhesion. Condition light colors first, then move to darker colors.    Polymer clay pieces can be cured in a standard oven (convection)  or toaster oven. Do not microwave polymer clay. If you don't have a  dedicated oven, place items in an aluminum pan, then cover tightly  with foil to prevent residue build up in your oven. Cure pieces in  a well-ventilated area. Check oven accuracy with a thermometer and  use a timer to avoid exceeding curing time.    The recommended curing temperature is 300° F (150° C).  Kato Polyclay™ can be cured at 275° F (135° C) with  good results and has been approved to cure at 350° F by our  toxicologist, however caution should be taken when curing at that  temperature, time should be limited to 10 minutes as you will run  the risk of discoloration. You should never exceed 365° F.    Materials that will withstand clay curing temperatures, such as  glass, paper mache, wood, metal and ceramic items may be covered  with clay and baked in the oven. Items may be nested in polyester  batting to avoid flat, shiny spots. Finished pieces may be painted  or glazed after curing. Water-based paints and glazes are  recommended. Cured clay may also be wet sanded (automotive  sandpaper - 400 and 600 grit, in water) and then buffed to a  high-gloss sheen.    Working Properties of Kato PolyClay™      1. Conditioning - Kato Polyclay™ is easy to condition, with  no crumbling. I slice the blocks into 1/8" thick pieces. Roll  through the pasta machine at the thickest setting. Finish by  folding and rolling.     2. Handling - with continuous kneading and working, Kato  Polyclay™ does not become sticky and, therefore, maintains  its ease of workability.    3. Strength - Kato Polyclay™ was deemed as strong or  stronger than other clays the testers used, - most feeling it was  stronger. Not one single respondent found it to be less strong.  Additionally, every color shares the same strength.    4. Color stability - From uncured to cured state, no Kato  Polyclay™ color shifts more than 1/2 shade, with the majority  remaining unchanged from uncured to cured state. It is virtually  "true- color".    5. Consistency - Colors share the same consistency and softness.  For example, you won't find white very hard and green very soft.  Even consistency promotes even cane reduction, which results in  less distorted imagery and less waste at cane ends.    6. Color Mixing - Rather than taking an academic approach (this  requires that the user have a rather extensive knowledge of color  mixing) we have opted for a more user friendly and intuitive  method. The Spectral Colors form the basis for the creation of all  colors. If they were placed on the color wheel, you would find them  very evenly spaced. This approach makes color mixing simple for  even the most inexperienced user.    7. Colors - Colors have been formulated for maximum purity and  brilliance.    8. Finish - Once cured, Kato Polyclay™ exhibits a satin  sheen.    9. Density - As part of the manufacturing process, Kato  Polyclay™ is vacuum extruded (we are the only company  utilizing this state of the art process). In essence, air from the  clay is removed, making the clay denser and eliminating the need  for continuous folding and rolling to remove air pockets from the  clay.    10. Warm repositioning - Kato Polyclay™ is not as fragile  as other brands when warm. Kato Polyclay™ allows for a  measure of repositioning of elements when warm - the clay maintains  its new position without breaking.        See Related Products links (below) for similar items and additional jewelry-making supplies that are often used with this item.

    Kato Polyclay, 12.5oz - White (Each)

    $10.84
    Polymer Clay Basics Polymer clays are man made modeling materials that, once heat cured, become permanent and will not return to their original state. All are composed of the same basic components: plasticizers, resins, fillers and colorants. ...
    Qty in Cart: 0
    Quantity:
    Price:
    $10.84
    Subtotal:
  • Which Glue is Best? For the most durable bond, we almost always recommend epoxies rather than other types of glue, but it depends on a few factors... Check out the options, plus tips for successful glue bonds, on our Adhesives and Jewelry Glues page. See Related Products links (below) for similar items and additional jewelry-making supplies that are often used with this item. Which Glue is Best? For the most durable bond, we almost always recommend epoxies rather than other types of glue, but it depends on a few factors... Check out the options, plus tips for successful glue bonds, on our Adhesives and Jewelry Glues page. See Related Products links (below) for similar items and additional jewelry-making supplies that are often used with this item.

    Magnet, Round, 18mm (35 Pieces)

    $9.67
    Which Glue is Best? For the most durable bond, we almost always recommend epoxies rather than other types of glue, but it depends on a few factors... Check out the options, plus tips for successful glue bonds, on our Adhesives and Jewelry Glues page. See...
    Qty in Cart: 0
    Quantity:
    Price:
    $9.67
    Subtotal:
  • Tip: If you ever get a ring (or sizer) stuck on your finger, Windex does an excellent job helping the ring slide off. And if you're at a fair, show, or jewelry store, odds are that there is some Windex (or other spray cleanser) nearby, for keeping glass cases and mirrors sparkling!See Related Products links (below) for similar items and additional jewelry-making supplies that are often used with this item.

    Ring Sizers, Plastic (Each)

    $1.99
    Tip: If you ever get a ring (or sizer) stuck on your finger, Windex does an excellent job helping the ring slide off. And if you're at a fair, show, or jewelry store, odds are that there is some Windex (or other spray cleanser) nearby, for keeping glass...
    Qty in Cart: 0
    Quantity:
    Price:
    $1.99
    Subtotal:
  • Polymer Clay Basics      Polymer clays are man made modeling materials that, once heat  cured, become permanent and will not return to their original  state. All are composed of the same basic components: plasticizers,  resins, fillers and colorants.     Before using polymer clay it must be conditioned... kneading by  hand until the clay is soft and pliable or fold and roll through a  pasta machine. Inadequate conditioning will result in weakened  finished items and weakened piece to piece adhesion. Condition light colors first, then move to darker colors.    Polymer clay pieces can be cured in a standard oven (convection)  or toaster oven. Do not microwave polymer clay. If you don't have a  dedicated oven, place items in an aluminum pan, then cover tightly  with foil to prevent residue build up in your oven. Cure pieces in  a well-ventilated area. Check oven accuracy with a thermometer and  use a timer to avoid exceeding curing time.    The recommended curing temperature is 300° F (150° C).  Kato Polyclay™ can be cured at 275° F (135° C) with  good results and has been approved to cure at 350° F by our  toxicologist, however caution should be taken when curing at that  temperature, time should be limited to 10 minutes as you will run  the risk of discoloration. You should never exceed 365° F.    Materials that will withstand clay curing temperatures, such as  glass, paper mache, wood, metal and ceramic items may be covered  with clay and baked in the oven. Items may be nested in polyester  batting to avoid flat, shiny spots. Finished pieces may be painted  or glazed after curing. Water-based paints and glazes are  recommended. Cured clay may also be wet sanded (automotive  sandpaper - 400 and 600 grit, in water) and then buffed to a  high-gloss sheen.    Working Properties of Kato PolyClay™      1. Conditioning - Kato Polyclay™ is easy to condition, with  no crumbling. I slice the blocks into 1/8" thick pieces. Roll  through the pasta machine at the thickest setting. Finish by  folding and rolling.     2. Handling - with continuous kneading and working, Kato  Polyclay™ does not become sticky and, therefore, maintains  its ease of workability.    3. Strength - Kato Polyclay™ was deemed as strong or  stronger than other clays the testers used, - most feeling it was  stronger. Not one single respondent found it to be less strong.  Additionally, every color shares the same strength.    4. Color stability - From uncured to cured state, no Kato  Polyclay™ color shifts more than 1/2 shade, with the majority  remaining unchanged from uncured to cured state. It is virtually  "true- color".    5. Consistency - Colors share the same consistency and softness.  For example, you won't find white very hard and green very soft.  Even consistency promotes even cane reduction, which results in  less distorted imagery and less waste at cane ends.    6. Color Mixing - Rather than taking an academic approach (this  requires that the user have a rather extensive knowledge of color  mixing) we have opted for a more user friendly and intuitive  method. The Spectral Colors form the basis for the creation of all  colors. If they were placed on the color wheel, you would find them  very evenly spaced. This approach makes color mixing simple for  even the most inexperienced user.    7. Colors - Colors have been formulated for maximum purity and  brilliance.    8. Finish - Once cured, Kato Polyclay™ exhibits a satin  sheen.    9. Density - As part of the manufacturing process, Kato  Polyclay™ is vacuum extruded (we are the only company  utilizing this state of the art process). In essence, air from the  clay is removed, making the clay denser and eliminating the need  for continuous folding and rolling to remove air pockets from the  clay.    10. Warm repositioning - Kato Polyclay™ is not as fragile  as other brands when warm. Kato Polyclay™ allows for a  measure of repositioning of elements when warm - the clay maintains  its new position without breaking.        See Related Products links (below) for similar items and additional jewelry-making supplies that are often used with this item.

    Kato Polyclay, 2oz, Metallic - Pearl (Each)

    $2.11
    Polymer Clay Basics Polymer clays are man made modeling materials that, once heat cured, become permanent and will not return to their original state. All are composed of the same basic components: plasticizers, resins, fillers and colorants. ...
    Qty in Cart: 0
    Price:
    $2.11
    Subtotal:
  • See Related Products links (below) for similar items and additional jewelry-making supplies that are often used with this item. Questions? E-mail us for friendly, expert help!

    Bead Mat, 9x12" - Beige (Each)

    $1.12
    See Related Products links (below) for similar items and additional jewelry-making supplies that are often used with this item. Questions? E-mail us for friendly, expert help!
    Qty in Cart: 0
    Quantity:
    Price:
    $1.12
    Subtotal:
  • To use, first clean the metal to remove any oils or oxidation, then  use a cotton swab to apply the full-strength patina. Use a polishing cloth, polishing paper, or 0000 steel wool to lightene the high points of your metal. Renaissance Wax (listed with the Cleaners and Polishers products) can be used to seal  the patina.    See Related Products links (below) for similar items and additional jewelry-making supplies that are often used with this item. To use, first clean the metal to remove any oils or oxidation, then  use a cotton swab to apply the full-strength patina. Use a polishing cloth, polishing paper, or 0000 steel wool to lightene the high points of your metal. Renaissance Wax (listed with the Cleaners and Polishers products) can be used to seal  the patina.    See Related Products links (below) for similar items and additional jewelry-making supplies that are often used with this item.

    Novacan Black Patina - HZ* (Each)

    $6.38
    To use, first clean the metal to remove any oils or oxidation, then use a cotton swab to apply the full-strength patina. Use a polishing cloth, polishing paper, or 0000 steel wool to lightene the high points of your metal. Renaissance Wax (listed with...
    Qty in Cart: 0
    Quantity:
    Price:
    $6.38
    Subtotal:
  • To avoid cross-contamination (it's just as important with metals, as it is for foods), keep your polishing pads used for aluminum or nickel silver separate from your polishing pads used with sterling, copper, brass, karat gold, etc. -- If you use the same polishing pad for multiple metals, you may bring brass or copper color into your aluminum or sterling, or you may contaminate your sterling or karat gold with traces of nickel or aluminum, making them hazardous to solder or use with oxidization chemicals.  See Related Products links (below) for similar items and additional jewelry-making supplies that are often used with this item.

    EURO TOOL Polishing Pads, Ultra, 2x2" (pack)

    EURO TOOL

    $8.07
    To avoid cross-contamination (it's just as important with metals, as it is for foods), keep your polishing pads used for aluminum or nickel silver separate from your polishing pads used with sterling, copper, brass, karat gold, etc. -- If you use the...
    Qty in Cart: 0
    Quantity:
    Price:
    $8.07
    Subtotal:
  • Magic-Glos™ Crystal clear, but will darken/yellow if baked over 125°F. Waterproof. Scratch resistant but not scratch proof. Use to seal cured polymer clay, image transfers, foils, mosaics and more. Will magnify the patterns underneath. Apply multiple layers to make faux dichro effects and domed cabochons. Can be mixed with inclusions such as glitter and dried flowers. Photographic paper, regular paper and fabric should be sealed to create a waterproof barrier before applying Magic-Glos™. (Use clear packing tape, transparent shelf liner, laminating film or a coating of liquid polymer clay.) Papers and fabrics coated with water-soluble sealers (decoupage fluid, Mod Podge®, etc.) should not be coated with Magic-Glos™. Cures with direct sunlight (outdoors) or a UV lamp. Typical cure time is 5-15 minutes depending on size of cure area and thickness of layer. Store in a cool, dry place.  See Related Products links (below) for similar items and additional jewelry-making supplies that are often used with this item. Magic-Glos™ Crystal clear, but will darken/yellow if baked over 125°F. Waterproof. Scratch resistant but not scratch proof. Use to seal cured polymer clay, image transfers, foils, mosaics and more. Will magnify the patterns underneath. Apply multiple layers to make faux dichro effects and domed cabochons. Can be mixed with inclusions such as glitter and dried flowers. Photographic paper, regular paper and fabric should be sealed to create a waterproof barrier before applying Magic-Glos™. (Use clear packing tape, transparent shelf liner, laminating film or a coating of liquid polymer clay.) Papers and fabrics coated with water-soluble sealers (decoupage fluid, Mod Podge®, etc.) should not be coated with Magic-Glos™. Cures with direct sunlight (outdoors) or a UV lamp. Typical cure time is 5-15 minutes depending on size of cure area and thickness of layer. Store in a cool, dry place.  See Related Products links (below) for similar items and additional jewelry-making supplies that are often used with this item.

    Magic-Glos, UV Resin, 1oz (Each)

    Lisa Pavelka

    $8.78
    Magic-Glos™ Crystal clear, but will darken/yellow if baked over 125°F. Waterproof. Scratch resistant but not scratch proof. Use to seal cured polymer clay, image transfers, foils, mosaics and more. Will magnify the patterns underneath. Apply multiple...
    Qty in Cart: 0
    Price:
    $8.78
    Subtotal:
  • Polymer Clay Basics      Polymer clays are man made modeling materials that, once heat  cured, become permanent and will not return to their original  state. All are composed of the same basic components: plasticizers,  resins, fillers and colorants.     Before using polymer clay it must be conditioned... kneading by  hand until the clay is soft and pliable or fold and roll through a  pasta machine. Inadequate conditioning will result in weakened  finished items and weakened piece to piece adhesion. Condition light colors first, then move to darker colors.    Polymer clay pieces can be cured in a standard oven (convection)  or toaster oven. Do not microwave polymer clay. If you don't have a  dedicated oven, place items in an aluminum pan, then cover tightly  with foil to prevent residue build up in your oven. Cure pieces in  a well-ventilated area. Check oven accuracy with a thermometer and  use a timer to avoid exceeding curing time.    The recommended curing temperature is 300° F (150° C).  Kato Polyclay™ can be cured at 275° F (135° C) with  good results and has been approved to cure at 350° F by our  toxicologist, however caution should be taken when curing at that  temperature, time should be limited to 10 minutes as you will run  the risk of discoloration. You should never exceed 365° F.    Materials that will withstand clay curing temperatures, such as  glass, paper mache, wood, metal and ceramic items may be covered  with clay and baked in the oven. Items may be nested in polyester  batting to avoid flat, shiny spots. Finished pieces may be painted  or glazed after curing. Water-based paints and glazes are  recommended. Cured clay may also be wet sanded (automotive  sandpaper - 400 and 600 grit, in water) and then buffed to a  high-gloss sheen.    Working Properties of Kato PolyClay™      1. Conditioning - Kato Polyclay™ is easy to condition, with  no crumbling. I slice the blocks into 1/8" thick pieces. Roll  through the pasta machine at the thickest setting. Finish by  folding and rolling.     2. Handling - with continuous kneading and working, Kato  Polyclay™ does not become sticky and, therefore, maintains  its ease of workability.    3. Strength - Kato Polyclay™ was deemed as strong or  stronger than other clays the testers used, - most feeling it was  stronger. Not one single respondent found it to be less strong.  Additionally, every color shares the same strength.    4. Color stability - From uncured to cured state, no Kato  Polyclay™ color shifts more than 1/2 shade, with the majority  remaining unchanged from uncured to cured state. It is virtually  "true- color".    5. Consistency - Colors share the same consistency and softness.  For example, you won't find white very hard and green very soft.  Even consistency promotes even cane reduction, which results in  less distorted imagery and less waste at cane ends.    6. Color Mixing - Rather than taking an academic approach (this  requires that the user have a rather extensive knowledge of color  mixing) we have opted for a more user friendly and intuitive  method. The Spectral Colors form the basis for the creation of all  colors. If they were placed on the color wheel, you would find them  very evenly spaced. This approach makes color mixing simple for  even the most inexperienced user.    7. Colors - Colors have been formulated for maximum purity and  brilliance.    8. Finish - Once cured, Kato Polyclay™ exhibits a satin  sheen.    9. Density - As part of the manufacturing process, Kato  Polyclay™ is vacuum extruded (we are the only company  utilizing this state of the art process). In essence, air from the  clay is removed, making the clay denser and eliminating the need  for continuous folding and rolling to remove air pockets from the  clay.    10. Warm repositioning - Kato Polyclay™ is not as fragile  as other brands when warm. Kato Polyclay™ allows for a  measure of repositioning of elements when warm - the clay maintains  its new position without breaking.        See Related Products links (below) for similar items and additional jewelry-making supplies that are often used with this item.

    Kato Polyclay, 12.5oz - Black (Each)

    $10.84
    Polymer Clay Basics Polymer clays are man made modeling materials that, once heat cured, become permanent and will not return to their original state. All are composed of the same basic components: plasticizers, resins, fillers and colorants. ...
    Qty in Cart: 0
    Price:
    $10.84
    Subtotal:
  • Polymer Clay Basics      Polymer clays are man made modeling materials that, once heat  cured, become permanent and will not return to their original  state. All are composed of the same basic components: plasticizers,  resins, fillers and colorants.     Before using polymer clay it must be conditioned... kneading by  hand until the clay is soft and pliable or fold and roll through a  pasta machine. Inadequate conditioning will result in weakened  finished items and weakened piece to piece adhesion. Condition light colors first, then move to darker colors.    Polymer clay pieces can be cured in a standard oven (convection)  or toaster oven. Do not microwave polymer clay. If you don't have a  dedicated oven, place items in an aluminum pan, then cover tightly  with foil to prevent residue build up in your oven. Cure pieces in  a well-ventilated area. Check oven accuracy with a thermometer and  use a timer to avoid exceeding curing time.    The recommended curing temperature is 300° F (150° C).  Kato Polyclay™ can be cured at 275° F (135° C) with  good results and has been approved to cure at 350° F by our  toxicologist, however caution should be taken when curing at that  temperature, time should be limited to 10 minutes as you will run  the risk of discoloration. You should never exceed 365° F.    Materials that will withstand clay curing temperatures, such as  glass, paper mache, wood, metal and ceramic items may be covered  with clay and baked in the oven. Items may be nested in polyester  batting to avoid flat, shiny spots. Finished pieces may be painted  or glazed after curing. Water-based paints and glazes are  recommended. Cured clay may also be wet sanded (automotive  sandpaper - 400 and 600 grit, in water) and then buffed to a  high-gloss sheen.    Working Properties of Kato PolyClay™      1. Conditioning - Kato Polyclay™ is easy to condition, with  no crumbling. I slice the blocks into 1/8" thick pieces. Roll  through the pasta machine at the thickest setting. Finish by  folding and rolling.     2. Handling - with continuous kneading and working, Kato  Polyclay™ does not become sticky and, therefore, maintains  its ease of workability.    3. Strength - Kato Polyclay™ was deemed as strong or  stronger than other clays the testers used, - most feeling it was  stronger. Not one single respondent found it to be less strong.  Additionally, every color shares the same strength.    4. Color stability - From uncured to cured state, no Kato  Polyclay™ color shifts more than 1/2 shade, with the majority  remaining unchanged from uncured to cured state. It is virtually  "true- color".    5. Consistency - Colors share the same consistency and softness.  For example, you won't find white very hard and green very soft.  Even consistency promotes even cane reduction, which results in  less distorted imagery and less waste at cane ends.    6. Color Mixing - Rather than taking an academic approach (this  requires that the user have a rather extensive knowledge of color  mixing) we have opted for a more user friendly and intuitive  method. The Spectral Colors form the basis for the creation of all  colors. If they were placed on the color wheel, you would find them  very evenly spaced. This approach makes color mixing simple for  even the most inexperienced user.    7. Colors - Colors have been formulated for maximum purity and  brilliance.    8. Finish - Once cured, Kato Polyclay™ exhibits a satin  sheen.    9. Density - As part of the manufacturing process, Kato  Polyclay™ is vacuum extruded (we are the only company  utilizing this state of the art process). In essence, air from the  clay is removed, making the clay denser and eliminating the need  for continuous folding and rolling to remove air pockets from the  clay.    10. Warm repositioning - Kato Polyclay™ is not as fragile  as other brands when warm. Kato Polyclay™ allows for a  measure of repositioning of elements when warm - the clay maintains  its new position without breaking.        See Related Products links (below) for similar items and additional jewelry-making supplies that are often used with this item.

    Kato Polyclay, 2oz - Turquoise (Each)

    $1.98
    Polymer Clay Basics Polymer clays are man made modeling materials that, once heat cured, become permanent and will not return to their original state. All are composed of the same basic components: plasticizers, resins, fillers and colorants. ...
    Qty in Cart: 0
    Price:
    $1.98
    Subtotal:
  • Shaping, Smoothing and Texturing Tools  When using Art Clay Silver or other Precious Metal Clays, clean your tools promptly after each use, so you can save the scrap silver and re-use it.  It might not seem like much each time, but it can add up to a lot of saved money! Small screw-tight cosmetic containers work very well for saving left-over bits of unfired Art Clay Silver and other precious Metal Clays.  Add a few drops of water as necessary.   See Related Products links (below) for similar items and additional jewelry-making supplies that are often used with this item.

    Plastic Roller (Each)

    $3.94
    Shaping, Smoothing and Texturing Tools When using Art Clay Silver or other Precious Metal Clays, clean your tools promptly after each use, so you can save the scrap silver and re-use it.  It might not seem like much each time, but it can add up to...
    Qty in Cart: 0
    Price:
    $3.94
    Subtotal:
  • Polymer Clay Basics      Polymer clays are man made modeling materials that, once heat  cured, become permanent and will not return to their original  state. All are composed of the same basic components: plasticizers,  resins, fillers and colorants.     Before using polymer clay it must be conditioned... kneading by  hand until the clay is soft and pliable or fold and roll through a  pasta machine. Inadequate conditioning will result in weakened  finished items and weakened piece to piece adhesion. Condition light colors first, then move to darker colors.    Polymer clay pieces can be cured in a standard oven (convection)  or toaster oven. Do not microwave polymer clay. If you don't have a  dedicated oven, place items in an aluminum pan, then cover tightly  with foil to prevent residue build up in your oven. Cure pieces in  a well-ventilated area. Check oven accuracy with a thermometer and  use a timer to avoid exceeding curing time.    The recommended curing temperature is 300° F (150° C).  Kato Polyclay™ can be cured at 275° F (135° C) with  good results and has been approved to cure at 350° F by our  toxicologist, however caution should be taken when curing at that  temperature, time should be limited to 10 minutes as you will run  the risk of discoloration. You should never exceed 365° F.    Materials that will withstand clay curing temperatures, such as  glass, paper mache, wood, metal and ceramic items may be covered  with clay and baked in the oven. Items may be nested in polyester  batting to avoid flat, shiny spots. Finished pieces may be painted  or glazed after curing. Water-based paints and glazes are  recommended. Cured clay may also be wet sanded (automotive  sandpaper - 400 and 600 grit, in water) and then buffed to a  high-gloss sheen.    Working Properties of Kato PolyClay™      1. Conditioning - Kato Polyclay™ is easy to condition, with  no crumbling. I slice the blocks into 1/8" thick pieces. Roll  through the pasta machine at the thickest setting. Finish by  folding and rolling.     2. Handling - with continuous kneading and working, Kato  Polyclay™ does not become sticky and, therefore, maintains  its ease of workability.    3. Strength - Kato Polyclay™ was deemed as strong or  stronger than other clays the testers used, - most feeling it was  stronger. Not one single respondent found it to be less strong.  Additionally, every color shares the same strength.    4. Color stability - From uncured to cured state, no Kato  Polyclay™ color shifts more than 1/2 shade, with the majority  remaining unchanged from uncured to cured state. It is virtually  "true- color".    5. Consistency - Colors share the same consistency and softness.  For example, you won't find white very hard and green very soft.  Even consistency promotes even cane reduction, which results in  less distorted imagery and less waste at cane ends.    6. Color Mixing - Rather than taking an academic approach (this  requires that the user have a rather extensive knowledge of color  mixing) we have opted for a more user friendly and intuitive  method. The Spectral Colors form the basis for the creation of all  colors. If they were placed on the color wheel, you would find them  very evenly spaced. This approach makes color mixing simple for  even the most inexperienced user.    7. Colors - Colors have been formulated for maximum purity and  brilliance.    8. Finish - Once cured, Kato Polyclay™ exhibits a satin  sheen.    9. Density - As part of the manufacturing process, Kato  Polyclay™ is vacuum extruded (we are the only company  utilizing this state of the art process). In essence, air from the  clay is removed, making the clay denser and eliminating the need  for continuous folding and rolling to remove air pockets from the  clay.    10. Warm repositioning - Kato Polyclay™ is not as fragile  as other brands when warm. Kato Polyclay™ allows for a  measure of repositioning of elements when warm - the clay maintains  its new position without breaking.        See Related Products links (below) for similar items and additional jewelry-making supplies that are often used with this item.

    Kato Polyclay, 2oz - Magenta (Each)

    $1.98
    Polymer Clay Basics Polymer clays are man made modeling materials that, once heat cured, become permanent and will not return to their original state. All are composed of the same basic components: plasticizers, resins, fillers and colorants. ...
    Qty in Cart: 0
    Price:
    $1.98
    Subtotal:
  • See Related Products links (below) for similar items and additional jewelry-making supplies that are often used with this item. Questions? E-mail us for friendly, expert help! See Related Products links (below) for similar items and additional jewelry-making supplies that are often used with this item. Questions? E-mail us for friendly, expert help!

    Beadalon Jewelry Pliers, Memory Wire Bending, 1.5 and 3mm (Each)

    Beadalon
    $9.55
    See Related Products links (below) for similar items and additional jewelry-making supplies that are often used with this item. Questions? E-mail us for friendly, expert help!
    Qty in Cart: 0
    Quantity:
    Price:
    $9.55
    Subtotal:
  • See Related Products links (below) for similar items and additional jewelry-making supplies that are often used with this item. Questions? E-mail us for friendly, expert help!

    Sunshine Polishing Cloth (Each)

    $6.19
    See Related Products links (below) for similar items and additional jewelry-making supplies that are often used with this item. Questions? E-mail us for friendly, expert help!
    Qty in Cart: 0
    Quantity:
    Price:
    $6.19
    Subtotal:
  • Make quick and easy bracelets and necklaces!    String your beads, then glue on a memory wire end, or use  durable round-nose pliers to twist each end into a loop. (Optional:  Add dangling beads or charms to looped ends.)    Make lacy netted chokers and bracelets with seed, "E" and faceted crystal beads hanging from a single coil of necklace wire.    See Related Products links (below) for similar items and additional jewelry-making supplies that are often used with this item.

    22ga Beadalon Stainless Steel Memory Wire Coil, Bracelet, 1oz (ounce)

    Beadalon

    $6.29
    Make quick and easy bracelets and necklaces! String your beads, then glue on a memory wire end, or use durable round-nose pliers to twist each end into a loop. (Optional: Add dangling beads or charms to looped ends.) Make lacy netted chokers and...
    Qty in Cart: 0
    Quantity:
    Price:
    $6.29
    Subtotal:
  • Saw Blade Chart:  See Related Products links (below) for similar items and additional jewelry-making supplies that are often used with this item.Questions? E-mail us for friendly, expert help!

    Antilope Saw Blade, #5/0 (12 Pieces)

    Antilope
    $2.52
    Saw Blade Chart: See Related Products links (below) for similar items and additional jewelry-making supplies that are often used with this item.Questions? E-mail us for friendly, expert help!
    Qty in Cart: 0
    Price:
    $2.52
    Subtotal:
  • See Related Products links (below) for similar items and additional jewelry-making supplies that are often used with this item. Questions? E-mail us for friendly, expert help!

    Brass Sheet, Pebble Pattern (Each)

    $5.28
    See Related Products links (below) for similar items and additional jewelry-making supplies that are often used with this item. Questions? E-mail us for friendly, expert help!
    Qty in Cart: 0
    Quantity:
    Price:
    $5.28
    Subtotal:
  • Polymer Clay Basics      Polymer clays are man made modeling materials that, once heat  cured, become permanent and will not return to their original  state. All are composed of the same basic components: plasticizers,  resins, fillers and colorants.     Before using polymer clay it must be conditioned... kneading by  hand until the clay is soft and pliable or fold and roll through a  pasta machine. Inadequate conditioning will result in weakened  finished items and weakened piece to piece adhesion. Condition light colors first, then move to darker colors.    Polymer clay pieces can be cured in a standard oven (convection)  or toaster oven. Do not microwave polymer clay. If you don't have a  dedicated oven, place items in an aluminum pan, then cover tightly  with foil to prevent residue build up in your oven. Cure pieces in  a well-ventilated area. Check oven accuracy with a thermometer and  use a timer to avoid exceeding curing time.    The recommended curing temperature is 300° F (150° C).  Kato Polyclay™ can be cured at 275° F (135° C) with  good results and has been approved to cure at 350° F by our  toxicologist, however caution should be taken when curing at that  temperature, time should be limited to 10 minutes as you will run  the risk of discoloration. You should never exceed 365° F.    Materials that will withstand clay curing temperatures, such as  glass, paper mache, wood, metal and ceramic items may be covered  with clay and baked in the oven. Items may be nested in polyester  batting to avoid flat, shiny spots. Finished pieces may be painted  or glazed after curing. Water-based paints and glazes are  recommended. Cured clay may also be wet sanded (automotive  sandpaper - 400 and 600 grit, in water) and then buffed to a  high-gloss sheen.    Working Properties of Kato PolyClay™      1. Conditioning - Kato Polyclay™ is easy to condition, with  no crumbling. I slice the blocks into 1/8" thick pieces. Roll  through the pasta machine at the thickest setting. Finish by  folding and rolling.     2. Handling - with continuous kneading and working, Kato  Polyclay™ does not become sticky and, therefore, maintains  its ease of workability.    3. Strength - Kato Polyclay™ was deemed as strong or  stronger than other clays the testers used, - most feeling it was  stronger. Not one single respondent found it to be less strong.  Additionally, every color shares the same strength.    4. Color stability - From uncured to cured state, no Kato  Polyclay™ color shifts more than 1/2 shade, with the majority  remaining unchanged from uncured to cured state. It is virtually  "true- color".    5. Consistency - Colors share the same consistency and softness.  For example, you won't find white very hard and green very soft.  Even consistency promotes even cane reduction, which results in  less distorted imagery and less waste at cane ends.    6. Color Mixing - Rather than taking an academic approach (this  requires that the user have a rather extensive knowledge of color  mixing) we have opted for a more user friendly and intuitive  method. The Spectral Colors form the basis for the creation of all  colors. If they were placed on the color wheel, you would find them  very evenly spaced. This approach makes color mixing simple for  even the most inexperienced user.    7. Colors - Colors have been formulated for maximum purity and  brilliance.    8. Finish - Once cured, Kato Polyclay™ exhibits a satin  sheen.    9. Density - As part of the manufacturing process, Kato  Polyclay™ is vacuum extruded (we are the only company  utilizing this state of the art process). In essence, air from the  clay is removed, making the clay denser and eliminating the need  for continuous folding and rolling to remove air pockets from the  clay.    10. Warm repositioning - Kato Polyclay™ is not as fragile  as other brands when warm. Kato Polyclay™ allows for a  measure of repositioning of elements when warm - the clay maintains  its new position without breaking.        See Related Products links (below) for similar items and additional jewelry-making supplies that are often used with this item.

    Kato Polyclay, 2oz, Metallic - Gold (Each)

    $1.98
    Polymer Clay Basics Polymer clays are man made modeling materials that, once heat cured, become permanent and will not return to their original state. All are composed of the same basic components: plasticizers, resins, fillers and colorants. ...
    Qty in Cart: 0
    Quantity:
    Price:
    $1.98
    Subtotal:
  • See Related Products links (below) for similar items and additional jewelry-making supplies that are often used with this item. Questions? E-mail us for friendly, expert help!

    Linen Drawstring Bag, 3x4" (Each)

    $0.62
    See Related Products links (below) for similar items and additional jewelry-making supplies that are often used with this item. Questions? E-mail us for friendly, expert help!
    Qty in Cart: 0
    Price:
    $0.62
    Subtotal:
  • See Related Products links (below) for similar items and additional jewelry-making supplies that are often used with this item. Questions? E-mail us for friendly, expert help!

    Linen Drawstring Bag, 4x6" (Each)

    $0.98
    See Related Products links (below) for similar items and additional jewelry-making supplies that are often used with this item. Questions? E-mail us for friendly, expert help!
    Qty in Cart: 0
    Price:
    $0.98
    Subtotal:
  • See Related Products links (below) for similar items and additional jewelry-making supplies that are often used with this item.        Visit our blog or watch the video below,for tips on using The Beadsmith® 1-Step Looper.      See Related Products links (below) for similar items and additional jewelry-making supplies that are often used with this item.        Visit our blog or watch the video below,for tips on using The Beadsmith® 1-Step Looper.

    The BeadSmith Jewelry Pliers, 1-Step Looper, 2.25mm (Each)

    The Beadsmith
    $28.25
    See Related Products links (below) for similar items and additional jewelry-making supplies that are often used with this item. Visit our blog or watch the video below,for tips on using The Beadsmith® 1-Step Looper.
    Qty in Cart: 0
    Quantity:
    Price:
    $28.25
    Subtotal:
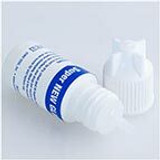
  • Which Glue is Best? Check out all the options, plus tips for successful glue bonds, on our main Adhesives and Jewelry Glues page. See Related Products links (below) for similar items and additional jewelry-making supplies that are often used with this item.

    EURO TOOL Adhesive, Super New Glue (Each)

    EURO TOOL
    $2.29
    Which Glue is Best? Check out all the options, plus tips for successful glue bonds, on our main Adhesives and Jewelry Glues page. See Related Products links (below) for similar items and additional jewelry-making supplies that are often used with this...
    Qty in Cart: 0
    Price:
    $2.29
    Subtotal:
  • Transform your DIY jewelry making experience with The Beadsmith Jeweller's Micro Pliers Bentnose Bent Nose! With a unique angled design, you can now reach the tightest spots with ease, eliminating hand and wrist fatigue. These pliers are perfect for smoothing wrapped wire, holding small objects, and picking out those tiny beads and findings. With sturdy box joint construction and a leaf spring, they're built to last and will take your handmade creations to the next level. Please note, these pliers are intended for fine hobby and beading work only. Upgrade your jewelry-making game and grab a pair today! Transform your DIY jewelry making experience with The Beadsmith Jeweller's Micro Pliers Bentnose Bent Nose! With a unique angled design, you can now reach the tightest spots with ease, eliminating hand and wrist fatigue. These pliers are perfect for smoothing wrapped wire, holding small objects, and picking out those tiny beads and findings. With sturdy box joint construction and a leaf spring, they're built to last and will take your handmade creations to the next level. Please note, these pliers are intended for fine hobby and beading work only. Upgrade your jewelry-making game and grab a pair today!

    The Beadsmith Jeweller's Micro Pliers Bentnose Bent Nose

    The Beadsmith
    $6.19
    Transform your DIY jewelry making experience with The Beadsmith Jeweller's Micro Pliers Bentnose Bent Nose! With a unique angled design, you can now reach the tightest spots with ease, eliminating hand and wrist fatigue. These pliers are perfect for...
    Qty in Cart: 0
    Quantity:
    Price:
    $6.19
    Subtotal:
  • See Related Products links (below) for similar items and additional jewelry-making supplies that are often used with this item. Questions? E-mail us for friendly, expert help!

    Beadalon Elastic Cord Needle (Each)

    Beadalon
    $3.37
    See Related Products links (below) for similar items and additional jewelry-making supplies that are often used with this item. Questions? E-mail us for friendly, expert help!
    Qty in Cart: 0
    Quantity:
    Price:
    $3.37
    Subtotal:
  • Polymer Clay Basics      Polymer clays are man made modeling materials that, once heat  cured, become permanent and will not return to their original  state. All are composed of the same basic components: plasticizers,  resins, fillers and colorants.     Before using polymer clay it must be conditioned... kneading by  hand until the clay is soft and pliable or fold and roll through a  pasta machine. Inadequate conditioning will result in weakened  finished items and weakened piece to piece adhesion. Condition light colors first, then move to darker colors.    Polymer clay pieces can be cured in a standard oven (convection)  or toaster oven. Do not microwave polymer clay. If you don't have a  dedicated oven, place items in an aluminum pan, then cover tightly  with foil to prevent residue build up in your oven. Cure pieces in  a well-ventilated area. Check oven accuracy with a thermometer and  use a timer to avoid exceeding curing time.    The recommended curing temperature is 300° F (150° C).  Kato Polyclay™ can be cured at 275° F (135° C) with  good results and has been approved to cure at 350° F by our  toxicologist, however caution should be taken when curing at that  temperature, time should be limited to 10 minutes as you will run  the risk of discoloration. You should never exceed 365° F.    Materials that will withstand clay curing temperatures, such as  glass, paper mache, wood, metal and ceramic items may be covered  with clay and baked in the oven. Items may be nested in polyester  batting to avoid flat, shiny spots. Finished pieces may be painted  or glazed after curing. Water-based paints and glazes are  recommended. Cured clay may also be wet sanded (automotive  sandpaper - 400 and 600 grit, in water) and then buffed to a  high-gloss sheen.    Working Properties of Kato PolyClay™      1. Conditioning - Kato Polyclay™ is easy to condition, with  no crumbling. I slice the blocks into 1/8" thick pieces. Roll  through the pasta machine at the thickest setting. Finish by  folding and rolling.     2. Handling - with continuous kneading and working, Kato  Polyclay™ does not become sticky and, therefore, maintains  its ease of workability.    3. Strength - Kato Polyclay™ was deemed as strong or  stronger than other clays the testers used, - most feeling it was  stronger. Not one single respondent found it to be less strong.  Additionally, every color shares the same strength.    4. Color stability - From uncured to cured state, no Kato  Polyclay™ color shifts more than 1/2 shade, with the majority  remaining unchanged from uncured to cured state. It is virtually  "true- color".    5. Consistency - Colors share the same consistency and softness.  For example, you won't find white very hard and green very soft.  Even consistency promotes even cane reduction, which results in  less distorted imagery and less waste at cane ends.    6. Color Mixing - Rather than taking an academic approach (this  requires that the user have a rather extensive knowledge of color  mixing) we have opted for a more user friendly and intuitive  method. The Spectral Colors form the basis for the creation of all  colors. If they were placed on the color wheel, you would find them  very evenly spaced. This approach makes color mixing simple for  even the most inexperienced user.    7. Colors - Colors have been formulated for maximum purity and  brilliance.    8. Finish - Once cured, Kato Polyclay™ exhibits a satin  sheen.    9. Density - As part of the manufacturing process, Kato  Polyclay™ is vacuum extruded (we are the only company  utilizing this state of the art process). In essence, air from the  clay is removed, making the clay denser and eliminating the need  for continuous folding and rolling to remove air pockets from the  clay.    10. Warm repositioning - Kato Polyclay™ is not as fragile  as other brands when warm. Kato Polyclay™ allows for a  measure of repositioning of elements when warm - the clay maintains  its new position without breaking.        See Related Products links (below) for similar items and additional jewelry-making supplies that are often used with this item.

    Kato Polyclay, 12.5oz - Translucent (Each)

    $10.84
    Polymer Clay Basics Polymer clays are man made modeling materials that, once heat cured, become permanent and will not return to their original state. All are composed of the same basic components: plasticizers, resins, fillers and colorants. ...
    Qty in Cart: 0
    Quantity:
    Price:
    $10.84
    Subtotal:
  • Polymer Clay Basics      Polymer clays are man made modeling materials that, once heat  cured, become permanent and will not return to their original  state. All are composed of the same basic components: plasticizers,  resins, fillers and colorants.     Before using polymer clay it must be conditioned... kneading by  hand until the clay is soft and pliable or fold and roll through a  pasta machine. Inadequate conditioning will result in weakened  finished items and weakened piece to piece adhesion. Condition light colors first, then move to darker colors.    Polymer clay pieces can be cured in a standard oven (convection)  or toaster oven. Do not microwave polymer clay. If you don't have a  dedicated oven, place items in an aluminum pan, then cover tightly  with foil to prevent residue build up in your oven. Cure pieces in  a well-ventilated area. Check oven accuracy with a thermometer and  use a timer to avoid exceeding curing time.    The recommended curing temperature is 300° F (150° C).  Kato Polyclay™ can be cured at 275° F (135° C) with  good results and has been approved to cure at 350° F by our  toxicologist, however caution should be taken when curing at that  temperature, time should be limited to 10 minutes as you will run  the risk of discoloration. You should never exceed 365° F.    Materials that will withstand clay curing temperatures, such as  glass, paper mache, wood, metal and ceramic items may be covered  with clay and baked in the oven. Items may be nested in polyester  batting to avoid flat, shiny spots. Finished pieces may be painted  or glazed after curing. Water-based paints and glazes are  recommended. Cured clay may also be wet sanded (automotive  sandpaper - 400 and 600 grit, in water) and then buffed to a  high-gloss sheen.    Working Properties of Kato PolyClay™      1. Conditioning - Kato Polyclay™ is easy to condition, with  no crumbling. I slice the blocks into 1/8" thick pieces. Roll  through the pasta machine at the thickest setting. Finish by  folding and rolling.     2. Handling - with continuous kneading and working, Kato  Polyclay™ does not become sticky and, therefore, maintains  its ease of workability.    3. Strength - Kato Polyclay™ was deemed as strong or  stronger than other clays the testers used, - most feeling it was  stronger. Not one single respondent found it to be less strong.  Additionally, every color shares the same strength.    4. Color stability - From uncured to cured state, no Kato  Polyclay™ color shifts more than 1/2 shade, with the majority  remaining unchanged from uncured to cured state. It is virtually  "true- color".    5. Consistency - Colors share the same consistency and softness.  For example, you won't find white very hard and green very soft.  Even consistency promotes even cane reduction, which results in  less distorted imagery and less waste at cane ends.    6. Color Mixing - Rather than taking an academic approach (this  requires that the user have a rather extensive knowledge of color  mixing) we have opted for a more user friendly and intuitive  method. The Spectral Colors form the basis for the creation of all  colors. If they were placed on the color wheel, you would find them  very evenly spaced. This approach makes color mixing simple for  even the most inexperienced user.    7. Colors - Colors have been formulated for maximum purity and  brilliance.    8. Finish - Once cured, Kato Polyclay™ exhibits a satin  sheen.    9. Density - As part of the manufacturing process, Kato  Polyclay™ is vacuum extruded (we are the only company  utilizing this state of the art process). In essence, air from the  clay is removed, making the clay denser and eliminating the need  for continuous folding and rolling to remove air pockets from the  clay.    10. Warm repositioning - Kato Polyclay™ is not as fragile  as other brands when warm. Kato Polyclay™ allows for a  measure of repositioning of elements when warm - the clay maintains  its new position without breaking.        See Related Products links (below) for similar items and additional jewelry-making supplies that are often used with this item.

    Kato Polyclay, 12.5oz - Yellow (Each)

    $10.84
    Polymer Clay Basics Polymer clays are man made modeling materials that, once heat cured, become permanent and will not return to their original state. All are composed of the same basic components: plasticizers, resins, fillers and colorants. ...
    Qty in Cart: 0
    Quantity:
    Price:
    $10.84
    Subtotal:
  • Which Glue is Best? For the most durable bond, we almost always recommend epoxies rather than other types of glue, but it depends on a few factors... Check out the options, plus tips for successful glue bonds, on our Adhesives and Jewelry Glues page. See Related Products links (below) for similar items and additional jewelry-making supplies that are often used with this item. Which Glue is Best? For the most durable bond, we almost always recommend epoxies rather than other types of glue, but it depends on a few factors... Check out the options, plus tips for successful glue bonds, on our Adhesives and Jewelry Glues page. See Related Products links (below) for similar items and additional jewelry-making supplies that are often used with this item.

    Magnet, Round, 12mm (35 Pieces)

    $7.08
    Which Glue is Best? For the most durable bond, we almost always recommend epoxies rather than other types of glue, but it depends on a few factors... Check out the options, plus tips for successful glue bonds, on our Adhesives and Jewelry Glues page. See...
    Qty in Cart: 0
    Price:
    $7.08
    Subtotal:
  • See Related Products links (below) for similar items and additional jewelry-making supplies that are often used with this item. Questions? E-mail us for friendly, expert help!

    Blazer Micro Torch, Butane (Each)

    $55.25
    See Related Products links (below) for similar items and additional jewelry-making supplies that are often used with this item. Questions? E-mail us for friendly, expert help!
    Qty in Cart: 0
    Quantity:
    Price:
    $55.25
    Subtotal:
  • See Related Products links (below) for similar items and additional jewelry-making supplies that are often used with this item. Questions? E-mail us for friendly, expert help!

    Coconut Carbon, 2lbs. (Each)

    $5.10
    See Related Products links (below) for similar items and additional jewelry-making supplies that are often used with this item. Questions? E-mail us for friendly, expert help!
    Qty in Cart: 0
    Quantity:
    Price:
    $5.10
    Subtotal:
  • Use with card stock, business cards, scrapbook supplies, and even greeting cards!See Related Products links (below) for similar items and additional jewelry-making supplies that are often used with this item. Questions? E-mail us for friendly, expert help!

    Easy Earring Card Foldover Hang Tag/ Display Punch (Each)

    $14.40
    Use with card stock, business cards, scrapbook supplies, and even greeting cards!See Related Products links (below) for similar items and additional jewelry-making supplies that are often used with this item. Questions? E-mail us for friendly, expert...
    Qty in Cart: 0
    Quantity:
    Price:
    $14.40
    Subtotal:
  • See Related Products links (below) for similar items and additional jewelry-making supplies that are often used with this item.        Visit our blog or watch the video below,for tips on using The Beadsmith® 1-Step Looper.      See Related Products links (below) for similar items and additional jewelry-making supplies that are often used with this item.        Visit our blog or watch the video below,for tips on using The Beadsmith® 1-Step Looper.

    The BeadSmith Jewelry Pliers, 1-Step BIG Looper, 3mm (Each)

    The Beadsmith

    $28.25
    See Related Products links (below) for similar items and additional jewelry-making supplies that are often used with this item. Visit our blog or watch the video below,for tips on using The Beadsmith® 1-Step Looper.
    Qty in Cart: 0
    Quantity:
    Price:
    $28.25
    Subtotal:
  • See Related Products links (below) for similar items and additional jewelry-making supplies that are often used with this item.        Visit our blog or watch the video below,for tips on using The Beadsmith® 1-Step Looper.      See Related Products links (below) for similar items and additional jewelry-making supplies that are often used with this item.        Visit our blog or watch the video below,for tips on using The Beadsmith® 1-Step Looper.

    The BeadSmith Jewelry Pliers, Original 1-Step Looper, 1.5mm (Each)

    The Beadsmith

    $28.25
    See Related Products links (below) for similar items and additional jewelry-making supplies that are often used with this item. Visit our blog or watch the video below,for tips on using The Beadsmith® 1-Step Looper.
    Qty in Cart: 0
    Quantity:
    Price:
    $28.25
    Subtotal:
  • For stamps that aren't pre-labeled (or the label wears off with use), place a dot with Wite-Out® or colorful fingernail polish to indicate the bottom of each letter (or symbol) to help keep your letters directionally correct when stamping. For the stamps that are pre-marked with the letter or symbol, marking should generally face toward the user when stamping. If you have a set that's different, you may want to put a dot facing you, to keep all your stamps consistent. For more information on metal stamping take a look at our Metal Stamping 101 page or our free downloadable metal stamping PDF.    See Related Products links (below) for similar items and additional jewelry-making supplies that are often used with this item.

    ImpressArt Metal Stamp, Floral Swirl (Each)

    ImpressArt
    $8.17
    For stamps that aren't pre-labeled (or the label wears off with use), place a dot with Wite-Out® or colorful fingernail polish to indicate the bottom of each letter (or symbol) to help keep your letters directionally correct when stamping. For the...
    Qty in Cart: 0
    Quantity:
    Price:
    $8.17
    Subtotal:
  • Polymer Clay Basics      Polymer clays are man made modeling materials that, once heat  cured, become permanent and will not return to their original  state. All are composed of the same basic components: plasticizers,  resins, fillers and colorants.     Before using polymer clay it must be conditioned... kneading by  hand until the clay is soft and pliable or fold and roll through a  pasta machine. Inadequate conditioning will result in weakened  finished items and weakened piece to piece adhesion. Condition light colors first, then move to darker colors.    Polymer clay pieces can be cured in a standard oven (convection)  or toaster oven. Do not microwave polymer clay. If you don't have a  dedicated oven, place items in an aluminum pan, then cover tightly  with foil to prevent residue build up in your oven. Cure pieces in  a well-ventilated area. Check oven accuracy with a thermometer and  use a timer to avoid exceeding curing time.    The recommended curing temperature is 300° F (150° C).  Kato Polyclay™ can be cured at 275° F (135° C) with  good results and has been approved to cure at 350° F by our  toxicologist, however caution should be taken when curing at that  temperature, time should be limited to 10 minutes as you will run  the risk of discoloration. You should never exceed 365° F.    Materials that will withstand clay curing temperatures, such as  glass, paper mache, wood, metal and ceramic items may be covered  with clay and baked in the oven. Items may be nested in polyester  batting to avoid flat, shiny spots. Finished pieces may be painted  or glazed after curing. Water-based paints and glazes are  recommended. Cured clay may also be wet sanded (automotive  sandpaper - 400 and 600 grit, in water) and then buffed to a  high-gloss sheen.    Working Properties of Kato PolyClay™      1. Conditioning - Kato Polyclay™ is easy to condition, with  no crumbling. I slice the blocks into 1/8" thick pieces. Roll  through the pasta machine at the thickest setting. Finish by  folding and rolling.     2. Handling - with continuous kneading and working, Kato  Polyclay™ does not become sticky and, therefore, maintains  its ease of workability.    3. Strength - Kato Polyclay™ was deemed as strong or  stronger than other clays the testers used, - most feeling it was  stronger. Not one single respondent found it to be less strong.  Additionally, every color shares the same strength.    4. Color stability - From uncured to cured state, no Kato  Polyclay™ color shifts more than 1/2 shade, with the majority  remaining unchanged from uncured to cured state. It is virtually  "true- color".    5. Consistency - Colors share the same consistency and softness.  For example, you won't find white very hard and green very soft.  Even consistency promotes even cane reduction, which results in  less distorted imagery and less waste at cane ends.    6. Color Mixing - Rather than taking an academic approach (this  requires that the user have a rather extensive knowledge of color  mixing) we have opted for a more user friendly and intuitive  method. The Spectral Colors form the basis for the creation of all  colors. If they were placed on the color wheel, you would find them  very evenly spaced. This approach makes color mixing simple for  even the most inexperienced user.    7. Colors - Colors have been formulated for maximum purity and  brilliance.    8. Finish - Once cured, Kato Polyclay™ exhibits a satin  sheen.    9. Density - As part of the manufacturing process, Kato  Polyclay™ is vacuum extruded (we are the only company  utilizing this state of the art process). In essence, air from the  clay is removed, making the clay denser and eliminating the need  for continuous folding and rolling to remove air pockets from the  clay.    10. Warm repositioning - Kato Polyclay™ is not as fragile  as other brands when warm. Kato Polyclay™ allows for a  measure of repositioning of elements when warm - the clay maintains  its new position without breaking.        See Related Products links (below) for similar items and additional jewelry-making supplies that are often used with this item.

    Kato Polyclay, 12.5oz - Orange (Each)

    $10.20
    Polymer Clay Basics Polymer clays are man made modeling materials that, once heat cured, become permanent and will not return to their original state. All are composed of the same basic components: plasticizers, resins, fillers and colorants. ...
    Qty in Cart: 0
    Quantity:
    Price:
    $10.20
    Subtotal:
  • Polymer Clay Basics      Polymer clays are man made modeling materials that, once heat  cured, become permanent and will not return to their original  state. All are composed of the same basic components: plasticizers,  resins, fillers and colorants.     Before using polymer clay it must be conditioned... kneading by  hand until the clay is soft and pliable or fold and roll through a  pasta machine. Inadequate conditioning will result in weakened  finished items and weakened piece to piece adhesion. Condition light colors first, then move to darker colors.    Polymer clay pieces can be cured in a standard oven (convection)  or toaster oven. Do not microwave polymer clay. If you don't have a  dedicated oven, place items in an aluminum pan, then cover tightly  with foil to prevent residue build up in your oven. Cure pieces in  a well-ventilated area. Check oven accuracy with a thermometer and  use a timer to avoid exceeding curing time.    The recommended curing temperature is 300° F (150° C).  Kato Polyclay™ can be cured at 275° F (135° C) with  good results and has been approved to cure at 350° F by our  toxicologist, however caution should be taken when curing at that  temperature, time should be limited to 10 minutes as you will run  the risk of discoloration. You should never exceed 365° F.    Materials that will withstand clay curing temperatures, such as  glass, paper mache, wood, metal and ceramic items may be covered  with clay and baked in the oven. Items may be nested in polyester  batting to avoid flat, shiny spots. Finished pieces may be painted  or glazed after curing. Water-based paints and glazes are  recommended. Cured clay may also be wet sanded (automotive  sandpaper - 400 and 600 grit, in water) and then buffed to a  high-gloss sheen.    Working Properties of Kato PolyClay™      1. Conditioning - Kato Polyclay™ is easy to condition, with  no crumbling. I slice the blocks into 1/8" thick pieces. Roll  through the pasta machine at the thickest setting. Finish by  folding and rolling.     2. Handling - with continuous kneading and working, Kato  Polyclay™ does not become sticky and, therefore, maintains  its ease of workability.    3. Strength - Kato Polyclay™ was deemed as strong or  stronger than other clays the testers used, - most feeling it was  stronger. Not one single respondent found it to be less strong.  Additionally, every color shares the same strength.    4. Color stability - From uncured to cured state, no Kato  Polyclay™ color shifts more than 1/2 shade, with the majority  remaining unchanged from uncured to cured state. It is virtually  "true- color".    5. Consistency - Colors share the same consistency and softness.  For example, you won't find white very hard and green very soft.  Even consistency promotes even cane reduction, which results in  less distorted imagery and less waste at cane ends.    6. Color Mixing - Rather than taking an academic approach (this  requires that the user have a rather extensive knowledge of color  mixing) we have opted for a more user friendly and intuitive  method. The Spectral Colors form the basis for the creation of all  colors. If they were placed on the color wheel, you would find them  very evenly spaced. This approach makes color mixing simple for  even the most inexperienced user.    7. Colors - Colors have been formulated for maximum purity and  brilliance.    8. Finish - Once cured, Kato Polyclay™ exhibits a satin  sheen.    9. Density - As part of the manufacturing process, Kato  Polyclay™ is vacuum extruded (we are the only company  utilizing this state of the art process). In essence, air from the  clay is removed, making the clay denser and eliminating the need  for continuous folding and rolling to remove air pockets from the  clay.    10. Warm repositioning - Kato Polyclay™ is not as fragile  as other brands when warm. Kato Polyclay™ allows for a  measure of repositioning of elements when warm - the clay maintains  its new position without breaking.        See Related Products links (below) for similar items and additional jewelry-making supplies that are often used with this item.

    Kato Polyclay, 2oz - Black (Each)

    $1.98
    Polymer Clay Basics Polymer clays are man made modeling materials that, once heat cured, become permanent and will not return to their original state. All are composed of the same basic components: plasticizers, resins, fillers and colorants. ...
    Qty in Cart: 0
    Price:
    $1.98
    Subtotal:
  • See Related Products links (below) for similar items and additional jewelry-making supplies that are often used with this item. Questions? E-mail us for friendly, expert help!

    The BeadSmith Bead Organizer, 52 Compartment (Each)

    The Beadsmith

    $12.35
    See Related Products links (below) for similar items and additional jewelry-making supplies that are often used with this item. Questions? E-mail us for friendly, expert help!
    Qty in Cart: 0
    Quantity:
    Price:
    $12.35
    Subtotal:
  • Enameling Tips:Enamel is durable, but not totally infallible. Handle finished pieces with care.Do all metal shaping, stamping, punching, etc. before adding enamels.Thoroughly clean your metal before enameling. Penny Brite works great!Before sifting enamel onto the piece, spray on a light coat of Klyr-Fire to help enamel stay in place with an even coating.To paint instead of sift, mix with Klyr Fire or approximately 40% water (to get desired consistency) and paint with a small sable paintbrush. You may want to fire a layer of Opaque White Undercoat first.Sift or paint enamel in desired pattern, carefully transfer to your firing station, and fire!If torch firing, watch closely: when the enamel begins to melt, you'll see a glossy "orange peel" stage where the enamel beads up before slumping to a smooth enameled sheen. Fire a bit more, but don't overheat - some colors will scorch.Allow to slowly cool. A warmed pan (or small crockpot) of vermiculite works great.Clean as necessary - Penny Brite or a brief pickle, maybe a little underwater grinding with an alundum stone.Keep all your leftover / spilled enamel powder. If the colors get mixed, save them in a separate bin for use as a counter (back side) enamel. Place a creased paper on your sifting worksurface, so you can easily dump excess enamel back in the container or a mixed jar.Enameling Safety:Eye protection and a fine-particulate mask are recommended when working with enamels.Wash hands thoroughly when done, and avoid rubbing your eyes.If working regularly with enamels, we suggest protective gloves to prevent irritation from small glass particles.When torch-firing:Prepare a fireproof work area, and remove clutter.A fire extinguisher nearby and good ventilation are important.Consider wearing an apron, closed-toe shoes and natural fiber clothing, and avoiding loose hair, flowy clothing and dangling jewelry.Keep food, drinks, pets and small children away from your enamel and/or firing workspace.Metal Compatibility & Color:Copper "paint chip" in image shows how this enamel looks on copper. Opaque colors are on their own. Translucent and opalescent colors have Foundation White on the bottom portion, and then a layer of translucent or opalescent color over the Foundation White and part-way up the bare copper. The color number was stamped on each strip of copper before enameling.The firing temperature range for our enamels is 1,400°-1,500°F (760°-815°C), and they have a coefficient of expansion (COE) from 258 to 360, cubic expansion. Metals that work with these enamels must have a higher melting point, and a similar COE. Otherwise your metal may melt before your enamel, or the enamel may pop off when your jewelry is exposed to temperature changes.Specifically, these enamels work with copper, gold, low-carbon steel and fine silver. This includes fired copper clay and fine-silver clay. (And some alloys of brass work -- we've had good luck with Vintaj brass blanks and our 24g brass blanks, especially with the higher COE colors, but color results have been unpredictable with brass -- they often require a 2nd layer and 2nd firing to get the color you were aiming for.)Specific COE for most colors is listed in the "Additional specs" field on this page. For more information about why COE is important for people who like to experiment with alternate metals, see the Thompson Enamel Workbook.  See Related Products links (below) for similar items and additional jewelry-making supplies that are often used with this item. Enameling Tips:Enamel is durable, but not totally infallible. Handle finished pieces with care.Do all metal shaping, stamping, punching, etc. before adding enamels.Thoroughly clean your metal before enameling. Penny Brite works great!Before sifting enamel onto the piece, spray on a light coat of Klyr-Fire to help enamel stay in place with an even coating.To paint instead of sift, mix with Klyr Fire or approximately 40% water (to get desired consistency) and paint with a small sable paintbrush. You may want to fire a layer of Opaque White Undercoat first.Sift or paint enamel in desired pattern, carefully transfer to your firing station, and fire!If torch firing, watch closely: when the enamel begins to melt, you'll see a glossy "orange peel" stage where the enamel beads up before slumping to a smooth enameled sheen. Fire a bit more, but don't overheat - some colors will scorch.Allow to slowly cool. A warmed pan (or small crockpot) of vermiculite works great.Clean as necessary - Penny Brite or a brief pickle, maybe a little underwater grinding with an alundum stone.Keep all your leftover / spilled enamel powder. If the colors get mixed, save them in a separate bin for use as a counter (back side) enamel. Place a creased paper on your sifting worksurface, so you can easily dump excess enamel back in the container or a mixed jar.Enameling Safety:Eye protection and a fine-particulate mask are recommended when working with enamels.Wash hands thoroughly when done, and avoid rubbing your eyes.If working regularly with enamels, we suggest protective gloves to prevent irritation from small glass particles.When torch-firing:Prepare a fireproof work area, and remove clutter.A fire extinguisher nearby and good ventilation are important.Consider wearing an apron, closed-toe shoes and natural fiber clothing, and avoiding loose hair, flowy clothing and dangling jewelry.Keep food, drinks, pets and small children away from your enamel and/or firing workspace.Metal Compatibility & Color:Copper "paint chip" in image shows how this enamel looks on copper. Opaque colors are on their own. Translucent and opalescent colors have Foundation White on the bottom portion, and then a layer of translucent or opalescent color over the Foundation White and part-way up the bare copper. The color number was stamped on each strip of copper before enameling.The firing temperature range for our enamels is 1,400°-1,500°F (760°-815°C), and they have a coefficient of expansion (COE) from 258 to 360, cubic expansion. Metals that work with these enamels must have a higher melting point, and a similar COE. Otherwise your metal may melt before your enamel, or the enamel may pop off when your jewelry is exposed to temperature changes.Specifically, these enamels work with copper, gold, low-carbon steel and fine silver. This includes fired copper clay and fine-silver clay. (And some alloys of brass work -- we've had good luck with Vintaj brass blanks and our 24g brass blanks, especially with the higher COE colors, but color results have been unpredictable with brass -- they often require a 2nd layer and 2nd firing to get the color you were aiming for.)Specific COE for most colors is listed in the "Additional specs" field on this page. For more information about why COE is important for people who like to experiment with alternate metals, see the Thompson Enamel Workbook.  See Related Products links (below) for similar items and additional jewelry-making supplies that are often used with this item.

    Thompson Translucent 80-mesh Enamel for Metals - Peppermint Green, Sample (Each)

    Thompson
    $1.60
    Enameling Tips:Enamel is durable, but not totally infallible. Handle finished pieces with care.Do all metal shaping, stamping, punching, etc. before adding enamels.Thoroughly clean your metal before enameling. Penny Brite works great!Before sifting...
    Qty in Cart: 0
    Quantity:
    Price:
    $1.60
    Subtotal:
  • Which Glue is Best? Check out all the options, plus tips for successful glue bonds, on our main Adhesives and Jewelry Glues page. See Related Products links (below) for similar items and additional jewelry-making supplies that are often used with this item.

    Adhesive, Epoxy, 220 - HZ* (Each)

    $3.40
    Which Glue is Best? Check out all the options, plus tips for successful glue bonds, on our main Adhesives and Jewelry Glues page. See Related Products links (below) for similar items and additional jewelry-making supplies that are often used with this...
    Qty in Cart: 0
    Quantity:
    Price:
    $3.40
    Subtotal:
  • This replaces the out-of-production #63-110-01-522 cobalt blue Boston bottle with dropper.   See Related Products links (below) for similar items and additional jewelry-making supplies that are often used with this item.

    Boston Bottle with Dropper - 1 oz., Clear (Each)

    $1.16
    This replaces the out-of-production #63-110-01-522 cobalt blue Boston bottle with dropper. See Related Products links (below) for similar items and additional jewelry-making supplies that are often used with this item.
    Qty in Cart: 0
    Quantity:
    Price:
    $1.16
    Subtotal:
  • After removing firescale or other rough spots with this medium-grit abrasive buff, you may want to follow it with a muslin buffing wheel for a higher polish. Entanglement Warning: Keep hair, loose clothing, dangling jewelry, and beards away from the rotating parts of motorized polishing tools! If you find yourself doing a lot of grinding, buffing, polishing, soldering, pickling, etc., consider adding a ventilation system to pull dust, fumes and small particles away from you. Many pre-made systems exist for workshops, or you can create your own from flexible ductwork intakes directly over your work areas, and exhaust fan(s) that fit your workspace and needs. See Related Products links (below) for similar items and additional jewelry-making supplies that are often used with this item. After removing firescale or other rough spots with this medium-grit abrasive buff, you may want to follow it with a muslin buffing wheel for a higher polish. Entanglement Warning: Keep hair, loose clothing, dangling jewelry, and beards away from the rotating parts of motorized polishing tools! If you find yourself doing a lot of grinding, buffing, polishing, soldering, pickling, etc., consider adding a ventilation system to pull dust, fumes and small particles away from you. Many pre-made systems exist for workshops, or you can create your own from flexible ductwork intakes directly over your work areas, and exhaust fan(s) that fit your workspace and needs. See Related Products links (below) for similar items and additional jewelry-making supplies that are often used with this item.

    Buffing Wheel, Medium Abrasive, 2-7/8 x 3/4" (pair)

    EURO TOOL

    $8.46
    After removing firescale or other rough spots with this medium-grit abrasive buff, you may want to follow it with a muslin buffing wheel for a higher polish. Entanglement Warning: Keep hair, loose clothing, dangling jewelry, and beards away from the...
    Qty in Cart: 0
    Quantity:
    Price:
    $8.46
    Subtotal:
  • See Related Products links (below) for similar items and additional jewelry-making supplies that are often used with this item. Questions? E-mail us for friendly, expert help! See Related Products links (below) for similar items and additional jewelry-making supplies that are often used with this item. Questions? E-mail us for friendly, expert help!

    EURO TOOL Multi-Size Looping Pliers (Each)

    EURO TOOL
    $16.95
    See Related Products links (below) for similar items and additional jewelry-making supplies that are often used with this item. Questions? E-mail us for friendly, expert help!
    Qty in Cart: 0
    Quantity:
    Price:
    $16.95
    Subtotal:
  • See Related Products links (below) for similar items and additional jewelry-making supplies that are often used with this item. Questions? E-mail us for friendly, expert help! See Related Products links (below) for similar items and additional jewelry-making supplies that are often used with this item. Questions? E-mail us for friendly, expert help!

    EURO TOOL Wire Gauge (Each)

    EURO TOOL
    $12.15
    See Related Products links (below) for similar items and additional jewelry-making supplies that are often used with this item. Questions? E-mail us for friendly, expert help!
    Qty in Cart: 0
    Quantity:
    Price:
    $12.15
    Subtotal:
  • Polymer Clay Basics      Polymer clays are man made modeling materials that, once heat  cured, become permanent and will not return to their original  state. All are composed of the same basic components: plasticizers,  resins, fillers and colorants.     Before using polymer clay it must be conditioned... kneading by  hand until the clay is soft and pliable or fold and roll through a  pasta machine. Inadequate conditioning will result in weakened  finished items and weakened piece to piece adhesion. Condition light colors first, then move to darker colors.    Polymer clay pieces can be cured in a standard oven (convection)  or toaster oven. Do not microwave polymer clay. If you don't have a  dedicated oven, place items in an aluminum pan, then cover tightly  with foil to prevent residue build up in your oven. Cure pieces in  a well-ventilated area. Check oven accuracy with a thermometer and  use a timer to avoid exceeding curing time.    The recommended curing temperature is 300° F (150° C).  Kato Polyclay™ can be cured at 275° F (135° C) with  good results and has been approved to cure at 350° F by our  toxicologist, however caution should be taken when curing at that  temperature, time should be limited to 10 minutes as you will run  the risk of discoloration. You should never exceed 365° F.    Materials that will withstand clay curing temperatures, such as  glass, paper mache, wood, metal and ceramic items may be covered  with clay and baked in the oven. Items may be nested in polyester  batting to avoid flat, shiny spots. Finished pieces may be painted  or glazed after curing. Water-based paints and glazes are  recommended. Cured clay may also be wet sanded (automotive  sandpaper - 400 and 600 grit, in water) and then buffed to a  high-gloss sheen.    Working Properties of Kato PolyClay™      1. Conditioning - Kato Polyclay™ is easy to condition, with  no crumbling. I slice the blocks into 1/8" thick pieces. Roll  through the pasta machine at the thickest setting. Finish by  folding and rolling.     2. Handling - with continuous kneading and working, Kato  Polyclay™ does not become sticky and, therefore, maintains  its ease of workability.    3. Strength - Kato Polyclay™ was deemed as strong or  stronger than other clays the testers used, - most feeling it was  stronger. Not one single respondent found it to be less strong.  Additionally, every color shares the same strength.    4. Color stability - From uncured to cured state, no Kato  Polyclay™ color shifts more than 1/2 shade, with the majority  remaining unchanged from uncured to cured state. It is virtually  "true- color".    5. Consistency - Colors share the same consistency and softness.  For example, you won't find white very hard and green very soft.  Even consistency promotes even cane reduction, which results in  less distorted imagery and less waste at cane ends.    6. Color Mixing - Rather than taking an academic approach (this  requires that the user have a rather extensive knowledge of color  mixing) we have opted for a more user friendly and intuitive  method. The Spectral Colors form the basis for the creation of all  colors. If they were placed on the color wheel, you would find them  very evenly spaced. This approach makes color mixing simple for  even the most inexperienced user.    7. Colors - Colors have been formulated for maximum purity and  brilliance.    8. Finish - Once cured, Kato Polyclay™ exhibits a satin  sheen.    9. Density - As part of the manufacturing process, Kato  Polyclay™ is vacuum extruded (we are the only company  utilizing this state of the art process). In essence, air from the  clay is removed, making the clay denser and eliminating the need  for continuous folding and rolling to remove air pockets from the  clay.    10. Warm repositioning - Kato Polyclay™ is not as fragile  as other brands when warm. Kato Polyclay™ allows for a  measure of repositioning of elements when warm - the clay maintains  its new position without breaking.        See Related Products links (below) for similar items and additional jewelry-making supplies that are often used with this item.

    Kato Polyclay, 12.5oz - Red (Each)

    $10.84
    Polymer Clay Basics Polymer clays are man made modeling materials that, once heat cured, become permanent and will not return to their original state. All are composed of the same basic components: plasticizers, resins, fillers and colorants. ...
    Qty in Cart: 0
    Price:
    $10.84
    Subtotal:
  • Polymer Clay Basics      Polymer clays are man made modeling materials that, once heat  cured, become permanent and will not return to their original  state. All are composed of the same basic components: plasticizers,  resins, fillers and colorants.     Before using polymer clay it must be conditioned... kneading by  hand until the clay is soft and pliable or fold and roll through a  pasta machine. Inadequate conditioning will result in weakened  finished items and weakened piece to piece adhesion. Condition light colors first, then move to darker colors.    Polymer clay pieces can be cured in a standard oven (convection)  or toaster oven. Do not microwave polymer clay. If you don't have a  dedicated oven, place items in an aluminum pan, then cover tightly  with foil to prevent residue build up in your oven. Cure pieces in  a well-ventilated area. Check oven accuracy with a thermometer and  use a timer to avoid exceeding curing time.    The recommended curing temperature is 300° F (150° C).  Kato Polyclay™ can be cured at 275° F (135° C) with  good results and has been approved to cure at 350° F by our  toxicologist, however caution should be taken when curing at that  temperature, time should be limited to 10 minutes as you will run  the risk of discoloration. You should never exceed 365° F.    Materials that will withstand clay curing temperatures, such as  glass, paper mache, wood, metal and ceramic items may be covered  with clay and baked in the oven. Items may be nested in polyester  batting to avoid flat, shiny spots. Finished pieces may be painted  or glazed after curing. Water-based paints and glazes are  recommended. Cured clay may also be wet sanded (automotive  sandpaper - 400 and 600 grit, in water) and then buffed to a  high-gloss sheen.    Working Properties of Kato PolyClay™      1. Conditioning - Kato Polyclay™ is easy to condition, with  no crumbling. I slice the blocks into 1/8" thick pieces. Roll  through the pasta machine at the thickest setting. Finish by  folding and rolling.     2. Handling - with continuous kneading and working, Kato  Polyclay™ does not become sticky and, therefore, maintains  its ease of workability.    3. Strength - Kato Polyclay™ was deemed as strong or  stronger than other clays the testers used, - most feeling it was  stronger. Not one single respondent found it to be less strong.  Additionally, every color shares the same strength.    4. Color stability - From uncured to cured state, no Kato  Polyclay™ color shifts more than 1/2 shade, with the majority  remaining unchanged from uncured to cured state. It is virtually  "true- color".    5. Consistency - Colors share the same consistency and softness.  For example, you won't find white very hard and green very soft.  Even consistency promotes even cane reduction, which results in  less distorted imagery and less waste at cane ends.    6. Color Mixing - Rather than taking an academic approach (this  requires that the user have a rather extensive knowledge of color  mixing) we have opted for a more user friendly and intuitive  method. The Spectral Colors form the basis for the creation of all  colors. If they were placed on the color wheel, you would find them  very evenly spaced. This approach makes color mixing simple for  even the most inexperienced user.    7. Colors - Colors have been formulated for maximum purity and  brilliance.    8. Finish - Once cured, Kato Polyclay™ exhibits a satin  sheen.    9. Density - As part of the manufacturing process, Kato  Polyclay™ is vacuum extruded (we are the only company  utilizing this state of the art process). In essence, air from the  clay is removed, making the clay denser and eliminating the need  for continuous folding and rolling to remove air pockets from the  clay.    10. Warm repositioning - Kato Polyclay™ is not as fragile  as other brands when warm. Kato Polyclay™ allows for a  measure of repositioning of elements when warm - the clay maintains  its new position without breaking.        See Related Products links (below) for similar items and additional jewelry-making supplies that are often used with this item.

    Kato Polyclay, 2oz, Metallic - Copper (Each)

    $1.98
    Polymer Clay Basics Polymer clays are man made modeling materials that, once heat cured, become permanent and will not return to their original state. All are composed of the same basic components: plasticizers, resins, fillers and colorants. ...
    Qty in Cart: 0
    Quantity:
    Price:
    $1.98
    Subtotal:
  • Enameling Tips:Enamel is durable, but not totally infallible. Handle finished pieces with care.Do all metal shaping, stamping, punching, etc. before adding enamels.Thoroughly clean your metal before enameling. Penny Brite works great!Before sifting enamel onto the piece, spray on a light coat of Klyr-Fire to help enamel stay in place with an even coating.To paint instead of sift, mix with Klyr Fire or approximately 40% water (to get desired consistency) and paint with a small sable paintbrush. You may want to fire a layer of Opaque White Undercoat first.Sift or paint enamel in desired pattern, carefully transfer to your firing station, and fire!If torch firing, watch closely: when the enamel begins to melt, you'll see a glossy "orange peel" stage where the enamel beads up before slumping to a smooth enameled sheen. Fire a bit more, but don't overheat - some colors will scorch.Allow to slowly cool. A warmed pan (or small crockpot) of vermiculite works great.Clean as necessary - Penny Brite or a brief pickle, maybe a little underwater grinding with an alundum stone.Keep all your leftover / spilled enamel powder. If the colors get mixed, save them in a separate bin for use as a counter (back side) enamel. Place a creased paper on your sifting worksurface, so you can easily dump excess enamel back in the container or a mixed jar.Enameling Safety:Eye protection and a fine-particulate mask are recommended when working with enamels.Wash hands thoroughly when done, and avoid rubbing your eyes.If working regularly with enamels, we suggest protective gloves to prevent irritation from small glass particles.When torch-firing:Prepare a fireproof work area, and remove clutter.A fire extinguisher nearby and good ventilation are important.Consider wearing an apron, closed-toe shoes and natural fiber clothing, and avoiding loose hair, flowy clothing and dangling jewelry.Keep food, drinks, pets and small children away from your enamel and/or firing workspace.Metal Compatibility & Color:Copper "paint chip" in image shows how this enamel looks on copper. Opaque colors are on their own. Translucent and opalescent colors have Foundation White on the bottom portion, and then a layer of translucent or opalescent color over the Foundation White and part-way up the bare copper. The color number was stamped on each strip of copper before enameling.The firing temperature range for our enamels is 1,400°-1,500°F (760°-815°C), and they have a coefficient of expansion (COE) from 258 to 360, cubic expansion. Metals that work with these enamels must have a higher melting point, and a similar COE. Otherwise your metal may melt before your enamel, or the enamel may pop off when your jewelry is exposed to temperature changes.Specifically, these enamels work with copper, gold, low-carbon steel and fine silver. This includes fired copper clay and fine-silver clay. (And some alloys of brass work -- we've had good luck with Vintaj brass blanks and our 24g brass blanks, especially with the higher COE colors, but color results have been unpredictable with brass -- they often require a 2nd layer and 2nd firing to get the color you were aiming for.)Specific COE for most colors is listed in the "Additional specs" field on this page. For more information about why COE is important for people who like to experiment with alternate metals, see the Thompson Enamel Workbook.  See Related Products links (below) for similar items and additional jewelry-making supplies that are often used with this item. Enameling Tips:Enamel is durable, but not totally infallible. Handle finished pieces with care.Do all metal shaping, stamping, punching, etc. before adding enamels.Thoroughly clean your metal before enameling. Penny Brite works great!Before sifting enamel onto the piece, spray on a light coat of Klyr-Fire to help enamel stay in place with an even coating.To paint instead of sift, mix with Klyr Fire or approximately 40% water (to get desired consistency) and paint with a small sable paintbrush. You may want to fire a layer of Opaque White Undercoat first.Sift or paint enamel in desired pattern, carefully transfer to your firing station, and fire!If torch firing, watch closely: when the enamel begins to melt, you'll see a glossy "orange peel" stage where the enamel beads up before slumping to a smooth enameled sheen. Fire a bit more, but don't overheat - some colors will scorch.Allow to slowly cool. A warmed pan (or small crockpot) of vermiculite works great.Clean as necessary - Penny Brite or a brief pickle, maybe a little underwater grinding with an alundum stone.Keep all your leftover / spilled enamel powder. If the colors get mixed, save them in a separate bin for use as a counter (back side) enamel. Place a creased paper on your sifting worksurface, so you can easily dump excess enamel back in the container or a mixed jar.Enameling Safety:Eye protection and a fine-particulate mask are recommended when working with enamels.Wash hands thoroughly when done, and avoid rubbing your eyes.If working regularly with enamels, we suggest protective gloves to prevent irritation from small glass particles.When torch-firing:Prepare a fireproof work area, and remove clutter.A fire extinguisher nearby and good ventilation are important.Consider wearing an apron, closed-toe shoes and natural fiber clothing, and avoiding loose hair, flowy clothing and dangling jewelry.Keep food, drinks, pets and small children away from your enamel and/or firing workspace.Metal Compatibility & Color:Copper "paint chip" in image shows how this enamel looks on copper. Opaque colors are on their own. Translucent and opalescent colors have Foundation White on the bottom portion, and then a layer of translucent or opalescent color over the Foundation White and part-way up the bare copper. The color number was stamped on each strip of copper before enameling.The firing temperature range for our enamels is 1,400°-1,500°F (760°-815°C), and they have a coefficient of expansion (COE) from 258 to 360, cubic expansion. Metals that work with these enamels must have a higher melting point, and a similar COE. Otherwise your metal may melt before your enamel, or the enamel may pop off when your jewelry is exposed to temperature changes.Specifically, these enamels work with copper, gold, low-carbon steel and fine silver. This includes fired copper clay and fine-silver clay. (And some alloys of brass work -- we've had good luck with Vintaj brass blanks and our 24g brass blanks, especially with the higher COE colors, but color results have been unpredictable with brass -- they often require a 2nd layer and 2nd firing to get the color you were aiming for.)Specific COE for most colors is listed in the "Additional specs" field on this page. For more information about why COE is important for people who like to experiment with alternate metals, see the Thompson Enamel Workbook.  See Related Products links (below) for similar items and additional jewelry-making supplies that are often used with this item.

    Thompson Translucent 80-mesh Enamel for Metals - Aqua Blue, Sample (Each)

    Thompson
    $1.60
    Enameling Tips:Enamel is durable, but not totally infallible. Handle finished pieces with care.Do all metal shaping, stamping, punching, etc. before adding enamels.Thoroughly clean your metal before enameling. Penny Brite works great!Before sifting...
    Qty in Cart: 0
    Quantity:
    Price:
    $1.60
    Subtotal:
  • Which Glue is Best? Check out all the options, plus tips for successful glue bonds, on our main Adhesives and Jewelry Glues page. See Related Products links (below) for similar items and additional jewelry-making supplies that are often used with this item.

    Tip, E-6000 (Each)

    E-6000
    $0.25
    Which Glue is Best? Check out all the options, plus tips for successful glue bonds, on our main Adhesives and Jewelry Glues page. See Related Products links (below) for similar items and additional jewelry-making supplies that are often used with this...
    Qty in Cart: 0
    Quantity:
    Price:
    $0.25
    Subtotal:
  • Great for firing enamels and Art Clay™ Silver, but not large enough to hold the  firing pan required for COPPRclay and BRONZclay.To adjust the temperature, you can move the lid off-center or  purchase an in-line controller (purchased separately - normally  used by people turning the temperature down to 800 F for Keum-boo). A digital pyrometer can be used for exact temperature measurement, but is not normally necessary.The manufacturer provides excellent instructions in PDF format for using this kiln, including specifics for fusing glass, and firing PMC+, PMC3, PMC Onfire Sterling, Art Clay 650, FYI Fine Silver, FS999 Fine Silver, EZ960, Keum-Boo, and Cork Clay. (Plus they add new instructions periodically.)And the manufacturer provides videos on using the Ultralite kiln, now too! Here are a few favorites:                  See Related Products links (below) for similar items and additional jewelry-making supplies that are often used with this item.

    Ultralite Beehive Jewelry Kiln - Studio Pro (Each)

    $238.00
    Great for firing enamels and Art Clay™ Silver, but not large enough to hold the firing pan required for COPPRclay and BRONZclay.To adjust the temperature, you can move the lid off-center or purchase an in-line controller (purchased separately -...
    Qty in Cart: 0
    Price:
    $238.00
    Subtotal:
  • Which Glue is Best? Check out all the options, plus tips for successful glue bonds, on our main Adhesives and Jewelry Glues page. See Related Products links (below) for similar items and additional jewelry-making supplies that are often used with this item.

    Adhesive, Crafter's Pick, The Ultimate (Each)

    $3.00
    Which Glue is Best? Check out all the options, plus tips for successful glue bonds, on our main Adhesives and Jewelry Glues page. See Related Products links (below) for similar items and additional jewelry-making supplies that are often used with this...
    Qty in Cart: 0
    Price:
    $3.00
    Subtotal:
  • Polymer Clay Basics      Polymer clays are man made modeling materials that, once heat  cured, become permanent and will not return to their original  state. All are composed of the same basic components: plasticizers,  resins, fillers and colorants.     Before using polymer clay it must be conditioned... kneading by  hand until the clay is soft and pliable or fold and roll through a  pasta machine. Inadequate conditioning will result in weakened  finished items and weakened piece to piece adhesion. Condition light colors first, then move to darker colors.    Polymer clay pieces can be cured in a standard oven (convection)  or toaster oven. Do not microwave polymer clay. If you don't have a  dedicated oven, place items in an aluminum pan, then cover tightly  with foil to prevent residue build up in your oven. Cure pieces in  a well-ventilated area. Check oven accuracy with a thermometer and  use a timer to avoid exceeding curing time.    The recommended curing temperature is 300° F (150° C).  Kato Polyclay™ can be cured at 275° F (135° C) with  good results and has been approved to cure at 350° F by our  toxicologist, however caution should be taken when curing at that  temperature, time should be limited to 10 minutes as you will run  the risk of discoloration. You should never exceed 365° F.    Materials that will withstand clay curing temperatures, such as  glass, paper mache, wood, metal and ceramic items may be covered  with clay and baked in the oven. Items may be nested in polyester  batting to avoid flat, shiny spots. Finished pieces may be painted  or glazed after curing. Water-based paints and glazes are  recommended. Cured clay may also be wet sanded (automotive  sandpaper - 400 and 600 grit, in water) and then buffed to a  high-gloss sheen.    Working Properties of Kato PolyClay™      1. Conditioning - Kato Polyclay™ is easy to condition, with  no crumbling. I slice the blocks into 1/8" thick pieces. Roll  through the pasta machine at the thickest setting. Finish by  folding and rolling.     2. Handling - with continuous kneading and working, Kato  Polyclay™ does not become sticky and, therefore, maintains  its ease of workability.    3. Strength - Kato Polyclay™ was deemed as strong or  stronger than other clays the testers used, - most feeling it was  stronger. Not one single respondent found it to be less strong.  Additionally, every color shares the same strength.    4. Color stability - From uncured to cured state, no Kato  Polyclay™ color shifts more than 1/2 shade, with the majority  remaining unchanged from uncured to cured state. It is virtually  "true- color".    5. Consistency - Colors share the same consistency and softness.  For example, you won't find white very hard and green very soft.  Even consistency promotes even cane reduction, which results in  less distorted imagery and less waste at cane ends.    6. Color Mixing - Rather than taking an academic approach (this  requires that the user have a rather extensive knowledge of color  mixing) we have opted for a more user friendly and intuitive  method. The Spectral Colors form the basis for the creation of all  colors. If they were placed on the color wheel, you would find them  very evenly spaced. This approach makes color mixing simple for  even the most inexperienced user.    7. Colors - Colors have been formulated for maximum purity and  brilliance.    8. Finish - Once cured, Kato Polyclay™ exhibits a satin  sheen.    9. Density - As part of the manufacturing process, Kato  Polyclay™ is vacuum extruded (we are the only company  utilizing this state of the art process). In essence, air from the  clay is removed, making the clay denser and eliminating the need  for continuous folding and rolling to remove air pockets from the  clay.    10. Warm repositioning - Kato Polyclay™ is not as fragile  as other brands when warm. Kato Polyclay™ allows for a  measure of repositioning of elements when warm - the clay maintains  its new position without breaking.        See Related Products links (below) for similar items and additional jewelry-making supplies that are often used with this item.

    Kato Polyclay, 2oz - Brown (Each)

    $1.98
    Polymer Clay Basics Polymer clays are man made modeling materials that, once heat cured, become permanent and will not return to their original state. All are composed of the same basic components: plasticizers, resins, fillers and colorants. ...
    Qty in Cart: 0
    Quantity:
    Price:
    $1.98
    Subtotal:
  • See Related Products links (below) for similar items and additional jewelry-making supplies that are often used with this item. Questions? E-mail us for friendly, expert help!

    Mini Bead Stopper, Pack of 8 (pack)

    $4.32
    See Related Products links (below) for similar items and additional jewelry-making supplies that are often used with this item. Questions? E-mail us for friendly, expert help!
    Qty in Cart: 0
    Price:
    $4.32
    Subtotal:
  • Manufacturer's Suggested Uses: Nikolas #2105 Clear Silver Lacquer is used on lamp and lighting parts, brass furniture, giftware, picture frames and hardware. #2105 Clear Silver Lacquer is used by original manufacturers and refinishers.Benefits:Applies easilyAir dries, requires no special baking equipmentApplies to a clear even glossPerspiration resistanceCan be flattened to any sheenCan be tinted to simulate gold or bronze finishes on brassAvailable in aerosol cansPick UPS Ground in checkout, to see correct shipping cost, and to avoid order delays.See Related Products links (below) for similar items and additional jewelry-making supplies that are often used with this item.

    Nikolas Clear Spray Lacquer - 13 oz. - HZ* (Each)

    $26.31
    Manufacturer's Suggested Uses: Nikolas #2105 Clear Silver Lacquer is used on lamp and lighting parts, brass furniture, giftware, picture frames and hardware. #2105 Clear Silver Lacquer is used by original manufacturers and refinishers.Benefits:Applies...
    Qty in Cart: 0
    Quantity:
    Price:
    $26.31
    Subtotal:
  • See Related Products links (below) for similar items and additional jewelry-making supplies that are often used with this item. Questions? E-mail us for friendly, expert help!

    Rubber Bench Block, 4x4x1" (Each)

    $5.32
    See Related Products links (below) for similar items and additional jewelry-making supplies that are often used with this item. Questions? E-mail us for friendly, expert help!
    Qty in Cart: 0
    Quantity:
    Price:
    $5.32
    Subtotal:
  • Looking to take your jewelry-making skills to the next level? You won't want to miss out on the BeadSmith Metal Elements EZ-Bender Cuff Bracelet Tool! Designed with ease of use and top-notch results in mind, this sturdy steel tool is the perfect choice for creating stunning, one-of-a-kind metal bracelets. With its simple slot and lever system, you'll be able to transform your metal bracelet blanks into beautiful oval cuffs in no time. So why wait? Elevate your handmade or DIY jewelry collection today with the BeadSmith EZ-Bender. Looking to take your jewelry-making skills to the next level? You won't want to miss out on the BeadSmith Metal Elements EZ-Bender Cuff Bracelet Tool! Designed with ease of use and top-notch results in mind, this sturdy steel tool is the perfect choice for creating stunning, one-of-a-kind metal bracelets. With its simple slot and lever system, you'll be able to transform your metal bracelet blanks into beautiful oval cuffs in no time. So why wait? Elevate your handmade or DIY jewelry collection today with the BeadSmith EZ-Bender.

    The Beadsmith Metal Elements EZ-Bender, Cuff Bracelet Tool, Steel

    The Beadsmith
    $6.49
    Looking to take your jewelry-making skills to the next level? You won't want to miss out on the BeadSmith Metal Elements EZ-Bender Cuff Bracelet Tool! Designed with ease of use and top-notch results in mind, this sturdy steel tool is the perfect choice...
    Qty in Cart: 0
    Quantity:
    Price:
    $6.49
    Subtotal:
  • Make your jewelry crafting effortless and precise with The Beadsmith Simply Modern Series Round / Concave Nose Pliers. Whether you're a beginner or an expert, these pliers are perfect for creating stunning and intricate jewelry pieces that will leave everyone in awe. The two-toned contoured grips provide maximum comfort during extended crafting sessions and the extra-fine tips and box joint construction ensure seamless handling every time. Measuring 4.75 inches long, these pliers are easy to store and accessible at any time. Don't settle for anything less - elevate your crafting experience with The Beadsmith Simply Modern Series Round / Concave Nose Pliers today! Make your jewelry crafting effortless and precise with The Beadsmith Simply Modern Series Round / Concave Nose Pliers. Whether you're a beginner or an expert, these pliers are perfect for creating stunning and intricate jewelry pieces that will leave everyone in awe. The two-toned contoured grips provide maximum comfort during extended crafting sessions and the extra-fine tips and box joint construction ensure seamless handling every time. Measuring 4.75 inches long, these pliers are easy to store and accessible at any time. Don't settle for anything less - elevate your crafting experience with The Beadsmith Simply Modern Series Round / Concave Nose Pliers today!

    The Beadsmith Simply Modern Series, Round / Concave Nose Pliers, 4.75 Inches Long

    The Beadsmith
    $7.37
    Make your jewelry crafting effortless and precise with The Beadsmith Simply Modern Series Round / Concave Nose Pliers. Whether you're a beginner or an expert, these pliers are perfect for creating stunning and intricate jewelry pieces that will leave...
    Qty in Cart: 0
    Quantity:
    Price:
    $7.37
    Subtotal:
  • See Related Products links (below) for similar items and additional jewelry-making supplies that are often used with this item. Questions? E-mail us for friendly, expert help!

    TierraCast Rivet Setter for 4mm Leather Rivets (Each)

    TierraCast
    $4.57
    See Related Products links (below) for similar items and additional jewelry-making supplies that are often used with this item. Questions? E-mail us for friendly, expert help!
    Qty in Cart: 0
    Quantity:
    Price:
    $4.57
    Subtotal:
  • See Related Products links (below) for similar items and additional jewelry-making supplies that are often used with this item.  This video by Beadalon demonstrates how to use the Tin Cup Knotting Tool.  See Related Products links (below) for similar items and additional jewelry-making supplies that are often used with this item.  This video by Beadalon demonstrates how to use the Tin Cup Knotting Tool.

    Beadalon Tin Cup Knotter Tool (Each)

    Beadalon

    $26.55
    See Related Products links (below) for similar items and additional jewelry-making supplies that are often used with this item. This video by Beadalon demonstrates how to use the Tin Cup Knotting Tool.
    Qty in Cart: 0
    Quantity:
    Price:
    $26.55
    Subtotal:
  • See Related Products links (below) for similar items and additional jewelry-making supplies that are often used with this item. Questions? E-mail us for friendly, expert help!

    Choice, Cast Iron Soldering Stand (Each)

    $11.21
    See Related Products links (below) for similar items and additional jewelry-making supplies that are often used with this item. Questions? E-mail us for friendly, expert help!
    Qty in Cart: 0
    Quantity:
    Price:
    $11.21
    Subtotal:
  • See Related Products links (below) for similar items and additional jewelry-making supplies that are often used with this item. Questions? E-mail us for friendly, expert help! See Related Products links (below) for similar items and additional jewelry-making supplies that are often used with this item. Questions? E-mail us for friendly, expert help!

    EURO TOOL EuroPunch Jewelry Pliers, Round, 1.25mm, 18g, Hole (Each)

    EURO TOOL

    $11.65
    See Related Products links (below) for similar items and additional jewelry-making supplies that are often used with this item. Questions? E-mail us for friendly, expert help!
    Qty in Cart: 0
    Quantity:
    Price:
    $11.65
    Subtotal:
  • See Related Products links (below) for similar items and additional jewelry-making supplies that are often used with this item. Questions? E-mail us for friendly, expert help!

    EURO TOOL Finger Pro 3/4" Tape (Each)

    EURO TOOL
    $1.80
    See Related Products links (below) for similar items and additional jewelry-making supplies that are often used with this item. Questions? E-mail us for friendly, expert help!
    Qty in Cart: 0
    Quantity:
    Price:
    $1.80
    Subtotal:
  • This black non-toxic, waterbased acrylic ink is a great stamping enamel. It's water resistant when dry, but may be affected by some chemicals and soaps.See Related Products links (below) for similar items and additional jewelry-making supplies that are often used with this item.Questions? E-mail us for friendly, expert help! This black non-toxic, waterbased acrylic ink is a great stamping enamel. It's water resistant when dry, but may be affected by some chemicals and soaps.See Related Products links (below) for similar items and additional jewelry-making supplies that are often used with this item.Questions? E-mail us for friendly, expert help!

    ImpressArt Stamp Enamel Marker - Black (Each)

    ImpressArt
    $8.97
    This black non-toxic, waterbased acrylic ink is a great stamping enamel. It's water resistant when dry, but may be affected by some chemicals and soaps.See Related Products links (below) for similar items and additional jewelry-making supplies that are...
    Qty in Cart: 0
    Quantity:
    Price:
    $8.97
    Subtotal:
  • See Related Products links (below) for similar items and additional jewelry-making supplies that are often used with this item. Questions? E-mail us for friendly, expert help!

    Mixing Cup, 1oz (10 Pieces)

    $1.44
    See Related Products links (below) for similar items and additional jewelry-making supplies that are often used with this item. Questions? E-mail us for friendly, expert help!
    Qty in Cart: 0
    Quantity:
    Price:
    $1.44
    Subtotal:
  • See Related Products links (below) for similar items and additional jewelry-making supplies that are often used with this item. Questions? E-mail us for friendly, expert help!

    Plastic Ring Mandrel, Ungrooved (Each)

    EURO TOOL
    $4.45
    See Related Products links (below) for similar items and additional jewelry-making supplies that are often used with this item. Questions? E-mail us for friendly, expert help!
    Qty in Cart: 0
    Quantity:
    Price:
    $4.45
    Subtotal:
  • See Related Products links (below) for similar items and additional jewelry-making supplies that are often used with this item. Questions? E-mail us for friendly, expert help!

    Pointed Tweezer "3rd Hand" (Each)

    EURO TOOL
    $9.85
    See Related Products links (below) for similar items and additional jewelry-making supplies that are often used with this item. Questions? E-mail us for friendly, expert help!
    Qty in Cart: 0
    Quantity:
    Price:
    $9.85
    Subtotal:
  • A rawhide mallet is the traditional tool for re-sizing (hammering) the band portion of a ring up in size. A nylon hammer or mallet can also work well, but may leave slight marks. (Metal hammers, while tempting, will leave definite marks on the ring.)See Related Products links (below) for similar items and additional jewelry-making supplies that are often used with this item.Questions? E-mail us for friendly, expert help! A rawhide mallet is the traditional tool for re-sizing (hammering) the band portion of a ring up in size. A nylon hammer or mallet can also work well, but may leave slight marks. (Metal hammers, while tempting, will leave definite marks on the ring.)See Related Products links (below) for similar items and additional jewelry-making supplies that are often used with this item.Questions? E-mail us for friendly, expert help!

    Smooth Steel Economy Ring Mandrel (Each)

    $17.15
    A rawhide mallet is the traditional tool for re-sizing (hammering) the band portion of a ring up in size. A nylon hammer or mallet can also work well, but may leave slight marks. (Metal hammers, while tempting, will leave definite marks on the ring.)See...
    Qty in Cart: 0
    Quantity:
    Price:
    $17.15
    Subtotal:
  • Use this jewelry tool set to cut brass, copper and sterling silver wire; create wrapped or basic loops; open and close jump rings, ear wires and other jewelry loops; trim beading cord; lay out bracelet, anklet and necklace designs; and precisely position knots.See Related Products links (below) for similar items or additional jewelry-making supplies that are often used with this item.Questions? E-mail us for friendly, expert help! Use this jewelry tool set to cut brass, copper and sterling silver wire; create wrapped or basic loops; open and close jump rings, ear wires and other jewelry loops; trim beading cord; lay out bracelet, anklet and necklace designs; and precisely position knots.See Related Products links (below) for similar items or additional jewelry-making supplies that are often used with this item.Questions? E-mail us for friendly, expert help!

    The BeadSmith Beader's Mini Travel Kit (Each)

    The Beadsmith

    $15.35
    Use this jewelry tool set to cut brass, copper and sterling silver wire; create wrapped or basic loops; open and close jump rings, ear wires and other jewelry loops; trim beading cord; lay out bracelet, anklet and necklace designs; and precisely position...
    Qty in Cart: 0
    Quantity:
    Price:
    $15.35
    Subtotal:
  • See Related Products links (below) for similar items and additional jewelry-making supplies that are often used with this item. Questions? E-mail us for friendly, expert help!

    TierraCast Rivet Setter for 6mm Leather Rivets (Each)

    TierraCast
    $5.49
    See Related Products links (below) for similar items and additional jewelry-making supplies that are often used with this item. Questions? E-mail us for friendly, expert help!
    Qty in Cart: 0
    Quantity:
    Price:
    $5.49
    Subtotal:
  • Gain access to thousands of free  jewelry making tutorials and classes from Wubbers  University with the purchase of a single pair of Wubbers  pliers. See Related Products links (below) for similar items and additional jewelry-making supplies that are often used with this item.

    Wubbers Bent Chain-Nose Jewelry Making Pliers (Each)

    Wubbers

    $25.95
    Gain access to thousands of free jewelry making tutorials and classes from Wubbers University with the purchase of a single pair of Wubbers pliers. See Related Products links (below) for similar items and additional jewelry-making supplies that are...
    Qty in Cart: 0
    Quantity:
    Price:
    $25.95
    Subtotal:
  • Gain access to thousands of free  jewelry making tutorials and classes from Wubbers  University with the purchase of a single pair of Wubbers  pliers. See Related Products links (below) for similar items and additional jewelry-making supplies that are often used with this item. Gain access to thousands of free  jewelry making tutorials and classes from Wubbers  University with the purchase of a single pair of Wubbers  pliers. See Related Products links (below) for similar items and additional jewelry-making supplies that are often used with this item.

    Wubbers Medium, Flat-Nose Jewelry Making Pliers (Each)

    Wubbers
    $26.85
    Gain access to thousands of free jewelry making tutorials and classes from Wubbers University with the purchase of a single pair of Wubbers pliers. See Related Products links (below) for similar items and additional jewelry-making supplies that are...
    Qty in Cart: 0
    Quantity:
    Price:
    $26.85
    Subtotal:
  • Remember Murphy's Law! Before oxidizing, antiquing  or otherwise applying any chemical to every piece of your best  customer's 1,000-piece order, we strongly recommend that you test  the chemical(s) on a small sample of the goods.       Oxidizing Tips    Always work in a well-ventilated area.    Avoid contact with eyes, skin and clothing.    Make sure your metal is clean, dry (and warm if using  Win-Ox™).    Dip your piece directly into the oxidizer or apply with a  brush.    Optional: after rinsing and drying the metal, buff gently to  create antiqued crevices and shiny high points.    For safety and consistent results, antique your components  before assembling, especially when creating items from mixed  metals. Each metal reacts differently to each oxidizing solution,  and some reactions involving multiple metals are hazardous or  unpredictable.    See Related Products links (below) for similar items and additional jewelry-making supplies that are often used with this item. Remember Murphy's Law! Before oxidizing, antiquing  or otherwise applying any chemical to every piece of your best  customer's 1,000-piece order, we strongly recommend that you test  the chemical(s) on a small sample of the goods.       Oxidizing Tips    Always work in a well-ventilated area.    Avoid contact with eyes, skin and clothing.    Make sure your metal is clean, dry (and warm if using  Win-Ox™).    Dip your piece directly into the oxidizer or apply with a  brush.    Optional: after rinsing and drying the metal, buff gently to  create antiqued crevices and shiny high points.    For safety and consistent results, antique your components  before assembling, especially when creating items from mixed  metals. Each metal reacts differently to each oxidizing solution,  and some reactions involving multiple metals are hazardous or  unpredictable.    See Related Products links (below) for similar items and additional jewelry-making supplies that are often used with this item.

    XL GEL Liver of Sulphur, 4 oz. (Each)

    $17.25
    Remember Murphy's Law! Before oxidizing, antiquing or otherwise applying any chemical to every piece of your best customer's 1,000-piece order, we strongly recommend that you test the chemical(s) on a small sample of the goods. Oxidizing Tips ...
    Qty in Cart: 0
    Quantity:
    Price:
    $17.25
    Subtotal:
  • See Related Products links (below) for similar items and additional jewelry-making supplies that are often used with this item. Questions? E-mail us for friendly, expert help!

    2.5" Square Steel Block, for Stamping and Jewelry Making (Each)

    $9.60
    See Related Products links (below) for similar items and additional jewelry-making supplies that are often used with this item. Questions? E-mail us for friendly, expert help!
    Qty in Cart: 0
    Quantity:
    Price:
    $9.60
    Subtotal:
  • See Related Products links (below) for similar items and additional jewelry-making supplies that are often used with this item. Questions? E-mail us for friendly, expert help! See Related Products links (below) for similar items and additional jewelry-making supplies that are often used with this item. Questions? E-mail us for friendly, expert help!

    Artistic Wire Wire Straightener (Each)

    Artistic Wire

    $13.15
    See Related Products links (below) for similar items and additional jewelry-making supplies that are often used with this item. Questions? E-mail us for friendly, expert help!
    Qty in Cart: 0
    Quantity:
    Price:
    $13.15
    Subtotal:
  • Gain access to thousands of free  jewelry making tutorials and classes from Wubbers  University with the purchase of a single pair of Wubbers  pliers. See Related Products links (below) for similar items and additional jewelry-making supplies that are often used with this item. Gain access to thousands of free  jewelry making tutorials and classes from Wubbers  University with the purchase of a single pair of Wubbers  pliers. See Related Products links (below) for similar items and additional jewelry-making supplies that are often used with this item.

    Baby Wubbers Round-Nose Jewelry Making Pliers (Each)

    Wubbers
    $20.75
    Gain access to thousands of free jewelry making tutorials and classes from Wubbers University with the purchase of a single pair of Wubbers pliers. See Related Products links (below) for similar items and additional jewelry-making supplies that are...
    Qty in Cart: 0
    Quantity:
    Price:
    $20.75
    Subtotal:
  • See Related Products links (below) for similar items and additional jewelry-making supplies that are often used with this item. Questions? E-mail us for friendly, expert help!

    Bead Stopper, Pack of 6 (pack)

    $4.32
    See Related Products links (below) for similar items and additional jewelry-making supplies that are often used with this item. Questions? E-mail us for friendly, expert help!
    Qty in Cart: 0
    Price:
    $4.32
    Subtotal:
  • See Related Products links (below) for similar items and additional jewelry-making supplies that are often used with this item. Questions? E-mail us for friendly, expert help!

    Brass Sheet, Tiny Floral Pattern (Each)

    $5.28
    See Related Products links (below) for similar items and additional jewelry-making supplies that are often used with this item. Questions? E-mail us for friendly, expert help!
    Qty in Cart: 0
    Quantity:
    Price:
    $5.28
    Subtotal:
  • Transform your DIY projects into true works of art with the Crystal Lane DIY Crystal Glue Pen. Say goodbye to subpar results and hello to precision and ease. This John Bead tool will grant you the power to add pristine flatback rhinestones, beads, and other embellishments with the click of a button. Watch your creations come to life with a captivating sparkle that will impress all who lay eyes on them. Up your jewelry game and indulge your creativity with the Crystal Lane DIY Crystal Glue Pen.

    DIY Crystal Glue Pen (

    Crystal Lane
    $6.99
    Transform your DIY projects into true works of art with the Crystal Lane DIY Crystal Glue Pen. Say goodbye to subpar results and hello to precision and ease. This John Bead tool will grant you the power to add pristine flatback rhinestones, beads, and...
    Qty in Cart: 0
    Quantity:
    Price:
    $6.99
    Subtotal:
  • See Related Products links (below) for similar items and additional jewelry-making supplies that are often used with this item. Questions? E-mail us for friendly, expert help! See Related Products links (below) for similar items and additional jewelry-making supplies that are often used with this item. Questions? E-mail us for friendly, expert help!

    Dumbell Ring Tag, Rectangle (thousand)

    $22.35
    See Related Products links (below) for similar items and additional jewelry-making supplies that are often used with this item. Questions? E-mail us for friendly, expert help!
    Qty in Cart: 0
    Quantity:
    Price:
    $22.35
    Subtotal:
  • See Related Products links (below) for similar items and additional jewelry-making supplies that are often used with this item. Questions? E-mail us for friendly, expert help!

    EURO TOOL 2" Curved Steel Burnisher (Each)

    EURO TOOL

    $2.40
    See Related Products links (below) for similar items and additional jewelry-making supplies that are often used with this item. Questions? E-mail us for friendly, expert help!
    Qty in Cart: 0
    Quantity:
    Price:
    $2.40
    Subtotal:
  • See Related Products links (below) for similar items and additional jewelry-making supplies that are often used with this item. Questions? E-mail us for friendly, expert help! See Related Products links (below) for similar items and additional jewelry-making supplies that are often used with this item. Questions? E-mail us for friendly, expert help!

    EURO TOOL Cup Burr, Wire Rounder (set)

    EURO TOOL

    $11.15
    See Related Products links (below) for similar items and additional jewelry-making supplies that are often used with this item. Questions? E-mail us for friendly, expert help!
    Qty in Cart: 0
    Quantity:
    Price:
    $11.15
    Subtotal:
  • See Related Products links (below) for similar items and additional jewelry-making supplies that are often used with this item. Questions? E-mail us for friendly, expert help!

    EURO TOOL Fiber-Grip Tweezer, 8" (Each)

    EURO TOOL
    $2.76
    See Related Products links (below) for similar items and additional jewelry-making supplies that are often used with this item. Questions? E-mail us for friendly, expert help!
    Qty in Cart: 0
    Price:
    $2.76
    Subtotal:
  • With this specialty crimping tool, you don't need as much pressure on the crimp beads as you may have used with other pliers. Too much pressure can damage the tips of crimping pliers, and may cause the crimp to cut through beading cable. Pliers eventually wear out and may break. Rings & Things backs these crimp pliers with a six month warranty. When handled without excessive pressure, they last much longer. To use crimp pliers, string desired pattern, add crimp bead and finishing finding (jump ring, split ring, bullion or wire protector), then use the crimper section (1) of the crimp pliers to secure the stringing cable. (Best results are achieved when the two cable pieces are positioned on either side of the center dimple.) Use the rounder section (2) for final shaping. This gives you a compact, rounded crimp bead, which (if desired) can be hidden inside large-hole bead, a crimp cover, or even a fold-over bead tip.  See Related Products links (below) for similar items and additional jewelry-making supplies that are often used with this item. With this specialty crimping tool, you don't need as much pressure on the crimp beads as you may have used with other pliers. Too much pressure can damage the tips of crimping pliers, and may cause the crimp to cut through beading cable. Pliers eventually wear out and may break. Rings & Things backs these crimp pliers with a six month warranty. When handled without excessive pressure, they last much longer. To use crimp pliers, string desired pattern, add crimp bead and finishing finding (jump ring, split ring, bullion or wire protector), then use the crimper section (1) of the crimp pliers to secure the stringing cable. (Best results are achieved when the two cable pieces are positioned on either side of the center dimple.) Use the rounder section (2) for final shaping. This gives you a compact, rounded crimp bead, which (if desired) can be hidden inside large-hole bead, a crimp cover, or even a fold-over bead tip.  See Related Products links (below) for similar items and additional jewelry-making supplies that are often used with this item.

    EURO TOOL Jewelry Pliers, Crimping, Standard, 5" (Each)

    EURO TOOL
    $10.95
    With this specialty crimping tool, you don't need as much pressure on the crimp beads as you may have used with other pliers. Too much pressure can damage the tips of crimping pliers, and may cause the crimp to cut through beading cable. Pliers...
    Qty in Cart: 0
    Quantity:
    Price:
    $10.95
    Subtotal:
  • With this specialty crimping tool, you don't need as much pressure on the crimp beads as you may have used with other pliers. Too much pressure can damage the tips of crimping pliers, and may cause the crimp to cut through beading cable. Pliers eventually wear out and may break. Rings & Things backs these crimp pliers with a six month warranty. When handled without excessive pressure, they last much longer. To use crimp pliers, string desired pattern, add crimp bead and finishing finding (jump ring, split ring, bullion or wire protector), then use the crimper section (1) of the crimp pliers to secure the stringing cable. (Best results are achieved when the two cable pieces are positioned on either side of the center dimple.) Use the rounder section (2) for final shaping. This gives you a compact, rounded crimp bead, which (if desired) can be hidden inside large-hole bead, a crimp cover, or even a fold-over bead tip.  See Related Products links (below) for similar items and additional jewelry-making supplies that are often used with this item. With this specialty crimping tool, you don't need as much pressure on the crimp beads as you may have used with other pliers. Too much pressure can damage the tips of crimping pliers, and may cause the crimp to cut through beading cable. Pliers eventually wear out and may break. Rings & Things backs these crimp pliers with a six month warranty. When handled without excessive pressure, they last much longer. To use crimp pliers, string desired pattern, add crimp bead and finishing finding (jump ring, split ring, bullion or wire protector), then use the crimper section (1) of the crimp pliers to secure the stringing cable. (Best results are achieved when the two cable pieces are positioned on either side of the center dimple.) Use the rounder section (2) for final shaping. This gives you a compact, rounded crimp bead, which (if desired) can be hidden inside large-hole bead, a crimp cover, or even a fold-over bead tip.  See Related Products links (below) for similar items and additional jewelry-making supplies that are often used with this item.

    EURO TOOL Jewelry Pliers, Mighty Crimper, 5" (Each)

    EURO TOOL
    $11.85
    With this specialty crimping tool, you don't need as much pressure on the crimp beads as you may have used with other pliers. Too much pressure can damage the tips of crimping pliers, and may cause the crimp to cut through beading cable. Pliers...
    Qty in Cart: 0
    Quantity:
    Price:
    $11.85
    Subtotal:
  • Total: items /

Adding your products to cart