Vitreous enamels and enameling tools and supplies from Rings & Things
These 80-mesh medium-temperature medium-expansion vitreous enamels can be kiln fired or torch fired from 1,400° to 1,500°F (760°-815°C), and are perfect for use on copper, gold, low-carbon steel, fine silver, fired copper clay, and fired fine-silver clay.
- Translucent colors are normally applied on top of a white base coat, so you can see the true color of the translucent enamel unaffected by the color of the base metal.
- Opalescent colors are normally applied on top of a base coat of your choice.
- Clear enamel can be used on its own or in combination with other colors.
Experiment to find your favorite combinations!
Enameling Tips:
Enamel is durable, but not totally infallible. (It's glass!) Handle finished pieces with care.
- Do all metal shaping, stamping, hole punching, etc. before adding enamels.
- You can easily torch fire pieces up to about 2" (50mm) in diameter. Much larger, and you'll need to fire them in a kiln.
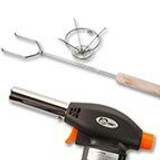
- Butane Micro Torches aren't totally out of the question, but they don't work up-side-down, and the small flame takes longer to heat a piece to the temperatures required to melt the enamel.
- The Handy Flame II Propane/MAPP Torch is our favorite for enameling. It heats pieces up the fastest, and can be used at any angle. But we also really like the Handy Flame Butane Torch head -- it has a nice bushy flame, and is our only butane torch head that can be used up-side-down. In both cases, purchase gas locally (hardware or camping store).
- Thoroughly clean your metal before enameling -- Penny Brite (either the liquid or the cream) works great.
- Before sifting enamel onto the piece, spray on a light coat of Klyr-Fire, to help enamel stay in place with an even coating.
- Translucent colors are normally applied on top of a white base coat, so you can see the true color of the translucent enamel unaffected by the color of the base metal.
- Opalescent colors are normally applied on top of a base coat of your choice.
- Clear enamel can be used on its own or in combination with other colors.
- To paint instead of sift, mix enamel with Klyr Fire or approximately 40% distilled water (to get desired consistency) and paint with a small sable paintbrush. You may want to fire a layer of Opaque White Undercoat first (especially if painting with translucent colors!).
- Sift or paint enamel in desired pattern, carefully transfer to your firing station, and fire!
- If you painted, allow the piece to dry before firing.
- When torch firing, heat from below, so you don't blow your enamel off. Like soldering, apply heat evenly, in a circular motion, starting outside the piece and then bringing heat in towards the center.
- If torch firing, watch closely: when the enamel begins to melt, you'll see a glossy "orange peel" stage where the enamel beads up before slumping to a smooth enameled sheen. Fire a bit more (past the "orange peel" stage), but don't overheat - some colors will scorch.
- Allow to slowly cool. A warmed pan (or small crockpot) of vermiculite works great.
- In a hurry? It's usually fine to drop small pieces in a quenching bowl after firing, instead of cooling slowly, but there is a chance that the enamel will pop off. (We've had almost no problem with this, but consider yourself warned.)
- Clean as necessary - Penny Brite or a brief pickle, maybe a little underwater grinding with an alundum stone.
- Warning: Pickle gives a matte effect to some colors of enamel.
- Keep all your leftover / spilled enamel powder. If the colors get mixed, save them in a separate bin for use as a counter (back side) enamel. Place a creased paper on your sifting worksurface, so you can easily dump excess enamel back in the container or a mixed jar.
Enameling Safety:


