Fly Bee! Bracelet Tutorial

Created by: Polly Nobbs-LaRue
Designer Tips
- Punch 1/16" holes in the bracelet where you want to place the rivets.
- Run the first rivet through the leather, place a washer on it, and use a fine-point Sharpie to mark a line on the rivet shaft about 1mm past the washer.
- Use heavy-duty flush cutters (or a jewelers saw) to cut at this line. Be sure to cut nice and flat (parallel with the rivet head). File flat if necessary.
- Place the bracelet rivet-head-down on the rubber side of a steel/rubber bench block.
- Begin mushrooming the wire rivet. See the Fancy Wire Rivets Blog post for step by step instructions.
- NOTE: If the washer jumps off, you need to mushroom the wire tiny bits at a time before you can put the washer back on and have it stay in place. Once the washer stays on, keep mushrooming the wire rivet until it is a nice smooth dome.
- Other (less expensive) washer options include vinyl / vulcanite heishi beads. Just punch a 1.6mm hole in the center (or a 1.5mm hole and enlarge is slightly with a bead reamer), and you have an inexpensive strand of 100's of washers!
Suggested Supplies
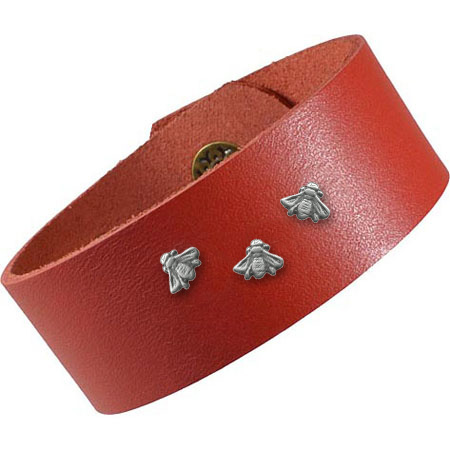
- 1 each #51-810-10-40 Bracelet, Genuine Leather, 1", Cuff
- 3 each #69-971-01-5 Rivet, Bumblebee
- 1 pkg of 16 [use 3] #69-930-01-1 Washers with approx. 1.6mm hole
Tools
- #69-436 Hammer, Riveting or #69-135 Tool, Hammer, Ball Pein
- #69-252-01-2 Tool, Flat File, 6", #2 Cut (Optional)
- #65-507 Tool, Heavy-Duty Cutter, 5.5"
- #69-238-L Tool, Long Neck Hole Punch, Round, 1.5mm hole
- #69-123 EURO TOOL Combo Bench Block
- Extra fine-point Sharpie
Jan 1st 2021
Our Bead Blog
-

Edgy Elegance Necklace
Mar 22nd 2024Created by: Guest Designer Deb FlorosSuggested Supplies 1 #20-111-204 TOHO Glass Seed Bead, Size 11
-

Elegant Button Earrings
Mar 22nd 2024Created by: Guest Designer Deb FlorosSuggested Supplies 1 #27-841-042-50 Beadalon Bead Bumper, 1.5m
-

Abstract Painted Cuffs
Feb 26th 2024Created by: Guest Designer Deb FlorosSuggested Supplies 1 #51-810-05-17 Leather Cuff Bracelet, 1/2"