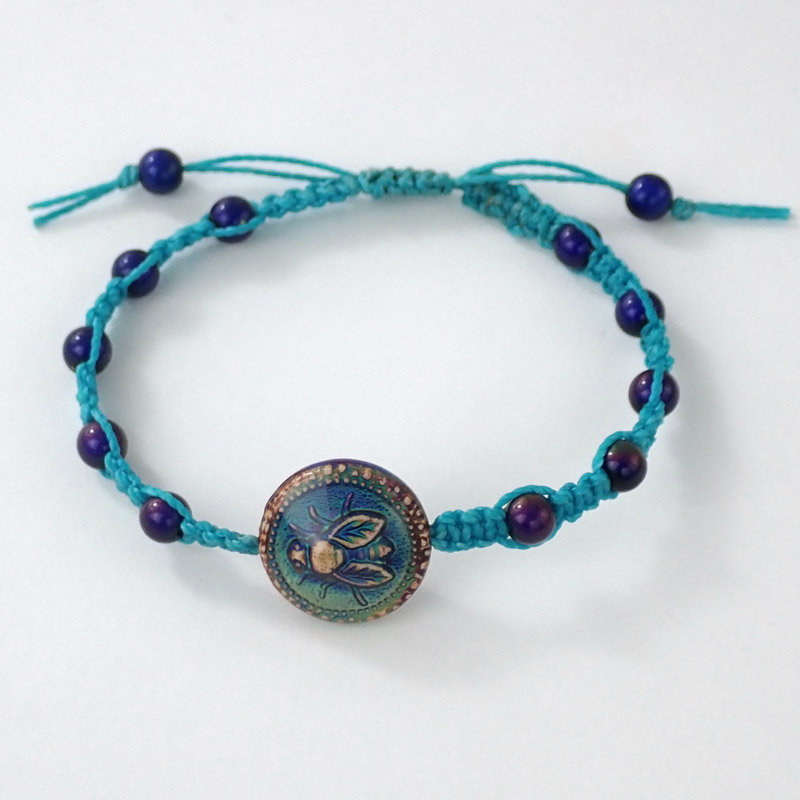
Bee Moody Bracelet Tutorial

The moody bee and sensitive side beads on this adjustable Shamballa-style macramé bracelet change color with slight temperature changes, like mood rings from the 70's!
by: Michelle Horning
Designer Tips
- For step-by-step knotting instructions, see our DIY Shamballa-Style Macrame Bracelet Tutorial.
- All beads can be strung onto the bottom of the anchor cords before anchoring to the board, and slid into place as you knot. All 4 cords can fit through the bee bead, so I put the small beads on, worked to the placement of the bee bead, then added the rest of the mirage beads to the anchor cord.
- Tight knots make it difficult to sew the tails back in, and you can break your needle. Pliers can help to get the needle through. Sew the tail back through the entire section of knots to ensure that it doesn't back out. Take care in this process, because the wax makes the cord susceptible to marring if overworked.
- The length of cord to cut for the clasp says 12" in the tutorial, but this leaves little to work with at the end, so I increased it to 18".
- The sliding clasp can be made longer as desired to fill any gaps left when pulled snug.
- The entire bracelet is adjustable. The knots can be scrunched together or pulled apart on the anchor cords in order to adjust length.
- The waxed cord is very stiff, and holds knots very well. I cut the cord holding the end beads close to the knot because of this.
Suggested Supplies
- 1 strand (use 1 bead) #27-398-18 Color-Changing Mirage Bead, Honey-Bee
- 1 strand (use 12 beads) #27-397-03 Color-Changing Mirage Bead, Micro Round
- 1 100-yard spool (use 12 feet) #61-800-02-135 Waxed Polyester Cord, 2-ply - Aqua
Tools
Other Supplies
- Thimble, Sewing Needle, Clip Board, Binder Clips
Jun 30th 2021
Our Bead Blog
-

Edgy Elegance Necklace
Mar 22nd 2024Created by: Guest Designer Deb FlorosSuggested Supplies 1 #20-111-204 TOHO Glass Seed Bead, Size 11
-

Elegant Button Earrings
Mar 22nd 2024Created by: Guest Designer Deb FlorosSuggested Supplies 1 #27-841-042-50 Beadalon Bead Bumper, 1.5m
-

Abstract Painted Cuffs
Feb 26th 2024Created by: Guest Designer Deb FlorosSuggested Supplies 1 #51-810-05-17 Leather Cuff Bracelet, 1/2"