Browsing Tag

how-to

Mixed-media fiber/fabric jewelry art!

May 6, 2011

{Thanks for clicking the Share buttons, to tell a friend!}


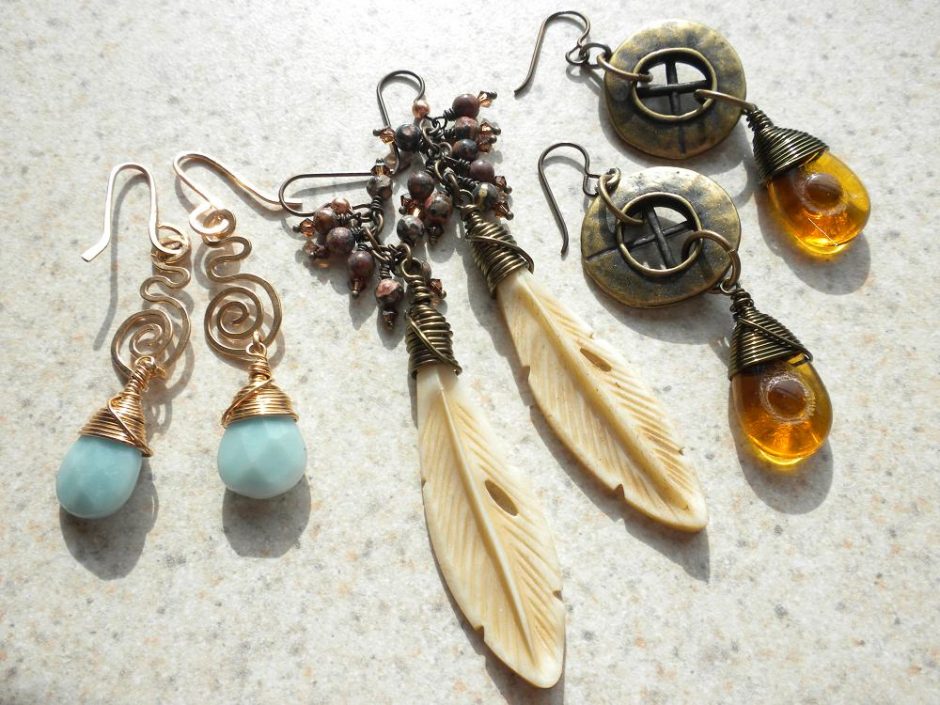
Mollie embellished the tag Toni made with seed beads and added a sweet little brass bird charm, before hanging it from a length of chain.

We’re very fortunate to have Toni, a mixed-media artist and art teacher, as one of our jewelry designers here at Rings & Things. From pottery to doll making, Toni has dabbled in it all. So when we started seeing fabulous fabric tag pendant necklaces in magazines like Belle Armoire and Cloth Paper Scissors, we asked Toni to make a few for our design team to play with. She has a huge fabric stash and was more than happy to put her scraps to good use! Toni’s “Patchy Blue Skies” in our design gallery also has a wee little birdie.

Whether you’re a jewelry artist or a fiber artist, it can be a lot fun to cross over into a similar craft. It challenges your creativity. Toni never does anything half way, so we had a ton of fabric swatches and squares of all sizes and patterns to play with. Here are some of the results, as well as some design tips and tricks we learned along the way.

First off, Toni sandwiched a piece of felt between two layers of fabric to give each tag a nice sturdy feel. If you’re using thick fabric, this step can be omitted. Most of the designers used
3/16″ eyelets to create a sturdy hole from which to hang their tags, but as you’ll see, you have other options.

I used choker clamps to grip the ends of the tag and added short sections of chain to turn it into a cuff bracelet. The choker clamps could also work in place of a bail to make a pendant.

She punched holes into a copper tube bail to stitch it onto the fabric tag.

It is so much fun to see what unique designs people come up with, even when starting with almost the same inspiration. Look for one of Toni’s fabric tag designs in an upcoming Rings & Things magazine ad! ~ Cindy


Shopping list:
Buy some of the items used in these projects…

Vintaj “rustic” altered base-metal canvases

Artistic Wire

Tim Holtz idea-ology pen nibs

magnetic cable chokers

“raku” ceramic Buddha

choker clamps

impression stone beads & lime keishi pearls from our BeadTour bead shows

red bamboo-coral beads

copper tube top bails


PS: here are some handy links to some other how-to‘s in the Rings & Things blog!

Two ways to color metal using Image Transfer Solution

April 22, 2011
design by sondra barrington

Alice in Wonderland image transfer bracelet

Hi Bloglandia! Last weekend I did a demo in our Spokane showroom on how to use Sherri Haab’s Image Transfer Solution (ITS) and thought now would be a good time to share these techniques for colorizing metal with everyone.

Image transfer is just that – transferring an image from the paper it is printed on to a different surface (in this case, metal jewelry components). Image transfers have a vintage, ethereal feel, and I love how the different colors of metals shine through. Unlike many of the other solvents and processes used for image transfer, Image Transfer Solution (ITS) is non-toxic. Yay! Plus, it has another purpose not even mentioned on the bottle: it is an excellent way to seal colors onto metal (more on that in a bit).

Transferring Images – ITS Method #1

One caveat: The images you use must be printed on a laser (toner based) printer. Ink jet pictures will not work. The pictures can be black or white or color. Photos and text should be reversed before you print, since transfers will be mirror images.

To be honest, I did not like ITS the first couple of times I tried it. I kinda hated it. Following the directions on the bottle, I prepped my metal with steel wool and heat-set the images in a 325 degree oven – just like it said! – but things just kept going wrong. Either my images would wash right off the metal or the paper would be so very stuck to the metal that no amount of scrubbing would remove it. But I loved the concept, so I kept playing with it. Below is my own method for using ITS. Maybe the package directions will work like a charm for you. If not, I hope my tips and tricks help:

  1. Scuff up your metal (aluminum, brass, copper and silver all work great) with a medium grit sanding pad or sand paper. Steel wool leaves the surface too smooth, in my opinion.
  2. Wash metal with rubbing alcohol to remove dirt, dust and oil – even if it looks clean!
  3. Using a clean, dry paintbrush, evenly coat the prepped metal with just a couple of drops of ITS.

  1. Press image face-down onto metal and press firmly into place to remove any air bubbles. ITS is like glue – you will not be able to reposition your paper at all, so be careful to place it where you want it! Let dry. Use an iron (high heat, no steam) to heat the metal for 1 or 2 minutes. Don’t worry, the paper won’t burn. Let metal cool.
  2. Place the metal into water and using a gentle circular motion, begin rubbing the paper off, leaving the image behind. Don’t get to aggressive or you could lift off parts of the image. Patience pays off here.
  3. After most of the paper is removed, use a sheet of polishing paper and more water to remove the finer paper fibers.
  4. After all of the paper is removed, seal the image with a dab of Renaissance Wax and a soft cloth. It really improves the luster.
image transfer necklace

My photograph looks like a vintage postcard after being transferred onto aluminum. The Swarovski beads are the same colors as the prayer flags hanging on the mountain tea house.

Complete your jewelry piece! The image is permanently attached. You can even punch holes or dap the metal and it won’t come off!

Sealing Colors – ITS Method #2

Image Transfer Solution can also be used to permanently seal inks onto metal! Ranger Adirondack Alcohol Inks are tons of fun to mix and blend onto non-porous surfaces, like metal, but since they are ink, they can be rubbed or washed off. That is, unless you seal them with ITS. When you heat-set ITS, it binds the color to the metal. It will not wash off or bleed onto your customer’s skin.

design by sondra barrington

Vintaj fussy peacock pendant colorized with alcohol inks for a faux enamel look.

You can color your metal with alcohol inks and then, after they’ve dried, paint a thin layer of ITS over the top. Another option is to mix the ITS directly with your inks (just a few drops of each) and paint that mix onto your metal. Either way, once the ITS has dried, you need to heat-set it to make the bond permanent. Just follow the directions on the Image Transfer Solution package for using an oven to heat-set (the iron won’t work for this application).

Looks like patina – but this blue bee was colored with alcohol inks.

There you have it! Two tried and true methods for permanently coloring your metal pieces for jewelry and other applications. Although this post focused on metal, Image Transfer Solution can be used on polymer clay, etched glass and other surfaces too! Since it really only takes a couple of drops per image, you’ll have plenty to experiment with! ~ Cindy


PS: here are some handy links to some other how-to‘s in the Rings & Things blog!

How to Wire-Wrap a Briolette

April 14, 2011

I love briolettes! I love them in all shapes, sizes, colors and materials. So what is a briolette? A briolette is a pear or teardrop-shaped bead that is faceted and tip-drilled. Some briolettes are flat and some are round, kind of like a ball that comes to a point on one end. When they are flat, the hole can either be front to back or side to side. No matter the type, briolettes are super versatile and great for making all kinds of beautiful jewelry. Continue Reading…

How to dap and dome metal jewelry

April 8, 2011

Cymbals of Happiness bracelet by Sondra:
stamped, textured and domed copper and brass disks make a tinkling charm bracelet.

It took me awhile to accept “dapping” as a real word. Even now that I am obsessed with dapping every flat piece of metal that crosses my path, I still find the term awkward. Spell check, ignoring the facts as usual, still doesn’t believe.

In jewelry making, dapping simply means taking a flat piece of metal and curving it into a dome with special dies and punches, called a dapping set. The dapping block (or die if you prefer) has a series of concave impressions that correspond in size with the dapping punches.

Rings & Things #69-199 dapping set by Eurotool, and a variety of flat and dapped metal pieces.

Simply place your metal piece in the block and use a hammer (preferably brass) to repeatedly tap the punch into the metal. I say tap because your goal is to gently bend the metal into a smooth, even curve. If you just whack as hard as you can, the metal won’t shape up evenly.

how not to dap metal

The entire piece of metal needs to fit inside the impression, not sit on top like in this picture.

how to dap metal

Here the metal pieces are inside the impressions, ready to be dapped.

Another tip: don’t hammer straight down on your metal. Hold the dapping punch at and angle, and tap tap tap with your hammer, turning your metal after every few taps to ensure that it is shaping up nicely.

For best results, keep rotating the die and the metal.

As you dap (tap, dome, whatever!), the height of the metal piece increases, while the width decreases. So after you’ve dapped as much as you can in one impression, you can move the metal into the next smallest hole and dap it with the next smallest punch to get a deeper dome.

Doming adds a professional quality to your work. Even just a slight curve instantly makes a metal disk reflect more light.

flat disk and dapped disk

Just a few taps is all it takes!

Brass, copper, aluminum and sterling silver are all excellent soft metals to dap (most of my images are of raw brass blanks). Even copper coins can all be dapped, although coins are thick and will require you to apply a bit more muscle. If you want to stamp, texture, punch holes, or otherwise adorn your metal (and you will!) do all that before you dap for beautiful results:

Use stamps to monogram brass disks for easy, elegant earrings.

Dapped pieces can be layered too, like on my copper and brass ring. (See bottom of this blog for tips about making this ring.)

One word of warning – you might need to upgrade your photography equipment to get good pictures of your dapped jewelry! I think the only way to get a clear picture of Mollie’s “God Save the Queen” necklace would be to use a professional light box. The domed Canadian penny is amazingly reflective. Since my photo-editing software lacks a “rhinestone-reflection remover tool,” this is as good of a shot as I could get. Believe me, the necklace is stunning in person!

A domed penny, brass filigree and snippet of rhinestone chain, all soldered onto a brass disk, forms the centerpiece.

I know you are quicker on the uptake than my computer: add dapping to your jewelry-making vocabulary today! ~ Cindy

—————– postscript: —————–

We’ve gotten a bunch of questions about Cindy’s copper and brass “True” ring above, but she has moved away, so I’ll do my best to answer. The ring uses only 3 parts:

Texture the copper washer using this technique, or simply give it a nice hammered texture with a chasing or ballpein hammer. Stamp “true” on the disk following these metal stamping instructions or this metal stamping article. Then dap (dome) the washer and the brass disk, and glue them into the bezel ring with your favorite adhesive. Cindy used E-6000. ~Polly

Blog Home (Newest Tutorials)

How to use heat to patina brass charms and filigrees

March 31, 2011
bee charms, raw and with heat patina

One before and two after applying heat patina. Check out the rainbows on the middle bee!

Ah, brass. Beautiful brass. I love everything about using brass in my handmade jewelry … except its raw brassiness. Brass is affordable, easy to work with, and available in all kinds of fun charms and filigrees. And while giving raw brass an antique patina with an oxidizing solution such as Win-Ox really is not difficult, my favorite method of coloring brass is the torch! It tones down that brash brassiness to a beautiful warm glow that is infinitely more appealing to my eye.

bee charm torch

Torching the bee charm only took a few seconds.

Applying heat to give the metal a patina is so easy – and clean! No chemicals, no rinsing, no waiting! Sometimes you can even get shimmery rainbows to appear by holding the heat on for a few extra seconds. (The same process works to heat patina raw copper.)

Heat patina raw brass filigree

Raw brass filigree, before and after meeting the torch flame.

You all know to set up a heat-proof work area before firing up your torch. This can be as simple as a cookie sheet. Tie back your hair, wear safety glasses and just plain BE SAFE. Do your homework before you start. A great book that explains all the necessities for working with a torch is Soldering Made Simple by Joe Silvera.

Butane is widely available at hardware stores.

Don’t feel fired up to experiment? You can buy Vintaj natural brass jewelry components, most of which have already undergone a chemical-free process to give them their rich color.
Plated brass filigrees are also available. But I encourage you to try heat patina. It is the safest way to let your inner pyromaniac out to play!

Velvet ribbon adds a luxurious feel to this brass bracelet.

Here is a gorgeous brass jewelry example by Mollie to inspire you! She soldered a raw brass bee to a Vintaj connector to make this bracelet and used both heat and Win-Ox to patina the pieces. ~ Cindy

Want to keep that perfect heat/torch patina that you’ve achieved? Nikolas #2105 Clear Silver Lacquer is the product we’ve most often heard recommended by teachers and jewelers, to protect heat patinas and other colors on silver, copper, brass, and bronze. Follow the manufacturer’s instructions on the packaging, to seal and protect your jewelry. When properly applied to metal surfaces, it forms a coating that protects from oxidation, perspiration, sulfur, and abrasion.

Please note, that this item does require special hazardous shipping, so be sure to select UPS GROUND as your shipping choice during order checkout.

How to make interchangeable magnetic jewelry with 1" buttons

March 24, 2011

bottle cap magnet button pendantHandmade magnetic bottle cap necklace with assorted buttons
Mollie has been borderline obsessed with one particular item lately. It’s not a pretty gemstone bead or sparkly crystal pendant. It isn’t even new. No, Mollie is obsessed with plain old sticky dots. Almost daily, she’d ask me, “Oooh, have you tried the sticky dot?” and I’d just roll my eyes. But now I’m a convert too.
Sticky dots are just that – self-stick little glue pads. Easy to use, strong, zero mess, no fuss, no cure time, no smell. This is true instant gratification!


Round sticky dots fit perfectly under our magnets!

Two of Mollie’s recent designs use the sticky dot: the interchangeable magnet ring and the interchangeable magnet bottle cap pendant. Like many of you crafty people, Mollie has a button making machine. The little 1″ buttons are particularly adorable, and since they are made of steel, naturally they are magnetic. I don’t have a button machine myself, but I buy lots of buttons – and now I can wear them instead of leaving them on my bulletin board!

Here’s the magnet

Here’s the pendant – so cute!

Rings & Things’ wholesale price breaks makes it really affordable to make a whole bunch of these necklaces. For about $50 (before shipping and tax, if applicable) you can get everything (except the buttons) to make 70 necklaces – with supplies leftover! If you don’t already have one, add a pair of EuroPunch pliers to make holes in the caps.

1 spool of ball chain (makes 70 17″ necklaces) $18-25 ~ 100 ball chain clasps $2 ~ 1 oz. jump rings $5-6 ~ 100 bottle caps $7-10 ~ 144 adhesive dots $6 ~ two packs of 35 magnets $12-14

The adhesive dot is completely hidden by the ring and magnet.

1″ buttons make perfect rings!

The same value applies to the magnetic ring design – and absolutely no tools are required to make these!

72 adjustable flat-pad ring blanks $42-62, depending on color (we do sell a less expensive ring blank if you prefer, but the style and comfort of this style is worth the added cost) ~ 144 adhesive dots $6 ~ two packs of 35 magnets $12-14

At these quantities, the necklaces cost less than a dollar and the rings about $1.20 to 1.50 each to make. Buy more and the cost per is even lower. Ah, the genius of good design! ~ Cindy

“Make everything as simple as possible, but not simpler.”
~ Albert Einstein


PS: here are some handy links to some other how-to’s in the Rings & Things blog!

How to make polymer clay pie earrings using mini bottle caps as pans!

March 18, 2011

polymer clay cherry pie earrings

If they weren’t so disgustingly cute, they’d be good enough to eat!

Hello, bloglandia! We just added a whole bunch of bottle caps to our mixed-media jewelry product line. The best of the bunch, in my opinion, is the cute little mini cap.

mini bottle caps

Wee bottle caps make regular size (1″) ones look huge in comparison!

As soon as I saw them I became obsessed with making tiny pies. It was basically an illness that I had to treat before I could move on with my life. So today I went ahead and baked my little cherry pie earrings. Disclaimer: I am by no means a polymer clay expert. My skill level is clumsy at best. But really, I think anyone can have fun making these! Here’s how:

punch pliers

These pliers make it so easy to punch holes!

  1. Punch holes in the caps. I used our EuroPunch pliers, which handle the job easily. However, since bottle caps are steel they will wear out the punch tips eventually (just replace the tips, not the pliers!).
  2. Add jump rings.
  3. Condition your clay and load up the tins with pie filling. I used magenta Kato polyclay. I also added a little red liquid polyclay. I like how the liquid added a realistic pie filling gooeyness, but if you are more of a perfectionist, omit the liquid clay. A note about Kato – it is fairly stiff and crumbly straight from the package. Since I was just making one pair, I kneaded it by hand, but it would have been way easier to condition a bigger lump of clay using a pasta machine.
  4. Roll out your pie crust – mine is yellow mixed with a little “beige flesh” color. Cut the crust into thin strips.
  5. Criss-cross the strips over the pies. Press down gently and trim off the ends.

    forming the clay pie crust

    Criss cross to make a traditional lattice top.

  6. ready to bake polymer pies

    Ready for the oven!

    Following the instructions for your type of clay, bake the pies in a toaster oven to cure.

  7. Use 2 more jump rings to attach the pies to ear wires (I used steel blue niobium).

easy cherry pie earrings

Pie is the new cupcake, I’ve been told. What do you think? Can a pie really be as cute as a cupcake?

Well, I thought baking these earrings would cure me of my pie obsession, but then a friend suggested making blackbird pie (from the nursery rhyme) and now I really want to make that too! And what about Pi Day earring? What kind of clay creations can you imagine making with these bottle caps? ~ Cindy


PS: here are some handy links to some other how-to’s in the Rings & Things blog!

Project Alert: Getting Creative with Hair Sticks

March 9, 2011
Here at Rings & Things, we are always trying to spice up our stock with fun new items.

Ruby Ballerina, a free hair pin design

“Ruby Ballerina” Hair Sticks with Red Sparkly Glass

Recently, we have delved into the enchanting world of hair findings. Our design team was challenged to use some of our new findings to make some unique hair decorations. I was given the task of creating something with our cherry
hair sticks that resemble chopsticks.

I wanted to make something easy, yet whimsical that could cascade through your locks and add a touch of “ooh-la-la” to the ordinary messy bun. I came up with two designs, that could easily be altered to fit your style or match any outfit. Simply pick whatever beads you like! You could go fun and flirty or sophisticated and elegant (think wedding party?). Whatever you decide, this project is easy, affordable and a great way to tackle the winter blues!

Hippie Chic Ballerina Hair Stick, a free jewelry design from Rings & Things

“Hippie Chic Ballerina” Hair Stick with Buddha Head Beads

Make your own Hair Sticks with:

Here are a few more ideas for creating hair findings! Or take a peek at our Jewelry Design Gallery for tons of free project ideas!

“Spring Flowers” Hair Clip by Cindy Morris

Rings & Things' free jewelry design, The Birds bobby pins

“The Birds” Bobby Pins by Jaclyn White

Rings & Things free jewelry design: Blue Bee bobby pin

“The Blue Bee” Bobby Pin by Sondra Barrington

Check out some of our other fun hair findings at Rings & Things and let the creativity begin! We have a great selection of bobby pins, hair combs, barrettes, and hair picks waiting for your personal touch!

Tiffany

Rings & Things Showroom

Design Team


PS: here are some handy links to some other how-to’s in the Rings & Things blog!

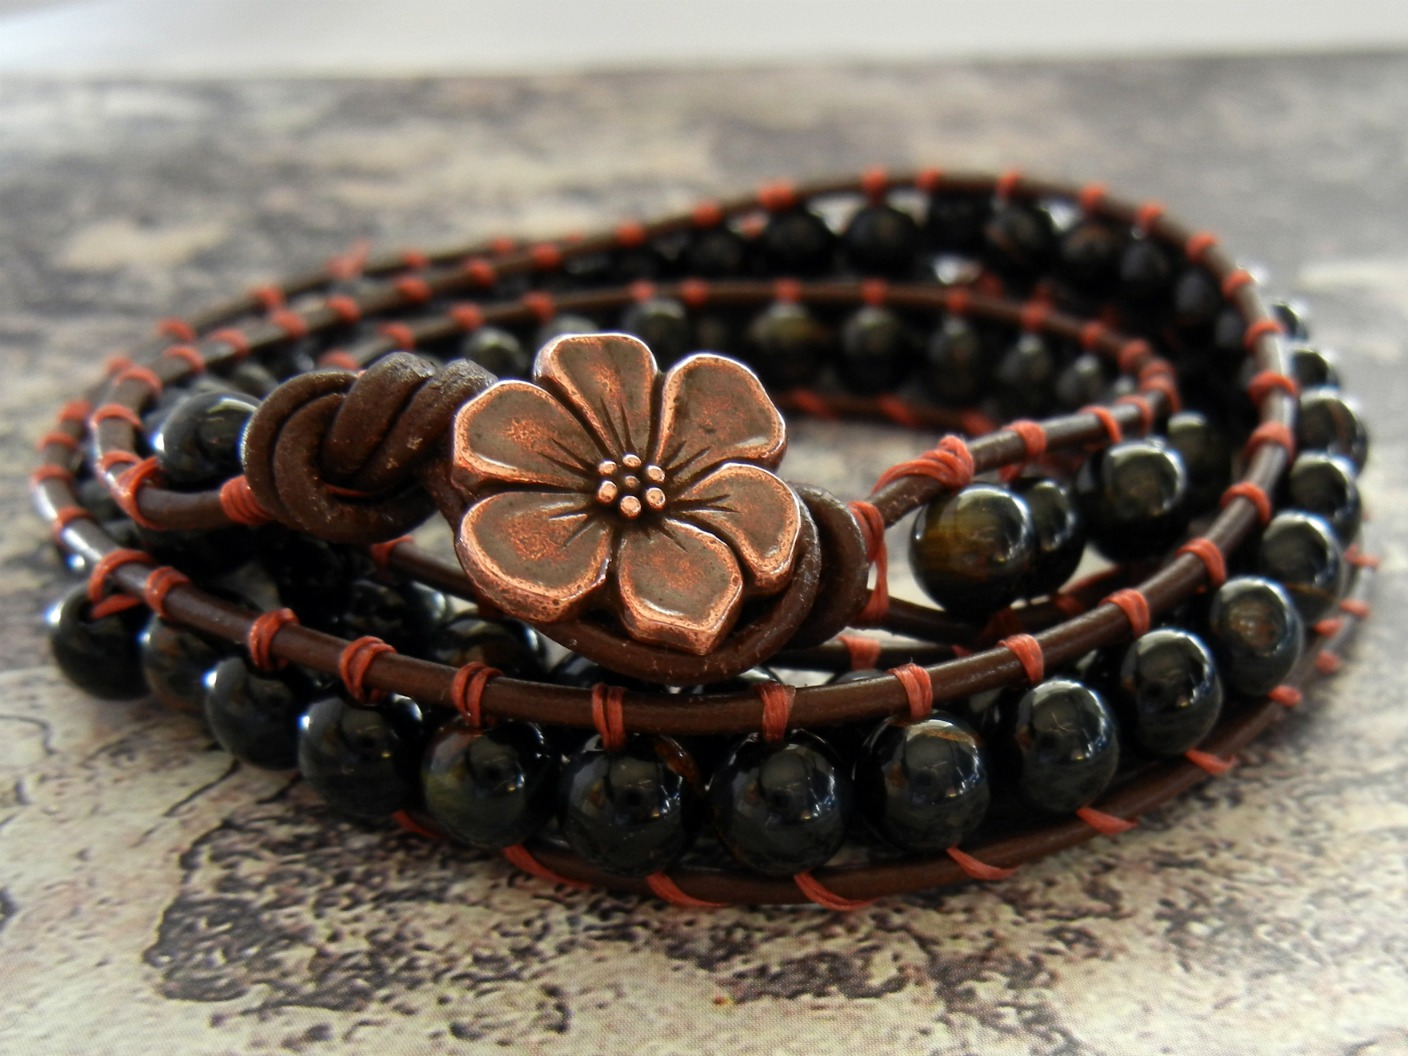
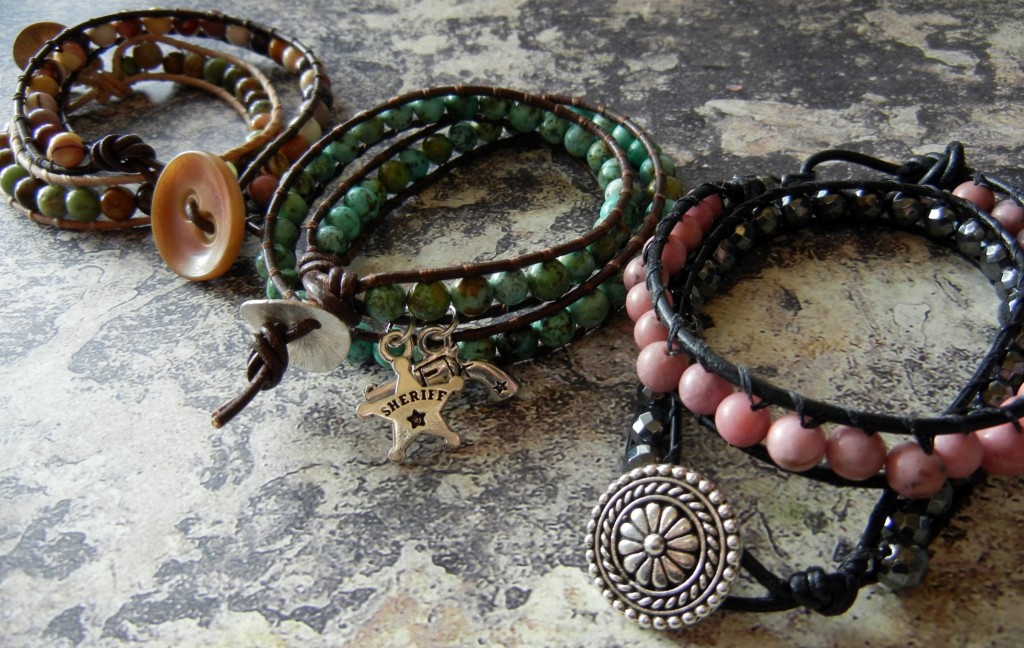
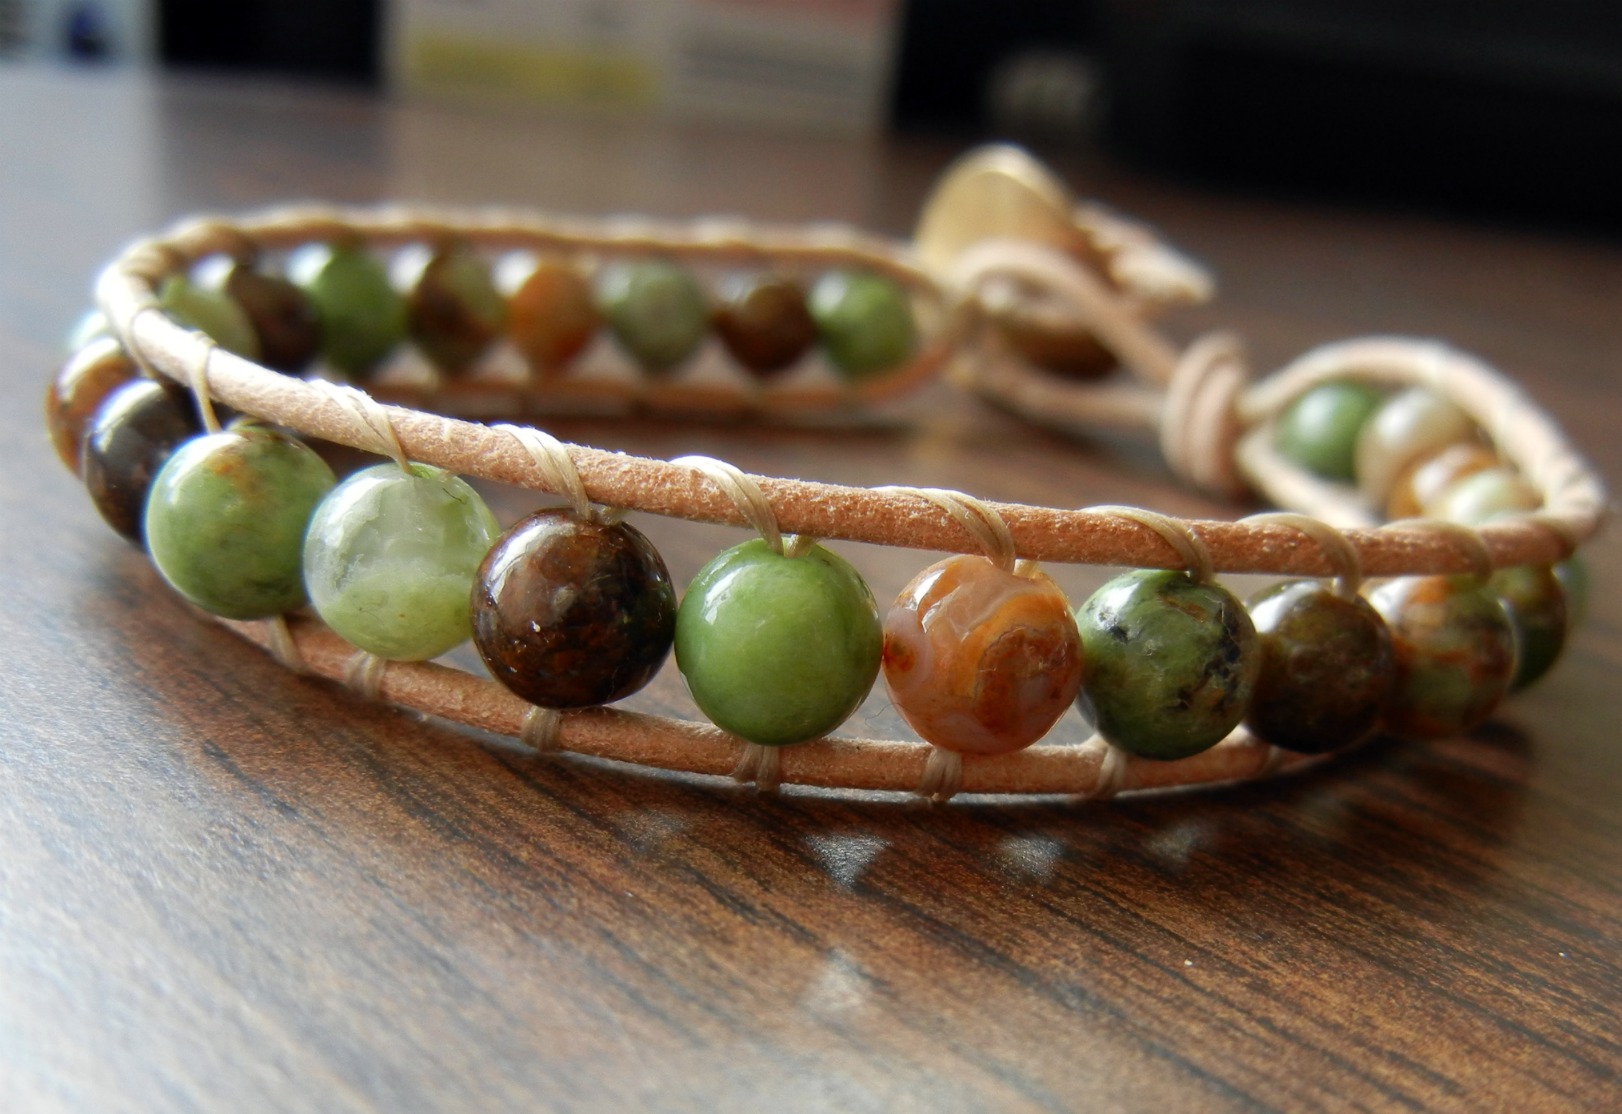
How to make wrapped leather bracelets

March 8, 2011


Triple-wrap leather bracelet with blue tigereye beads

Let me begin by stating the obvious – this style of wrapped leather bracelet is EVERYWHERE this season. Everywhere! Even my athletic clothing catalogs – which only have maybe three pieces of jewelry – are featuring this style. Why? Because it is casual yet chic and infinitely customizable! The catalog (which shall remain nameless) priced each bracelet at $120. Needless to say, you can make your own for far, far less using supplies from Rings & Things!

leather wrapped gemstone bracelets
Five different leather wrapped gemstone bracelets designs: green opal, mookaite, African turquoise, hematite and rhodonite

The supply list is pretty short:

  • 4-6mm round beads We used gemstone beads, but glass, crystal beads or pearls would also be lovely. The number you need depends on how many times you want to wrap the bracelet around your wrist. Larger beads work too – but they will start getting heavy on multiple-wrap styles. All the bracelets pictured in this post use 6mm. Our new wrapped bracelet kits use 4mm beads. <– The kits are great, because once you make your first bracelet, you’ll have plenty of thread and needles left over with which to make many more!
  • Leather cord Our examples use Greek leather. Both the 1.5mm and 2mm worked great.
  • Thread Needs to be sturdy and able to pass (doubled) through your beads twice. Pick a color that matches your leather or that provides a pretty contrast. We used earth assortment). We now have tubes with all black or all brown bobbins available too!
  • Button or bead for the clasp. Rings & Things has some pretty buttons from TierraCast.
  • Required tools: needle (size 12 is a good general choice), scissors, work surface with clips or clothespins.
  • Optional tools: needle threader, thread conditioner, glue (GS Hypo Cement, Bead Fix or other fabric-friendly adhesive for extra security on your knots).
Wrapped bracelet made with green opal gemstone beads and natural Greek leather.

The technique:

  1. Choose your bracelet length and cut your leather. The formula is double your finished bracelet length plus extra for making the knots. For single-wrap bracelet, measure your wrist and then triple that number to get the length of leather needed (7″ wrist = 21″ of leather). For a triple-wrap, multiply your wrist by seven (7″ wrist = 49″ leather). It is better to leave your leather too long than to end up with not enough.
  2. Cut a long piece of thread (10-12 feet) and thread your needle. Knot the end of the threads.
Knot the leather and thread together, leaving a loop on the end.

Holding the thread by the knot, let the needle fall to the ground so it is centered on the thread. Fold your piece of leather in half, leaving a loop large enough for your button to fit through. Holding the knot-end of the thread with the leather, tie an overhand knot so that your thread and leather are now connected.

Make sure your button will fit through the loop before you tighten the knot.
  • Attach your piece to a work surface.

    Using binder clips or clothespins, attach your loop to the top of a piece of cardboard. Use a second clip to attach the leather ends to the bottom of your board (leave the thread loose).

  • Starting with your thread in the middle of the two strands of leather, wrap the thread OVER the right strand to the outside, then UNDER the right, OVER the left to the outside, then UNDER the left and OVER the right. It is a simple figure-8 stitch.
  • how to stitch a wrapped leather bracelet
    Over, under, over, under – once you get a rhythm going, the bracelet is super easy to make!

    Do this 5-6 times, pulling the thread tight around the leather to form a binding. (The pattern could go either way, but since I’m right-handed I’m going to describe it this way. Reverse it if needed!) Here is a close-up of the lashing:

    A few stitches without beads secures the thread nicely on the leather.
  • Now you are ready to start adding beads. After your thread has passed UNDER the left leather, add a bead. Hold the bead between the two strands of leather, and stitch the thread OVER the right, back UNDER the right, THROUGH the bead hole again and OVER the left. Bring the thread UNDER the left and add another bead in the middle. Repeat many many times! Keep the beads pulled in snugly against the leather. Pay attention so that your stitches all face the same way. If your thread seems to snag a lot, use a bit of thread conditioner or beeswax on it.
  • Adding the first bead to a wrapped bracelet – but really I’m posting this picture to show off Jaci’s manicure!
    A work in progress. See how the beads line up inside the leather?
  • To finish the bracelet, form several stitches without beads, just like you did in step 5. Now you are ready to attach your button or bead. Ideally, you’ll have enough leather left to tie on a button with a nice knot on the back and trim the ends.
  • button end for wrapped leather bracelet
    Long tails makes it easy to tie on a button closure.
    If your button has a small loop, you might need to miter (angle) the leather end and pull it through with pliers.
    Buttons, disk beads and crimp ends can all be used to finish the bracelet ends.

    If somehow you come up short, all is not lost. You can tie a disk bead onto just one strand of the leather (use glue to enforce your knot), like on the 2nd bracelet from the left. Or if your ends are really short, use a hook-end crimp, as shown on the pink bracelet on the right.

  • If desired, add a touch of glue to the knots to ensure the thread is gripped securely by the leather. Trim ends as needed.
  • Other design options:

    • String your button or bead clasp first, then tie a series of knots on the end to make the bracelet length adjustable.
    • Use jump rings to attach a couple of charms, like on Mollie’s Belle Star bracelet.
    • Leave the leather tails long and add beads or decorative knots.
    • Substitute a different type of cord for the leather, as in Tracy’s rattail and dragon blood jasper design:
    wrapped gemstone bracelet with rattail instead of leather

    Have fun creating your own wrapped bracelets! You’ll find it is quite addictive once you start. Please feel free to post questions – I will do my best to answer! ~ Cindy


    Need supplies? Rings & Things ships around the world! The most popular wrapped leather bracelet supplies are:


    Q: “How do you start a new thread in the middle of the bracelet?”

    (answers selected from replies to blog comments)

    A: It’s best if you can avoid running out of thread (start with 10-12 feet to avoid running out). But if you do, start a few beads back and go through them again. This means you’ll have to go through some of your beads 4x, which (depending on your beads and cord) might be impossible. Other problems are that your bracelet will be weaker than if you were able to use 1 continuous thread, and you’ll be able to see the section that has twice as much cord as the rest of the bracelet.

    A2: Get really good at hiding knots in your beads. =)

    A3: If you’re down to just a tiny bit of thread, it is going to be hard to tie the ends onto new strands, but if you realize you’re not going to make it and cut off the needle, rethread and knot the strands together, you can probably pull the knot inside of a bead. I hope this makes sense – basically, you’re not “starting anew” but pausing, adding on some extra thread, and picking up right where you left off. 🙂

    www.rings-things.com

    Edited December 2021 to update links.

    Project Alert: How to use leftover beads to make a Statement Piece!

    February 25, 2011

    This blog is designed to address what I call “Orphan Beads”…

    If you are a jewelry maker, then inevitably you have some beads lying around at your house or in your studio. You know what I’m talking about; those stray beads leftover from projects past? A gemstone here, a few lampwork glass beads there.

    Too often these lost beads find homes at the bottom of our “bead organizers” and ” junk drawers” to never be used. I used to stare at these beads with turmoil, wondering how to organize them. In fact, I am ashamed to admit that in fits of OCD cleaning, I have actually thrown these lost beads away.

    But at last, I have found a project to use these stray beads, and in a way that is actually appealing!

    To begin this project, you need very little. Start by collecting all of your “orphan beads” together. Now pick one color palette to work within. As you can see here, I have chosen to work with hues of blue and teal.

    Try to find an assortment of beads in varying materials. If you look closely, you can see my assortment contains some Mother of Pearl, Magnesite Skulls, Resin Rectangles, Foil Glass, Recycled Glass Trade Beads, Turquoise, Amazonite, Shell Pearls, Paua Shell and even some Coral from our limited-availability stock. (Just to name a few!) I also found some various beads in Antiqued Silver Plate. I think it looks nice to add a metallic touch! If you like, you can incorporate some found objects as well, such as buttons and washers, into your design.

    Once you have your random bead assortment, then you can begin the stringing process. I like to use waxed linen cord with a little GS Hypo Cement to seal any knot ends.

    Start creating your necklace with a bead that has a hollow ring-like shape if possible, like I have done below. Cut a piece of waxed linen about three or four feet long. Find the center of the strand and tie the linen around your first bead, securing with a simple knot.

    Now begin adding beads from your random assortment. Just place one of the two strands through the holes of the beads. Secure with a knot between each bead.

    This is a good time to have a bead reamer handy for those beads that have a hole just a little too small for the waxed linen. Continue this process until you get near the end of your strand of waxed linen. Use another hollow ring-like shape bead here. Tie a secure double knot, trim the waxed linen and seal the edges with hypo fabric cement.

    Cut a new strand of waxed linen and repeat the process. I like to make a necklace that ends up long enough to double over and still be long, or triple over and be really chunky. (About 7 feet total!)

    The end result is a mixed-media statement necklace that utilizes all of your random leftover beads!

    Tiffany White

    Rings & Things Showroom

    Design Team


    PS: here are some handy links to some other how-to’s in the Rings & Things blog!

    www.rings-things.com