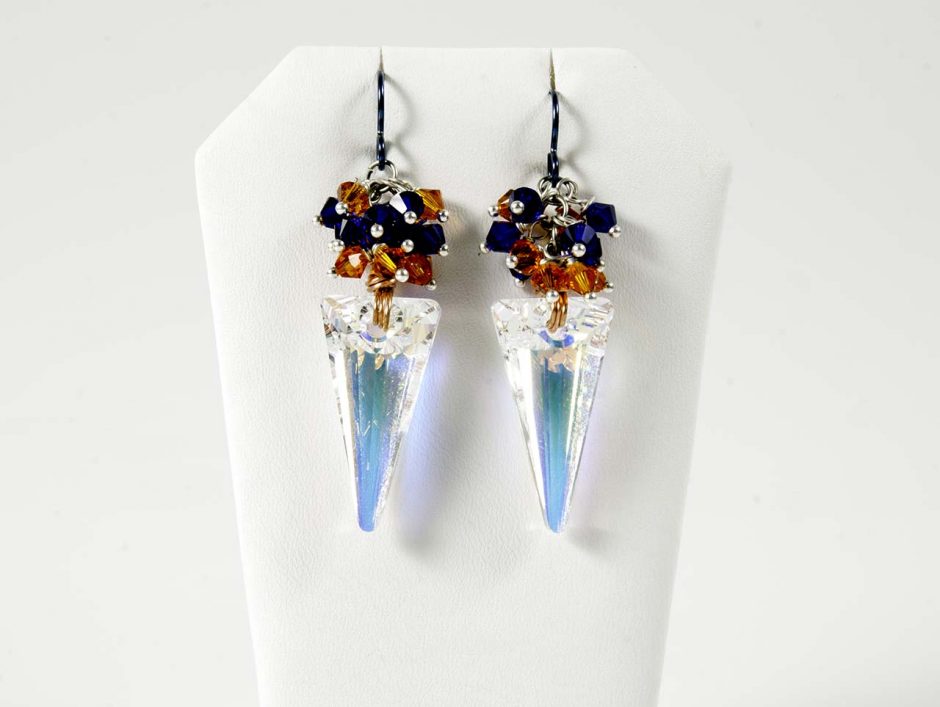
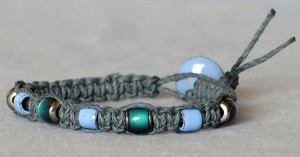
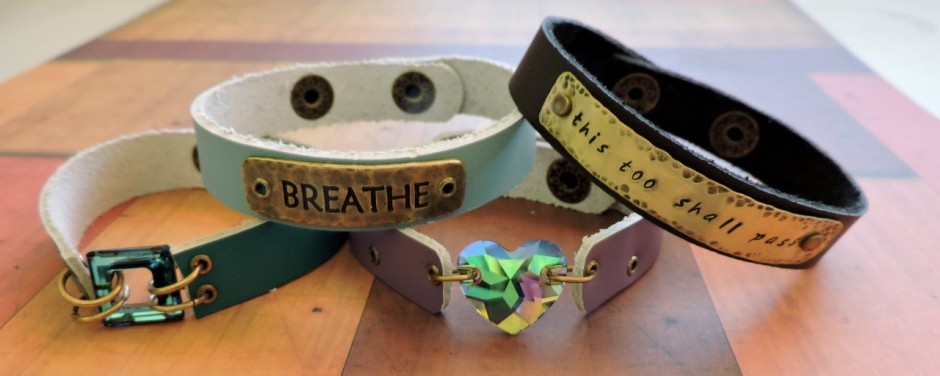
With football season fast approaching, it’s time to break out your team spirit! Colorful jewelry that shows off team colors will make it easy for everyone to know who you’re cheering for! Simply swap out the Swarovski crystal colors to make earrings that support your favorite team!
Continue Reading…
How to Use Center Crimp Cord Ends
October 14, 2014When you’re making jewelry, center crimp cord ends are an easy way to cleanly finish the ends of a wide variety of jewelry cord including but not limited to leather, silk ribbon, and chain.
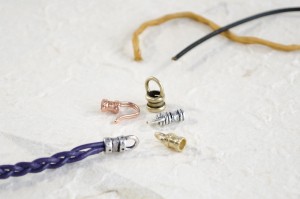
Center crimp cord ends are an easy way to cleanly finish the ends of a wide variety of jewelry cord.
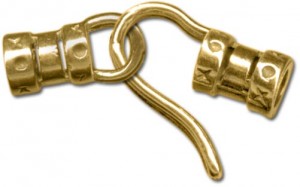
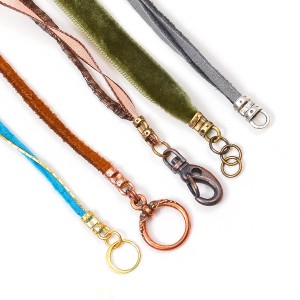
You can finish your necklace or bracelet with a loop and a hook:
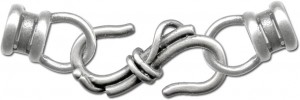
Or, use two loops and the clasp of your choice (shown here is an “S” hook clasp):
Here is how to apply the crimp ends:
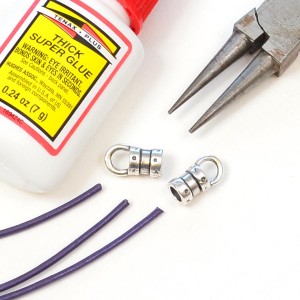
1. Gather your supplies. All you really need are the crimp ends, some round nose pliers (or non serrated chain nose pliers) and of course your cording material. Super glue is optional, but adds extra security.
2. For added security, put a dab of super glue inside the crimp end. Slide the cording end(s) into the crimp end. Do this quickly before that dab of glue dries.
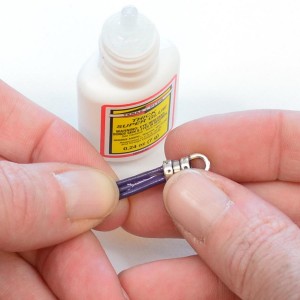
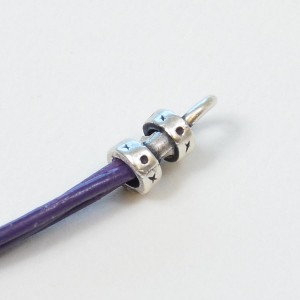
Insert the cording into the center crimp end. A dab of glue will offer added security to your clasp.
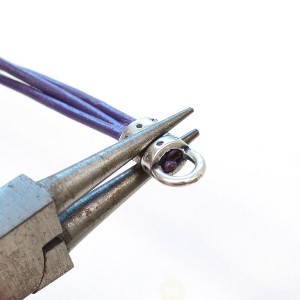
3. Holding the crimp in place over the cording, use your pliers to firmly squeeze the center portion of the crimp and clamp it down on the cording.
4. Once crimped, the center of the end piece will be flattened down on the cording. Crimping the metal on top of the glue will ensure a secure connection for jewelry designs.
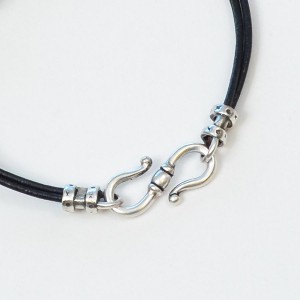
Center crimp ends with loops combined with an “S” clasp and leather cording make a simple yet stylish bracelet.
Here are some jewelry inpirations that incorporate the use of center crimp ends. These designs and more can be found in our Jewelry Design Gallery where you will find the complete supplies list as well as tips from the designer. Click on the images to take you there.
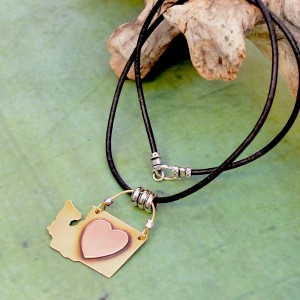
Go West Necklace Tutorial by Mollie Valente
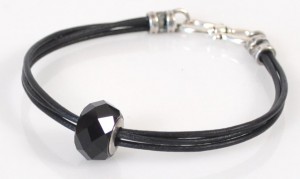
Basic Black Bracelet Tutorial by Rita Hutchinson
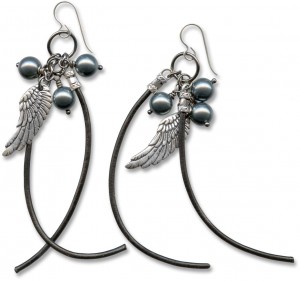
Bastian’s Earrings Tutorial by Lindsey Green
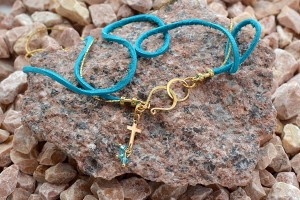
New Connection Necklace Tutorial by Karin Davis
Now that you know what to do with center crimp cord ends, don’t be shy! Use them to make bracelets, necklaces, earrings and more.
Did you know? You can Shop for center crimp cord ends here.
Happy creating! ~ Val
Say it Your Way with Easy Metal Stamped Jewelry
September 10, 2014You don’t have to be Frank Sinatra to do things your own way! That’s the beauty of metal stamping as a jewelry technique. Not only do you get to assemble components, you get to make your own components – and they can say whatever you want them to say!
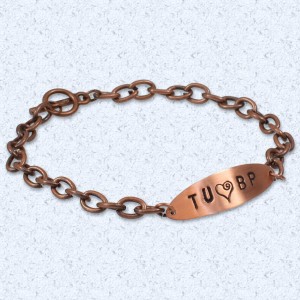
This Young Love bracelet is a perfect example of how you can easily customize jewelry with metal stamps!
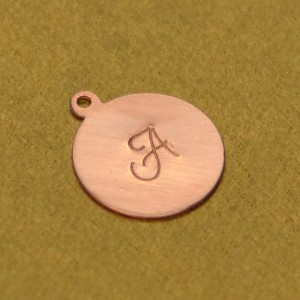
Letter stamps are the perfect way to create monogram jewelry, plus jewelry with names or inspirational sayings. Design metal stamps are the perfect way to add cuteness and panache.
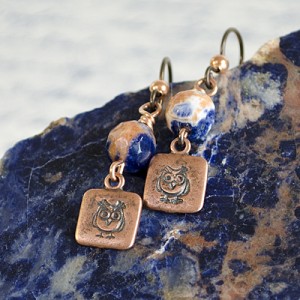
Learn to make these simple metal stamped earrings – just click the image above for the complete parts, ready to buy.
Designer Amy Mickelson’s “Hootie and the Sodalite Earrings” feature custom owl charms she made using an ImpressArt Metal Stamp and a JBB Antiqued Copper Plated Square Tag Charm. These JBB tags are plated especially for stampers – pretty amazing! For more on these components, see the full parts list and tutorial here.
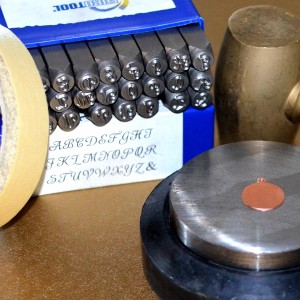
The basics of jewelry stamping are easy and only require a few tools. The tools are a small investment, but will last for years and thousands of impressions!
Supplies you’ll want:
- Letter stamps and/or design stamps
- A steel bench block (the block pictured is #69-123 combo block)
- A Brass hammer (the hammer pictured is #69-346)
- Metal blanks & tags – choose from 100’s of options!
- Optional: Stamp Straight Tape
The basic steps to jewelry stamping:
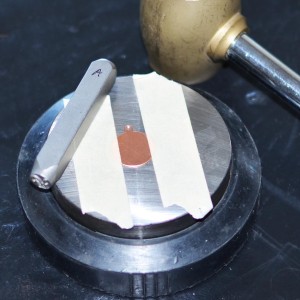
Once you’ve planned your design, secure your metal tag or blank onto your steel block with tape. Stamp Straight Tape by ImpressArt is more expensive than masking tape, but it offers a sturdier edge and does not leave sticky residue.
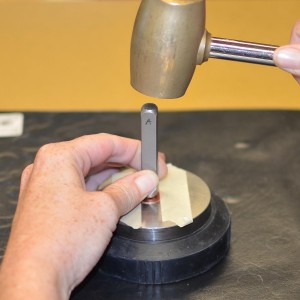
Strike the perfectly vertical stamp with one firm blow. This is important for achieving a clear impression.
That’s all there is to it! It really is that simple. Then, you can use your completed stamped charms to make earrings, necklaces, bracelets, gift tags, and more!
For a great monogram jewelry tutorial, see “Ava’s Ladies in Waiting” Necklace Tutorial in our Design Gallery.

Click this picture for all the parts and instructions you need to make adorable metal stamped owl earrings.
To make fun owl earrings, see the “Hootie and the Sodalite” Earrings Tutorial.

Click this picture for all the parts and instructions you need to make a simple metal stamped bracelet.
For the full how-to on making a metal stamped chain bracelet, see our “Young Love” Bracelet Tutorial.
Rings & Things offers a huge variety of metal stamping blanks, plus jewelry stamping tools and supplies with fast shipping and free returns.
So what are you waiting for? Isn’t it time to say things your way! ~ Melissa
Make a Simple, Dainty Sterling Silver Necklace
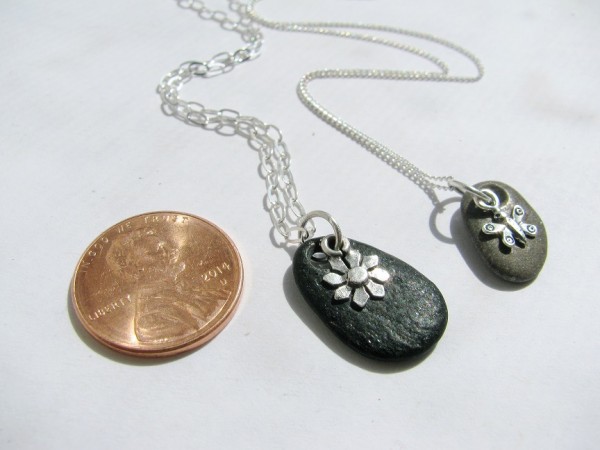
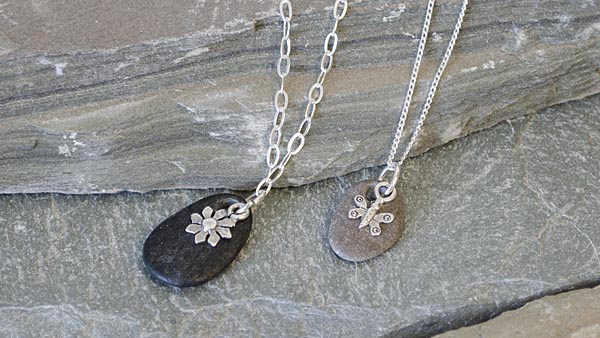
September 5, 2014Sometimes when it comes to jewelry, less is more. That’s the case when it comes to these adorable river rock and sterling silver charm necklaces designed by Rings & Things’ Amy Mickelson. This project is easy, yet really pretty! Plus there are a ton of different sterling silver charms to pick from!
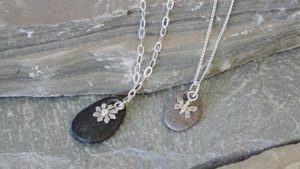
These necklaces only require one tool and a few simple components to make! The sterling silver chain necklaces are already finished with a clasp, making them a breeze to use. Plus, I just adore the contrast between the natural river rock and the dainty sterling silver charms.
Supplies and Tools Needed:
- Chain Nose Pliers (Amy used the #69-271-99 EURO TOOL 4-piece glitter set)
- Sterling Silver Jump Rings (Amy used #37-295-460, 6mm non-tarnish)
- River Rock Pendants, holey beach stones or any lovely, natural top drilled focal
- Sterling Silver Charms (Pictured, Flower and Butterfly Charm)
- Sterling Silver Necklace Chains (Pictured, Oval Curb Chain, #50-101-18-18 and Fine Curb Chain, #50-101-13-16)
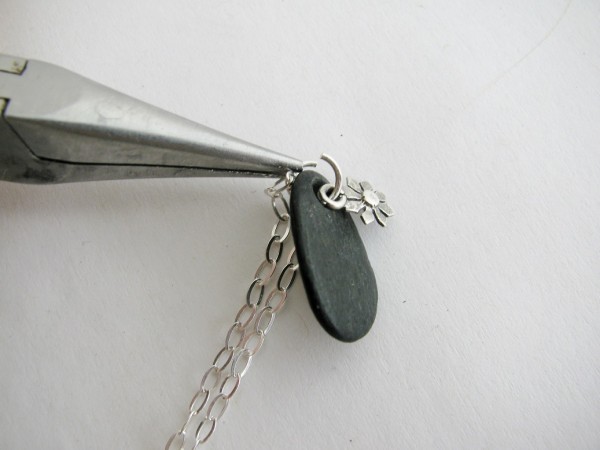
Simply layer the items on the sterling silver jump ring. Chain first, then river rock pendant, then sterling charm.
Creating this necklace couldn’t be easier! Using your chain-nose pliers, pry open the jump ring a little. You only need to open it enough so that you can layer the three elements together. When opening jump rings, remember to always twist the ends in opposite directions to separate them. Do not “oval” the ring by pulling the ends apart.
Place the chain first, then the rock pendant, then your sterling silver charm onto the jump ring. Close the jump ring carefully, so that the ends line up flush.
Each finished dangle is smaller than a penny!
If you like this look, buy the parts to make these necklaces now!
You can check out additional possibilities by browsing our huge selection of sterling silver charms and sterling silver chain necklaces! My personal favorite chain is the sterling faceted ball chain, because it sparkles!
~ Tiffany
Embellish Jewelry Blanks with Crystal Chatons
November 11, 2013It doesn’t matter if you’re a rhinestone cowgirl or an urban fashionista – dressing up belt buckles and other jewelry blanks with sparkling crystal chatons is just plain fun!
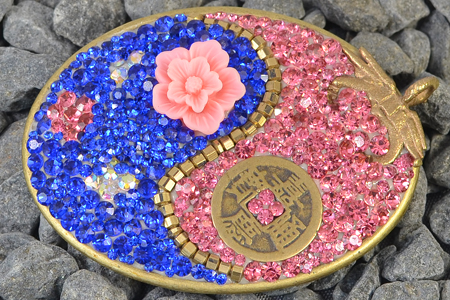
Use the steps below to either recreate the Zen Yin belt buckle by Jan or to embed you own designs in a wide range of jewelry components including bezel cups, buckle blanks, cuff links, and more.
Supplies:
- Belt buckle blank or bezel cup
- EnviroTex Jewelry Clay
- Crystal chatons with pointed backs
- Jewel setting tool
- Beads, buttons, coins, resin flowers and/or other embeddable objects
- Vinyl, nitrile or latex gloves
- Vegetable oil and/or baby powder (optional)
To make the exact belt buckle pictured in this blog, see the “Zen Yin” belt buckle full parts list in our Design Gallery.

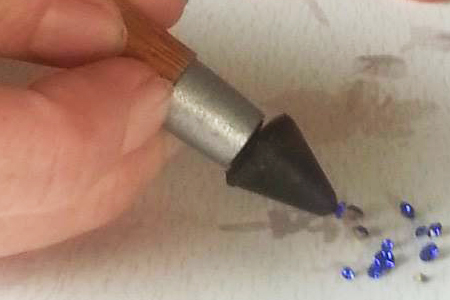
A jewel setting tool makes it easy to set chatons in your jewelry clay.
Tip: A jewel setter makes it much easier to set small objects into the clay! While bare fingers can hinder your field of vision and upset other elements of the design, jewel setters provide a wax tip to lightly pick up and place small objects in just the right spot.
Plan your layout before you unwrap the clay. This allows you to tinker with design options without the clay drying prematurely. This is especially important on large objects like a belt buckle.
Wear thin gloves to protect your hands. Measure equal amounts of “A” and “B” types of clay, and form each material into a separate ball. If the clay sticks, apply a thin coat of vegetable oil.
Combine the two balls together until they are well blended and uniform in color.
Press the clay into your jewelry blank. You can smooth it out by adding a little vegetable oil on top. If it gets too sticky, dust it lightly with baby powder.
Place larger objects and focal points into your clay first. Tip: To save time, you can leave strung beads on the string, rather than placing them individually in the clay. Trim excess string once the beads are in place.
Next, fill in the remaining exposed clay with sparkling crystal chatons. As mentioned above, a jewel setter can make this task quicker and easier. When you are placing your chatons into the clay, be sure not to press or tap them in to deeply. The clay will rise up a little bit around them particularly when it is very wet.
Set aside your design in a safe spot and allow the clay to thoroughly dry, based on the manufacturer’s instructions. EnviroTex Jewelry Clay fully cures in 24 hours to a hard, durable, and shock resistant substance with a smooth, porcelain like surface. It does not shrink as it cures!
Below, check out more fun designs Jan made with EnviroTex Clay and crystal chatons.
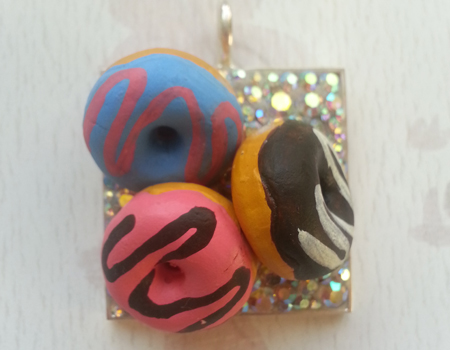
These chunky donut beads are held fast in the crystal clay,
demonstrating how strong EnviroTex clay is!
Homer Simpson wouldn’t be able to resist this whimsical bit of bling! It’s made with donut beads, aurora borealis crystals, and a square bezel-cup pendant blank.
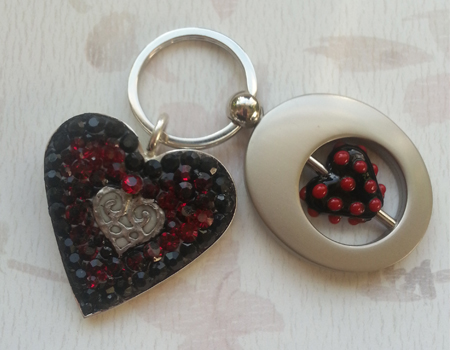
EnviroTex Jewelry Clay is durable enough for heavily-used objects
like key rings. Add heart to designs with heart bezel cups.
Heart-shaped bezel cups add an extra bit of love to jewelry designs.
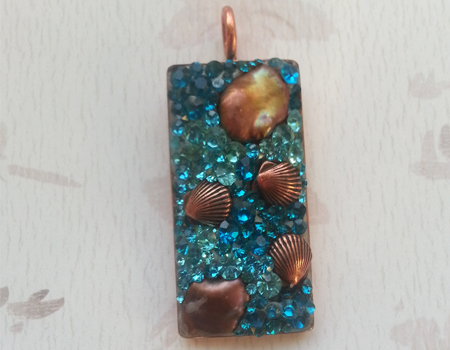
Go nautical with embedded scallop shell beads and freshwater pearls.
Rectangle bezel-cups provide a great shape for custom pendants with a touch of bling. The design pictured above is adorned with shell beads and freshwater pearls surrounded by blue zircon and aquamarine crystal chatons.
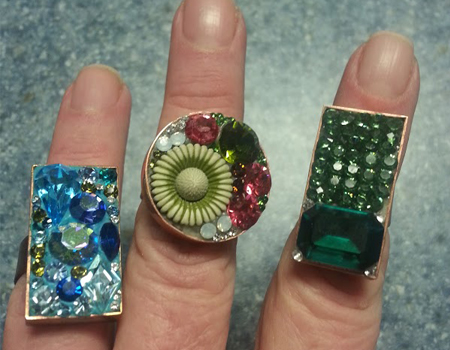
Adorn your hands with bezel cup ring blanks!
Bezel cup ring blanks come in several colors and shapes. Some styles are exclusive to Rings & Things, and all styles are adjustable to fit any ring size. They’re perfect for making blingy costume jewelry.

You don’t have to use crystals.
This polar bear ring has seed beads embedded in the jewelry clay.
Embed seed beads and other objects in the crystal clay to see what other effects you can achieve! This winter-themed ring has a polar bear bead and a “Snow Ball” seed bead mix embedded in the clay. Let your imagination be your guide as you have fun making mosaic jewelry and a whole lot more! 🙂
How to Make a Lashed Chain & Leather Bracelet
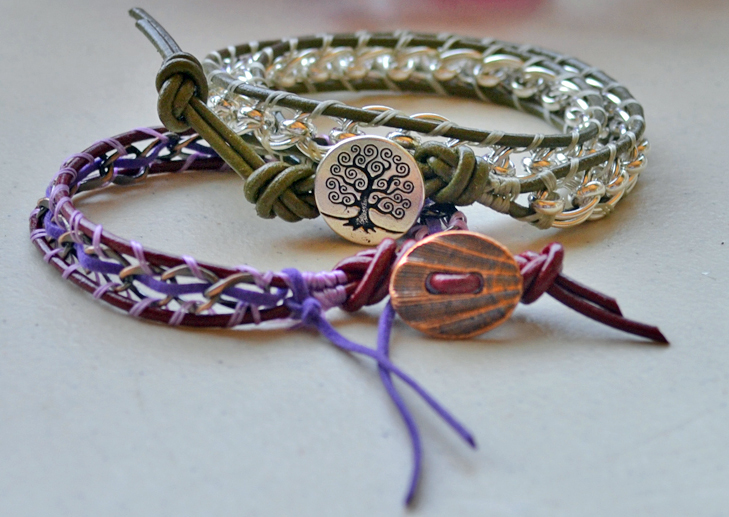
July 2, 2013Lashed wrapped leather bracelets aren’t just popular because they look great — they’re also a hit because once you know a couple tricks to get started, they are an easy and fun DIY jewelry project to make! A great twist on this hugely popular style is to lash chain instead of beads to leather cord. Read on to make your own leather and chain wrap bracelets! Continue Reading…
How to Macramé a Hemp Bracelet
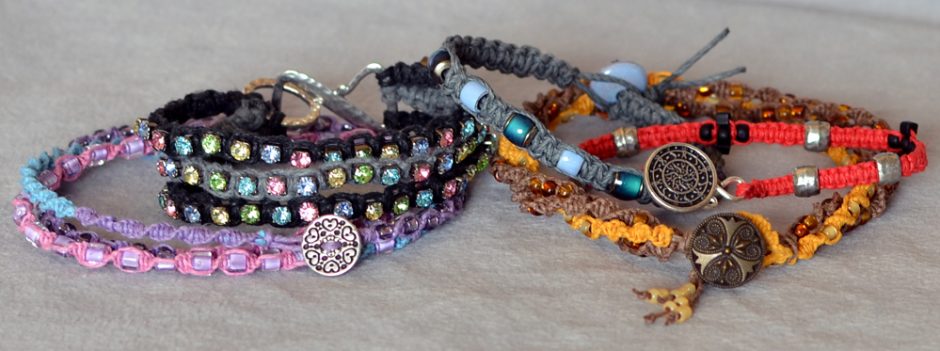
May 7, 2013Growing up in the 1970’s, I predictably spent part of my childhood making macramé. In fact, I spent hours tied to the ends of masses of cording creating the ubiquitous plant hangers that have become an icon of the era. Call me sentimental, but I got a warm and fuzzy feeling when asked to dust off my knotting fingers and make a hemp macramé bracelet for Rings & Things’ Blog.
Continue Reading…Jewelry Design Gallery Tricks
June 12, 2012Hi bloglandia! It has been awhile! I’ve been busy preparing our summer catalog (set to hit mailboxes early July). Once again it features lots of fun new beads, jewelry findings and mixed-media supplies. Our design team puts in a lot of work to create jewelry that fits with current trends and also helps illustrate how different products might be used. Sometimes it just isn’t so obvious how that little hook with crimp, or whatever it might be, could tie into a design!
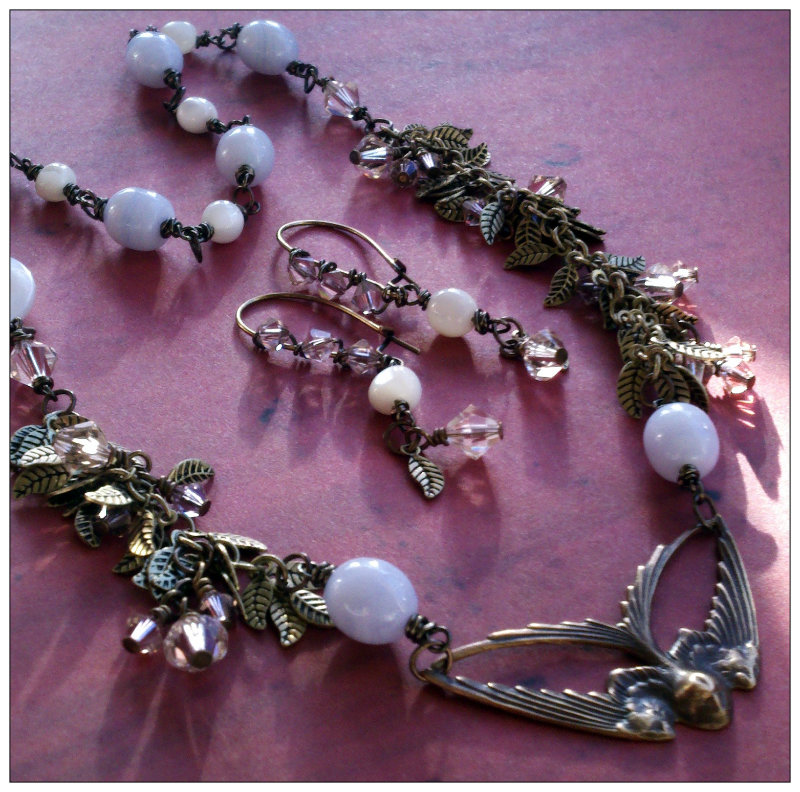
Spring Skies necklace featuring blue lace agate, Vintaj natural brass, feathery chain and the Bohemian Rhapsody mix of SWAROVSKI ELEMENTS crystal bicones.
We integrated our design gallery with our online store to make it easier for you to purchase the supplies for designs you like. However, we soon discovered a drawback: while it is easy to browse the jewelry designs, it is somewhat difficult to find one in particular. If you search for the name of a jewelry piece, our website brings back zero results (so sad!).
But – there is an upside. If you search for a certain stock number, you can now find jewelry designs that use that product! This is really exciting, to me at least.
For example, say you are looking at different types of clasps. You find hook and eye clasps on p. 273 of our main catalog and wonder if they’d really look right on your jewelry. Here’s how to find a design that uses those clasps:
1. Go to www.rings-things.com.
2. Enter the base stock number (39-293) in the search box and you’ll see all the colors of that clasp, AND:

Several of the category results up top are the names of jewelry designs. Sweet!
3. Let’s click on Spring Skies.

Wait, where is the necklace? Hold on a sec. We are looking at the exact clasp used on that necklace – but the necklace itself is nowhere to be seen.
4. Click into the product details.
 Same clasp, but now look above the product to see the category we’re in…Spring Skies!
5. Click the Spring Skies text link.

And voila! At long last we’ve arrived in at the design gallery listing for the Spring Skies necklace. Here you’ll find tips on how to make this piece, links to popular (and free!) jewelry-making technique sheets as well as all the products you need to create this design.
Obviously, we’ve got thousands of products and not all of them are going to have designs (I said our design team works hard – but we do have to sleep sometime!). Searching for just the base stock number (with many exceptions, the rule is that the final -# designates the color or plating of a family of items) will increase your odds of finding example jewelry that shows exactly what you are looking to find! Also, just take a look at those top category search results from time to time to see if anything intriguing pops up – it might lead you to a whole new look!
Happy designing! Please feel free to leave a comment if you have any questions about our design gallery or website in general. ~ Cindy
Beads can prolong your life!
October 11, 2010Well…not actually…but we learned the coolest thing the other day:
You can pick beads that extend the life of coated stringing cables (like ![]() Beadalon, Soft Touch, TigerTail and
Beadalon, Soft Touch, TigerTail and ![]()
Soft Flex). How’s that?
- Certain beads help the beading wire’s coating to “wear” more slowly.
- Other beads can wear the coating off faster, sometimes within a couple of weeks of making jewelry – even when the beads themselves look smooth and aren’t too heavy.
Of course, we all know to use the heaviest possible cable (thickest and as many strands as possible) for our projects, and not string too tightly. Why? Using thin stringing cable and stringing it tightly can weaken and cut into the cable.
But what we just learned from an industry source is that sometimes a smooth-looking bead has chemical residue that can eat away at the coating!
The three types of beads mentioned to us as often being rough on stringing cable were these:
- vermeil (the worst with chemical residue)
- Bali beads (also responsible for cutting the cord with sharp edges)
- brass beads (like certain trade beads)
These are still all great beads, of course! But the takeaway is that you can choose the best possible combination of stringing material and beads when you make jewelry.
You learn something every day!
With this knowledge, you can plan for maximum long life in your jewelry…
Eyelets, grommets, rivets, and…aglets?!
October 4, 2010One of my coworkers passed along some information that clears up a fine distinction regarding jewelry hardware:

