Adjustable bangle bracelets are everywhere these days! They are the hottest new trend, so I just had to figure out how to make them. They are very easy to make! You can make them with brass for a gold look or silver filled wire like I did below.
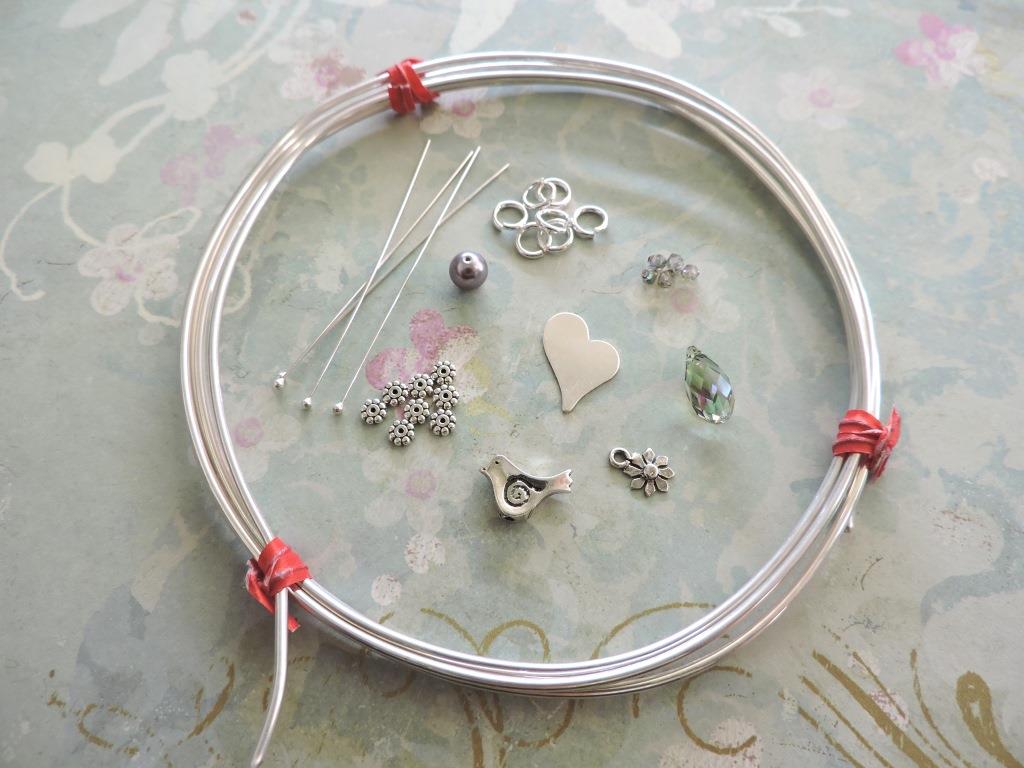 Materials you will need to make this project:
Tools needed:
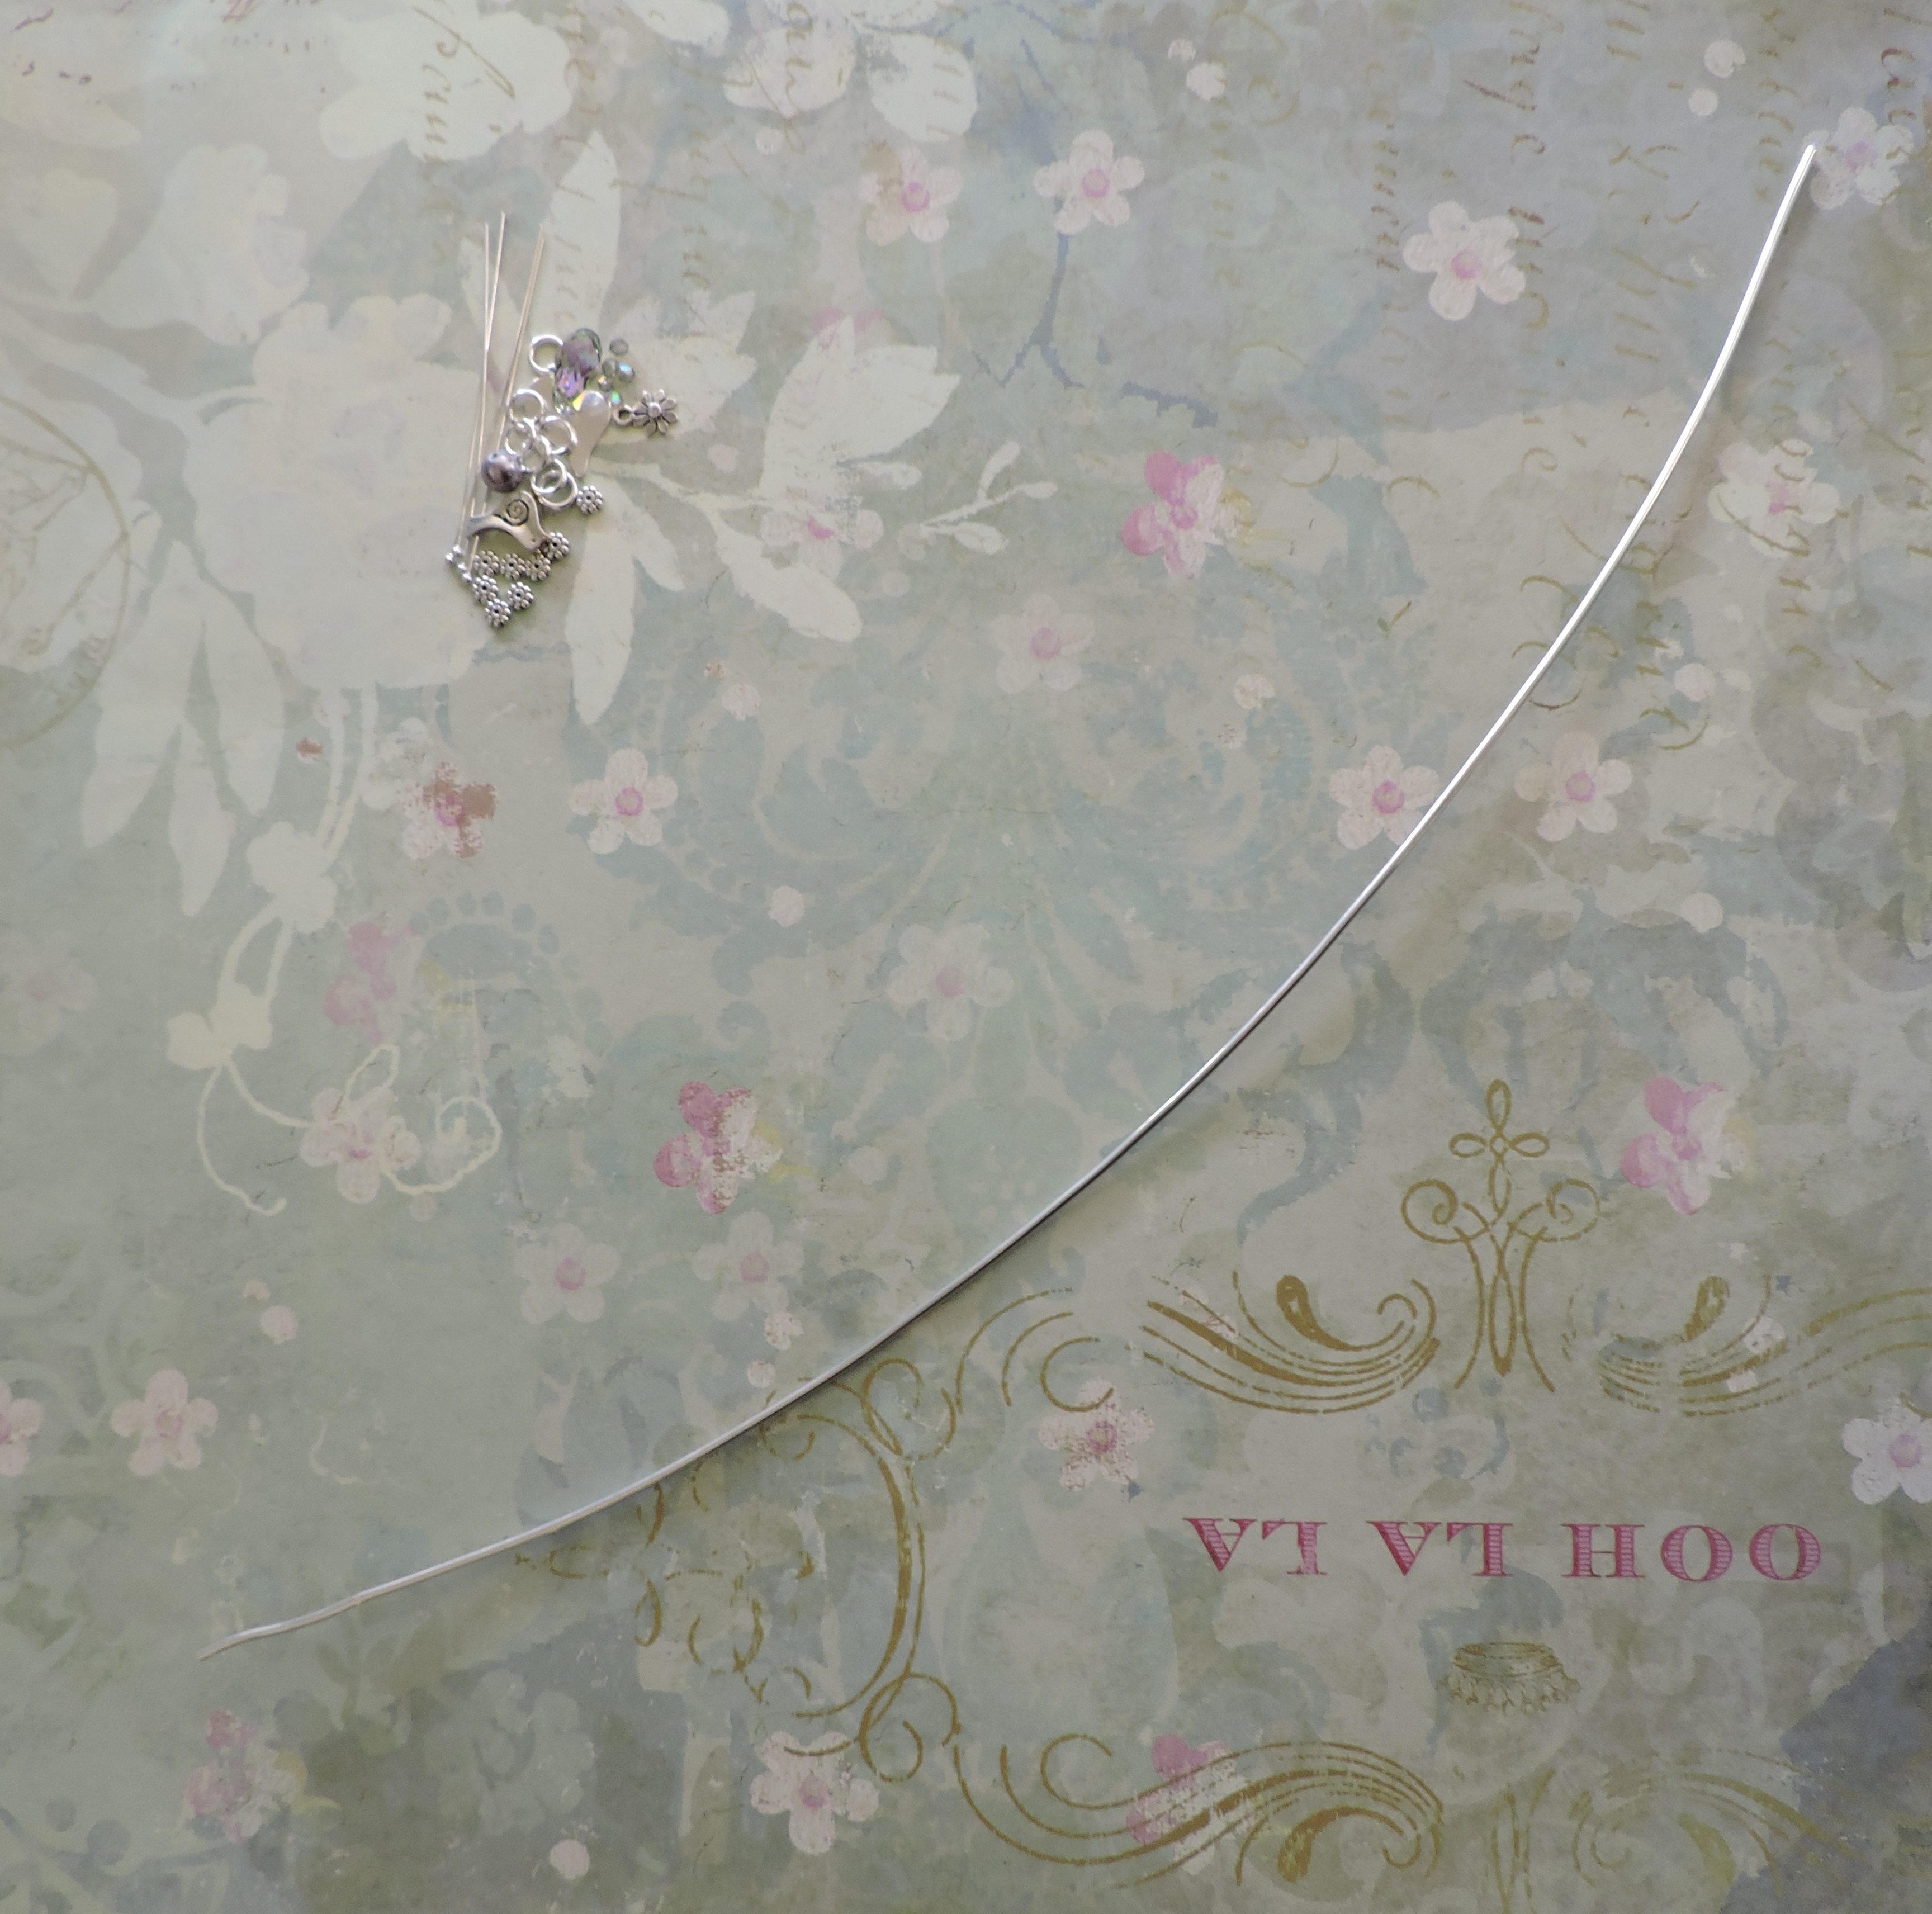
Cut a piece of wire 12 inches in length.
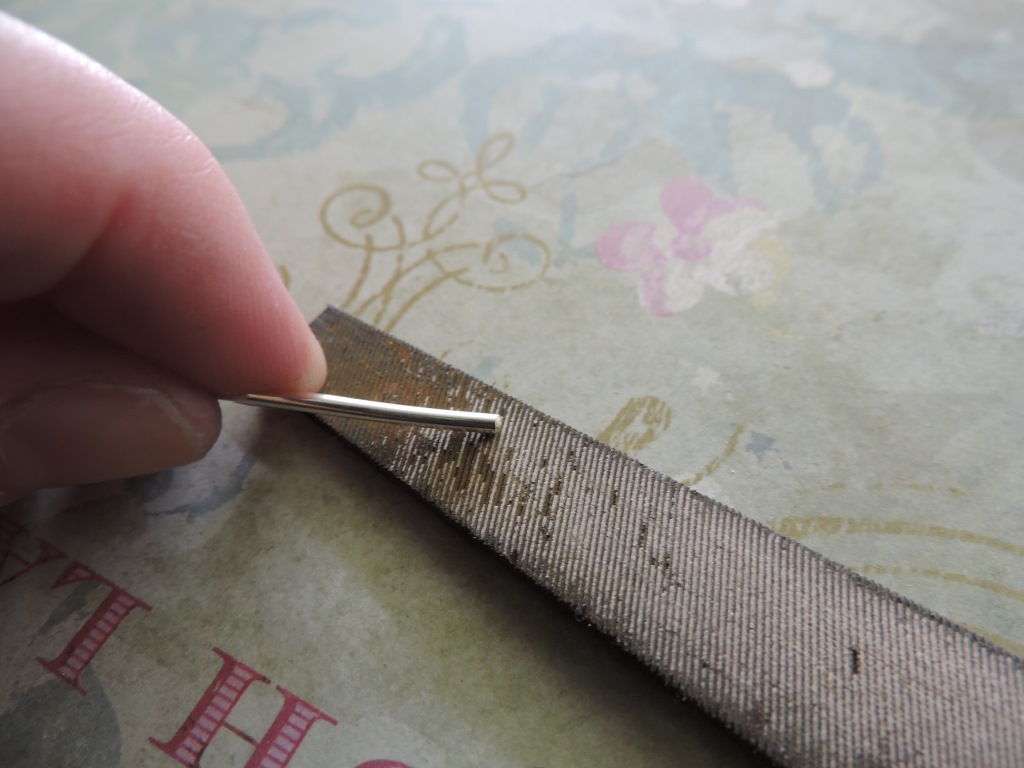
File edges of wire smooth.
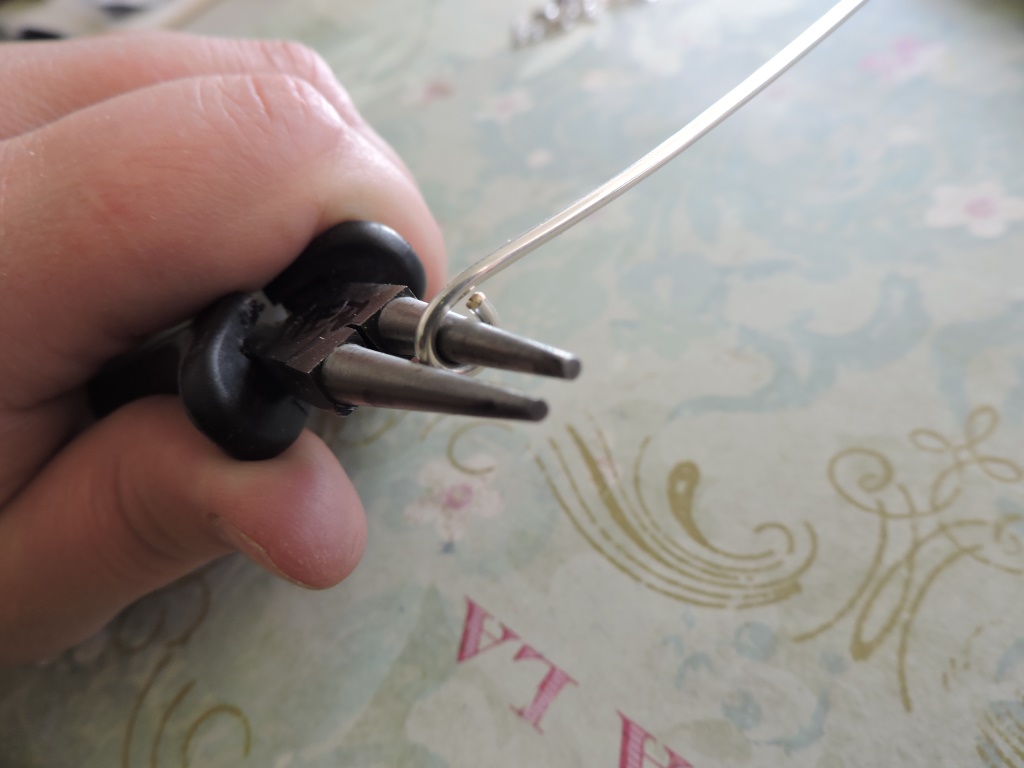
Using round nose pliers, make a loop with an inner diameter of about 3-4mm on one side of the wire.
On the other side make a matching loop, but facing the opposite way, so it’s like a very long S.

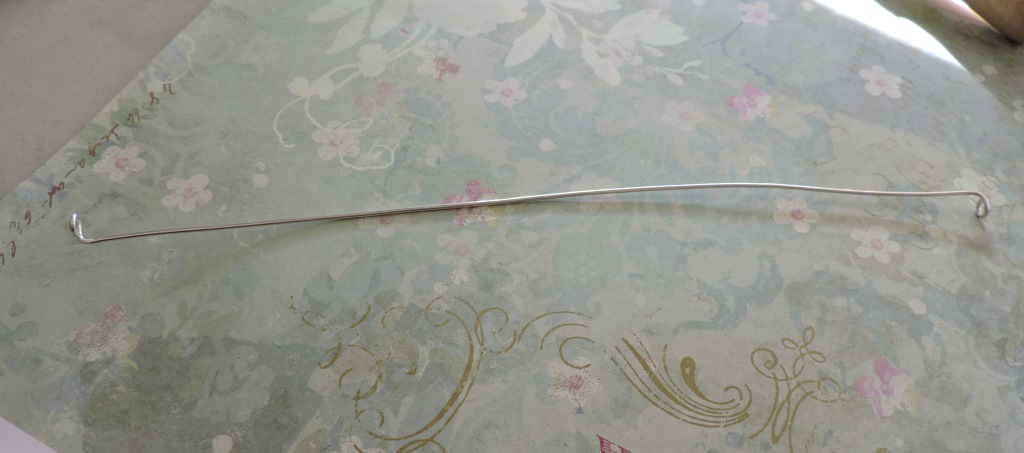
Here’s what your wire will look like after both loops are made.
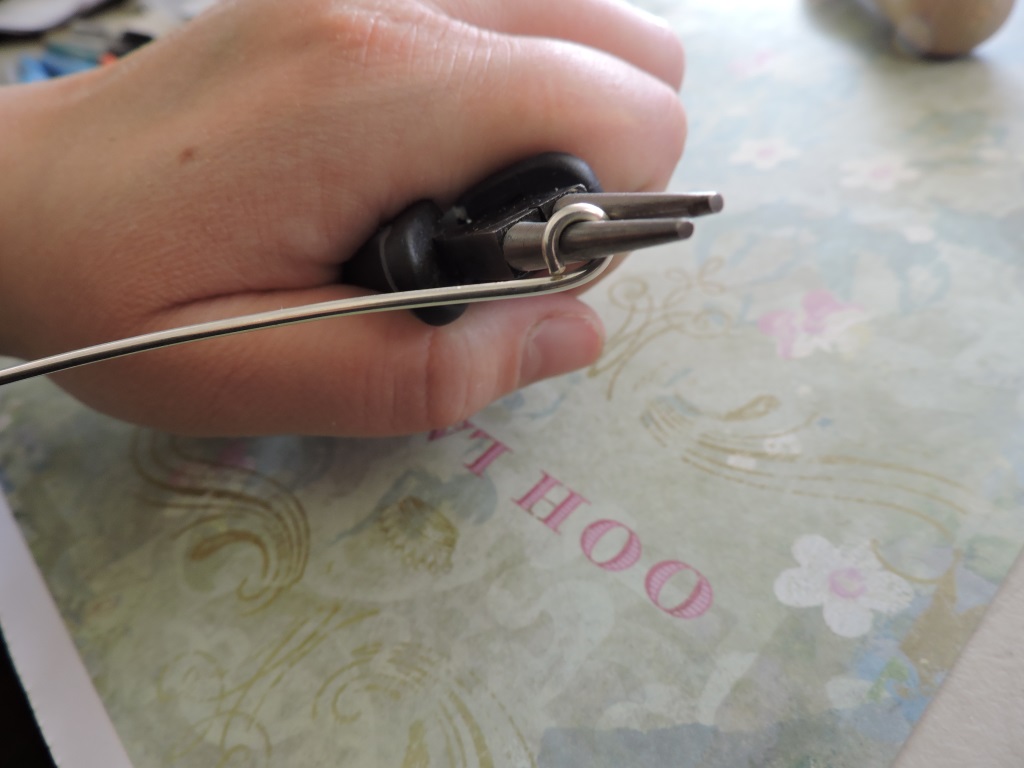
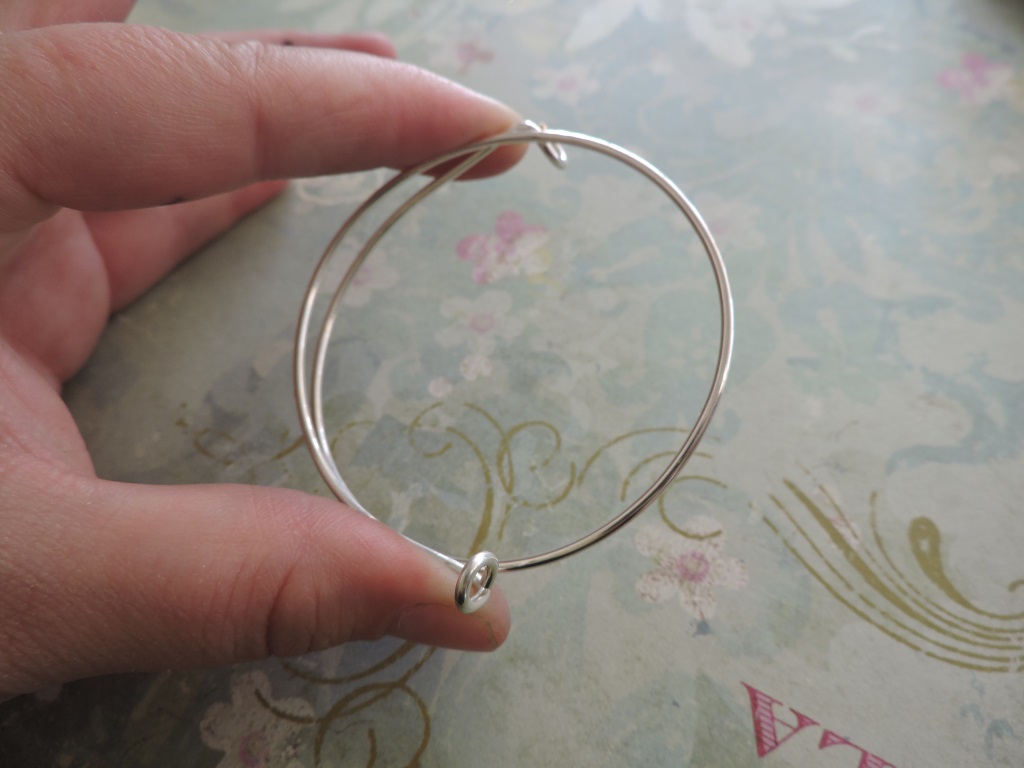
Using the nylon pliers bend the loop at a 90 degree angle. Bend the opposite loop the opposite way. So one is facing up and one is facing down.
You can see here how the wire should look. One loop up, one loop down.

Wrap the wire around the bracelet mandrel or a tapered glass if you don’t have a mandrel. You want to wrap it so that the wire overlaps about half the circumference.
Pull if off the bracelet mandrel while holding it to maintain the shape.

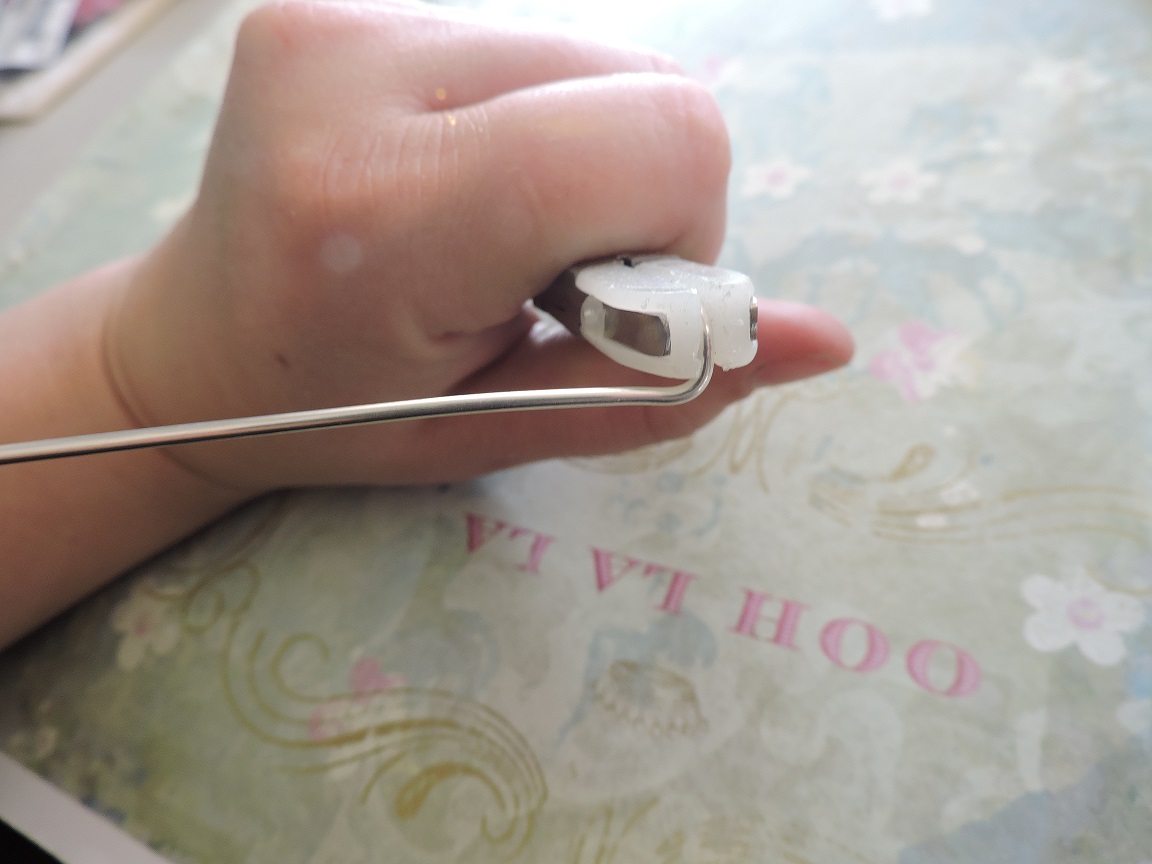
Using the nylon pliers so not to mar the wire, twist open the loop, and place the wire inside the loop. Then close the loop.
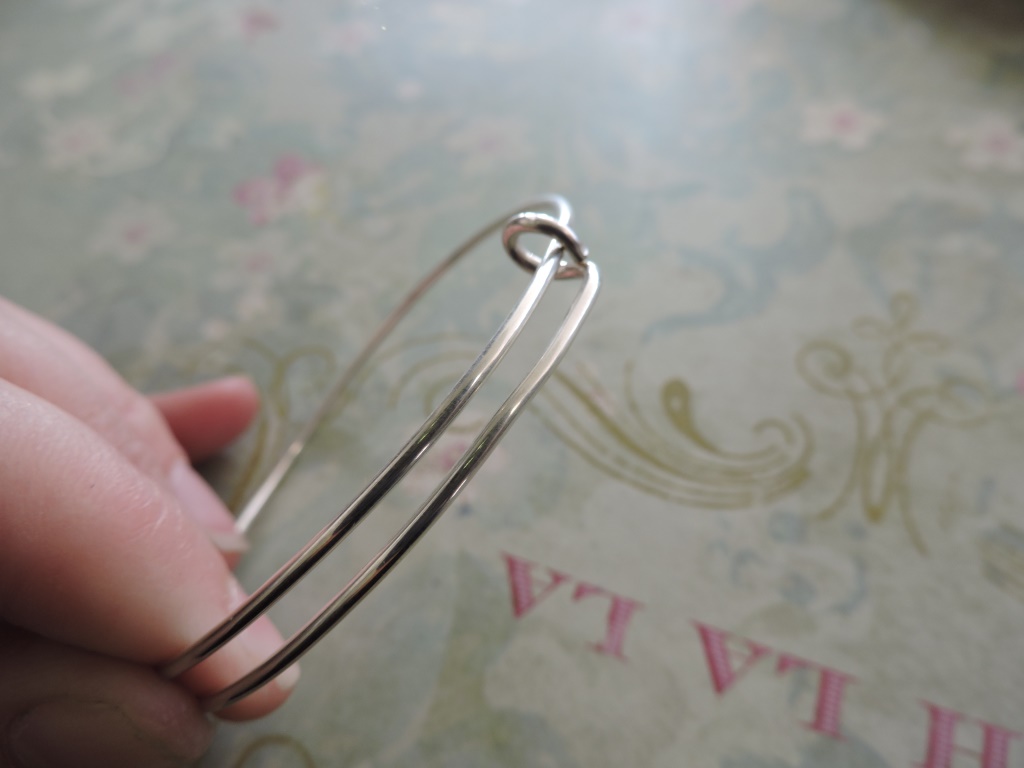
To complete the bracelet, do this on both sides.

If there are any kinks or bends in the wire, use the bracelet bending pliers to make the bracelet perfectly round. They work amazingly well!

Now you are ready to customize your bangle!
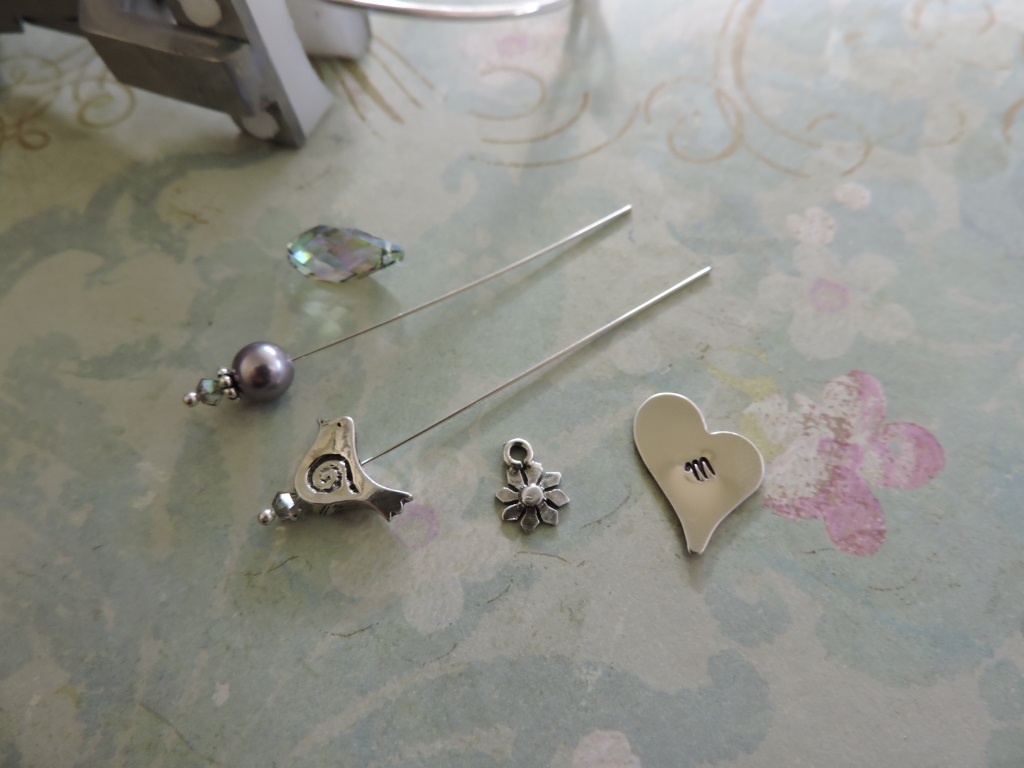
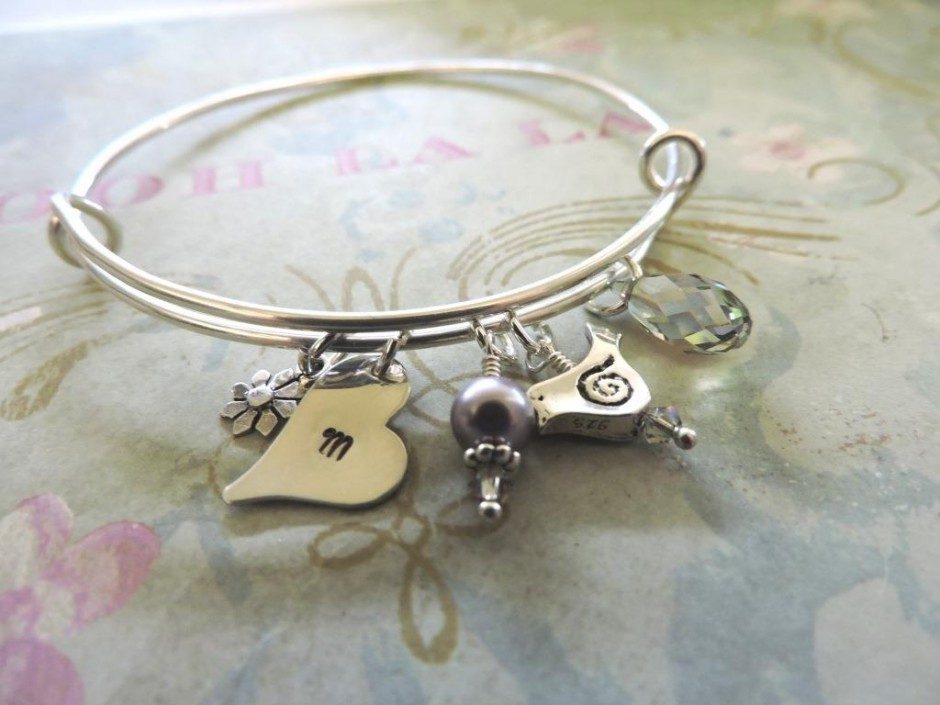
To customize this bracelet I selected an assortment of items: a Swarovski briolette, a Swarovski pearl, a sterling silver bird bead, a sterling silver silver flower charm, and a sterling silver heart that I stamped with an M. Arrange the beads onto the headpins.
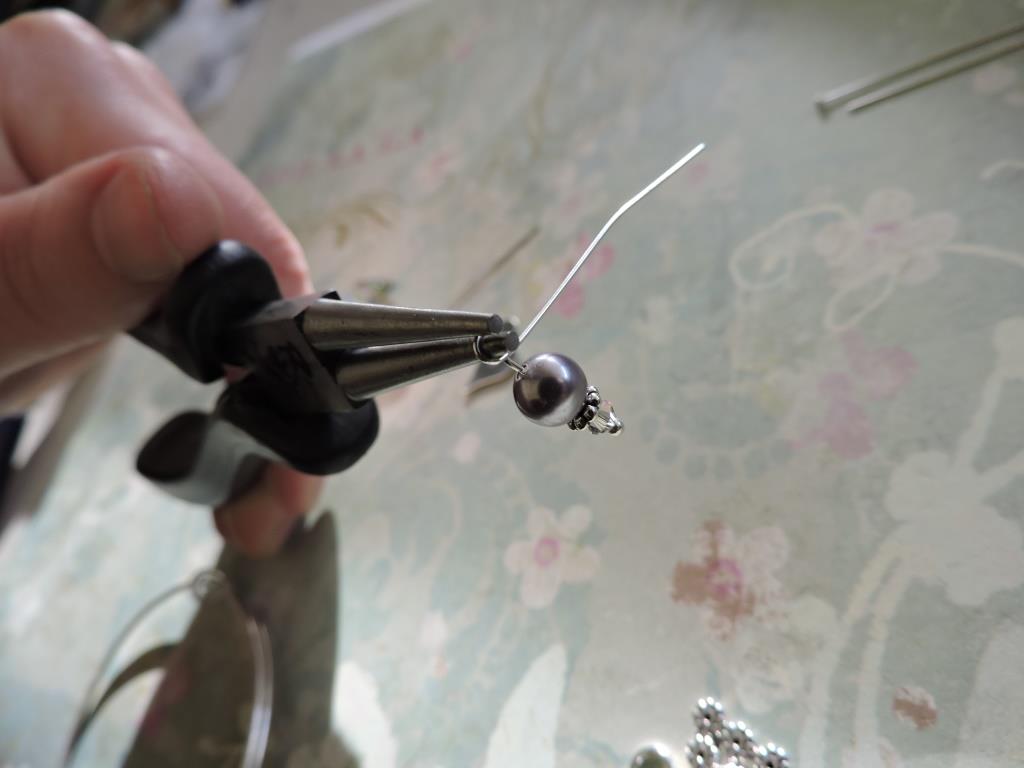
Using the round nose pliers, make a loop on the head pin a couple millimeters up from the pearl.

Wrap the wire down the length of the head pin until you get to the bead.
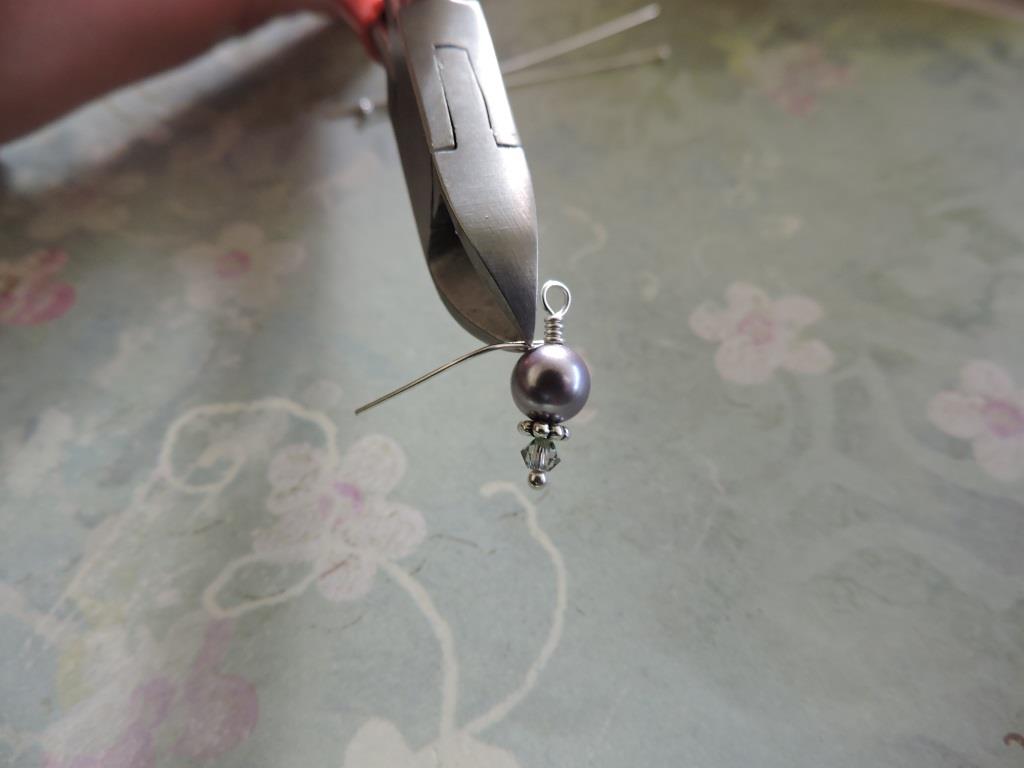
Clip the wire using your wire cutters. Then tuck in any tail of wire left with chain nose pliers.

Twist open the jump rings and attach your dangles to the bracelet.
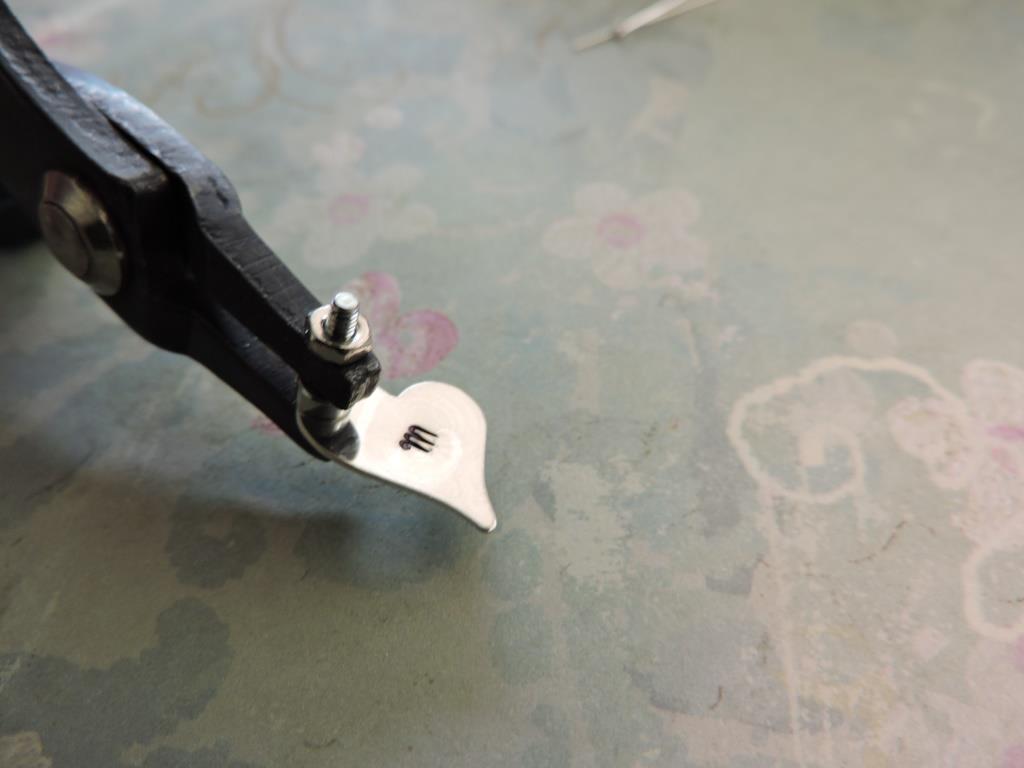
Using the metal hole punch, add a hole to the stamped sterling silver heart.
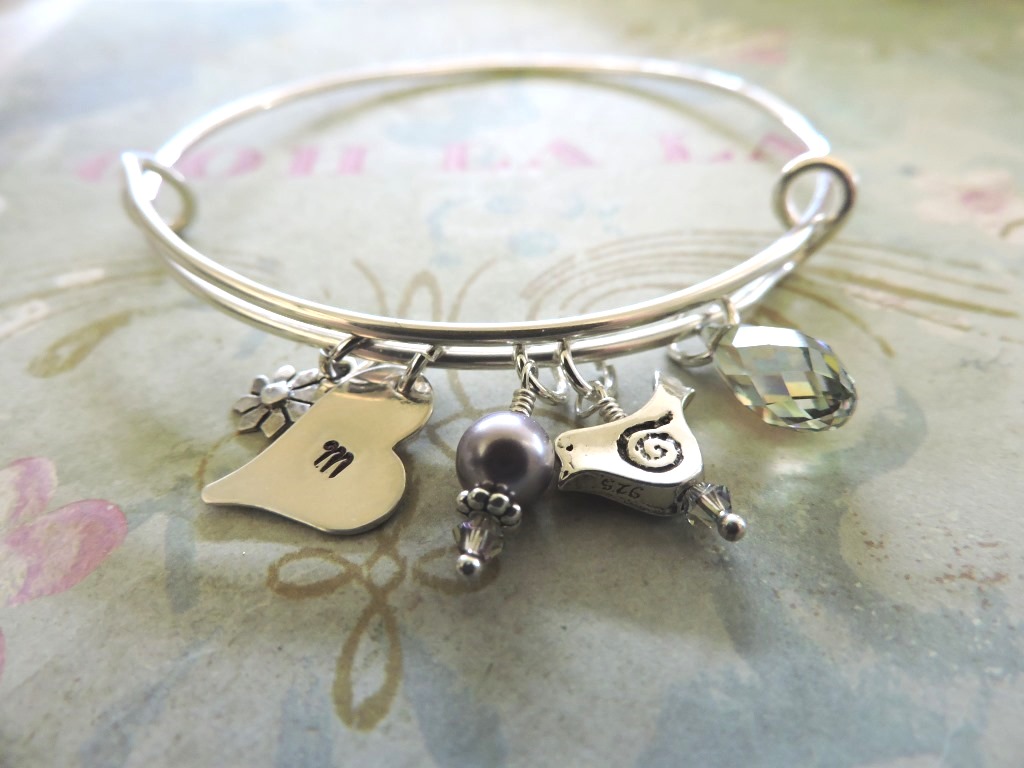
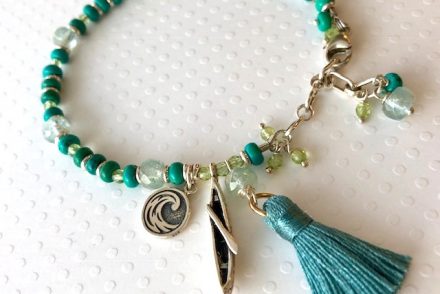
Completed bracelet!
I think I am going to be making a lot of these bracelets! They are kind of addictive! ~Tiffany

2 Comments
Woow this is lovely !! loved the idea !! Will surely gonna try these 🙂 Many Thanks
I have never cared enough to write a review or comment on ANY blog yet….until I came across your beautiful and WELL EXPLAINED way to CORRECTLY make these types of bracelets!!! I can’t thank you enough or tell you how well you wrote this post!!! Every picture and detail is perfect and written beautifully!!! And your bracelets are absolutely to die for!!!
Thank you so much for this post!! You just made my entire year!!!