In this do-it-yourself jewelry-making tutorial, the bracelet blanks from last week’s blog post, “Customizing Tim Holtz idea-ology® Word Bands for a Handmade Look”, combine with Rings & Things’ new leather strips to make two styles of leather cuffs.

Combine a customized bracelet blank with one of the many colors of Rings & Things’ leather strips to create a handmade leather bracelet.
Leather Bracelet Style One – A Single-Wrap Bracelet with Drawstring Clasp:
“In the Moment Leather Cuff Bracelet”

Step 1: Gather together the supplies you will need to make a drawstring clasp leather bracelet.
You will need the following tools and supplies:
ruler
1/2″ wide leather strip
3mm suede lace
5-ply waxed linen cord
large-hole bead (hole size 4mm)
customized Tim Holtz idea-ology® word bands
Sharpie®, Extra Fine Point

Step 2: Cut the leather strip to length. Size the leather so it fits comfortably on the wrist, ends butted together; mark the leather at the cut length. Use a ruler and hobby knife to make a straight cut at the mark.
. Mark two \"stitching\" holes on either side of the two word-band loops. Also mark a \"lacing\" hole set 5/16th inch from each leather end.")
Step 3: Measure and mark the position of the holes to be punched (it is easiest to do this before you curve the word band). Mark two “stitching” holes on either side of the two word-band loops. Also mark a “lacing” hole set 1/4th inch from each leather end.
 to punch the stitching holes for the bracelet blank; use the largest punch (4.5mm) to punch the lacing holes for the drawstring closure.")
Step 4: Use a rotary leather hole punch to cut holes in the leather strip at the marked positions. Use the smallest punch (2mm) to punch the stitching holes for the bracelet blank; use the largest punch (4.5mm) to punch the lacing holes for the drawstring closure.

Step 5: Align the bracelet blank with the punched stitching holes and stitch each side in place. The waxed linen cording is stiff enough to go through the 2mm holes without a needle. After making two or three stitches, pull the cord tight and secure with a knot on the backside of the bracelet.

Step 6: To create the drawstring closure, lace the suede cord through one hole and then back out, so the cord tails are on the outside of the cuff. String both cord ends through the large hole bead. Combine both cord ends and make an overhand knot approximately 2″ from the cuff. Slide the bead to tighten or loosen the cuff.

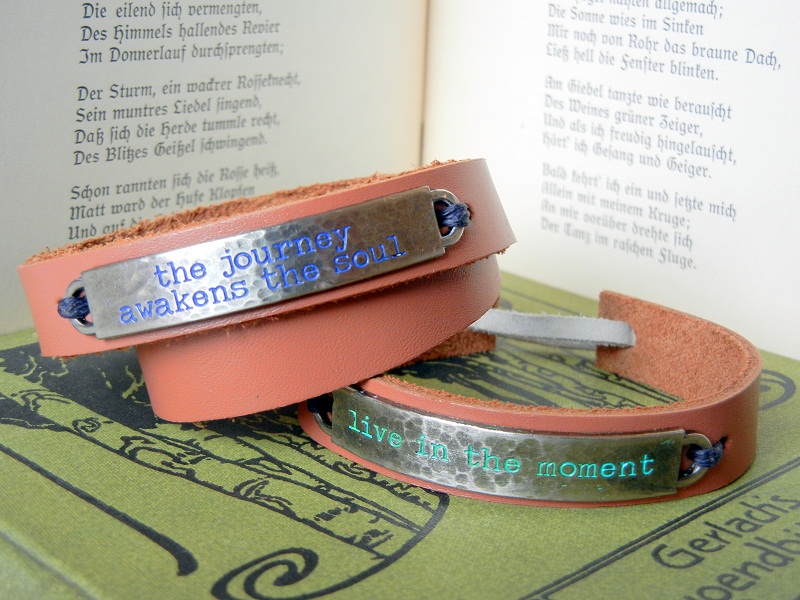
“Live in the Moment” leather-cuff bracelet with drawstring clasp is ready to wear.
Leather Bracelet Style Two – A Double-Wrap Bracelet with Hitch Clasp:
“The Journey Leather Wrap Bracelet”

Step 1: Gather together the supplies you will need to make a double-wrap leather cuff bracelet with hitch fastener.
You will need the following tools and supplies:
ruler
Sharpie®, Extra Fine Point
1/2″ wide leather strip
5-ply waxed linen cord
customized Tim Holtz idea-ology® word bands
Step 2: Cut the leather strip to length. Size the leather so it fits comfortably wrapped twice around the wrist; add one inch for the closure overlap. Mark the leather at the cut length. Use a ruler and hobby knife to make a straight cut at the mark.
Step 3: Measure and mark the position of the holes to be punched (it is easiest to do this before you curve the word band). Place the leather on your wrist and determine approximate placement for the metal blank. Mark two “stitching” holes on either side of the two word-band loops. Also mark a “hitch” hole set 1/4th inch from the first leather end and 1/2 inch from the second end.
 to punch the stitching holes for the bracelet blank; use the largest punch (4.5mm) to punch the fastener holes for the hitch closure.")
Step 4: Use a rotary leather hole punch to create holes in the leather strip at the marked positions. Use the smallest punch (2mm) to punch the stitching holes for the bracelet blank; use the largest punch (4.5mm) to punch the fastener holes for the hitch closure.

Step 5: Align the bracelet blank with the punched stitching holes and use waxed linen cord to attach the word band blank to the bracelet. Stitch the blank in place and knot the cord on the back side. For ease, a large sewing needle can be used.

Step 6 a: On one end hole insert the screw side of the hitch fastener.

Step 6 b: Attach and screw the hitch in place. From the backside, use a flat-head screw driver to tighten the hitch.

Step 7 a: On the other end hole, use the hobby knife to cut 1/8″ slits on opposite sides of the hole, running parallel to the strip length. This will allow the hitch to slip into the hole, but stay securely in place.

Step 7 b: Insert the hitch through the hole to close the fastener.

“The Journey Leather Wrap Bracelet” is ready to wear!

Bracelets can be worn together for a layered look.
Make things,
Mollie

5 Comments
Thanks for the options, Mollie! I’ve got everything I need to try this out…I can’t wait!
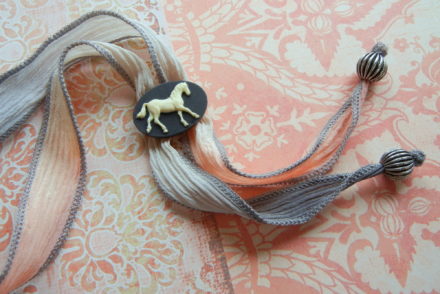
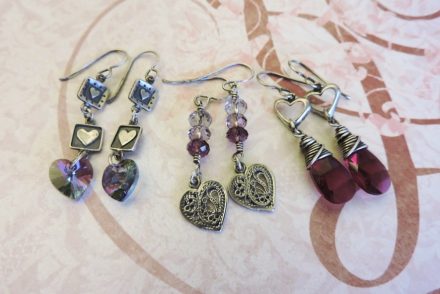
I thought I might share one more idea with you on using the Tim Holtz bands for bracelets. I’ve used these word bands before, but I completed the bracelet with lots of chain, Czech glass beaded links, and a handmade wire clasp. Of course I had to accent the band with lots of Swarovski crystal bi-cone dangles. 🙂
As always, Rings & Things’ Blog provide lots of creative ideas to get me excited about creating jewelry, and R&T website provides the quality supplies I need to make those ideas real. (And since I’m lucky enough to live in the Inland Northwest, R&T Showroom Staff provide exceptional in person customer service, too!) Thanks so much to all of you!!! 🙂
This is awesome; the possibilities are endless. Where can I find the word bands?
Thank you!!
Hi Denise!
You can find them at rings-things.com. Here is the direct link to the word bands:
https://shop.rings-things.com/cart/pc/idea-ology-Word-Bands-p35485.htm
~Polly
Thank you.
Thank you for sharing your knowledge. So sweet! Thank you!!!