I love jewelry with lots of sparkly adornment, but making simple jewelry loops can be tricky. Creating matching loops with the perfect shape requires skill and time. It’s little wonder the “1-Step Looper” is so popular — this magical tool makes consistent loops in one quick and easy step. In fact, the process is so quick, you might miss it if you blink.
Here are visual micro steps so you can see exactly how the looping pliers work.

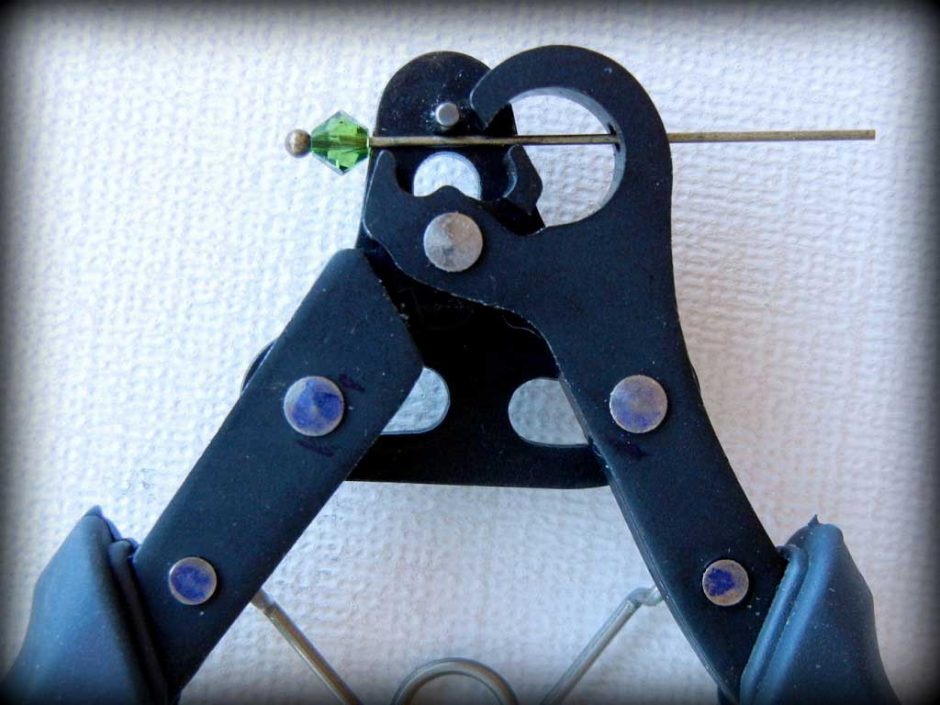
The 1-Step Looper works with head pins, eye pins and wire sized from 26 to 18 gauge, in both precious-metal and plated finishes.

Place a bead onto a head pin, slide the head pin into the pliers, and insert the excess wire through the hole in the pliers upper jaw.

Gently squeeze the pliers to trim and shape the wire.

Continue squeezing the pliers’ handles to form a perfect loop.

Before releasing the handles, gently press the wire downward to form a slight bend below the loop.

Release the handles to release the beaded charm.
.")
The 1-Step Looper is not only quick and easy to use, but it’s fun to use! It takes just minutes to make dozens of beaded charms (or links).

With the 1-Step Looper, all your handmade jewelry can sparkle!
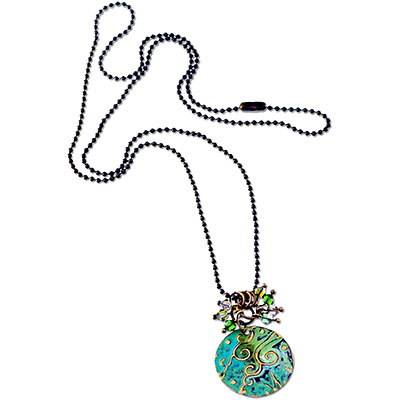
“Green Spark” Necklace by Rings & Things designer Mollie Valente
Visit Rings & Things Design Gallery for instructions and a complete list of supplies for this (and many other) jewelry projects!
Make things!
Mollie
[Editor’s note: Rings & Things is happy to ship the Original 1-Step Looper Tool and the 2 newer, larger sizes, anywhere in the world — but it keeps selling out, so if you see it in stock, don’t hesitate!]


7 Comments
Oh my! Love it – I must have!
Check out this web site. It is my Esty store. This necklace I used the 1 step looper and it was child’s play! So easy, easy on hands, easy uniformity, and makes this kind of work fun. The best tool I have purchased to date!
Hi Tamera,
Those are very cute little bees!
~Polly
Tis would save soooo much time……where can I get one of these???? Help please…I live in a remote northern community and need to order on line as it it 8 hours to the nearest small city… Thanks for your help! Cheers, Sheilah
Hi Sheilah,
You can get the 1-step looper here:
http://www.rings-things.com/Products/Wire-Wrapping-and-Looping-Pliers/The-BeadSmith-Pliers-1-Step-Looper.html
~Polly
Can you use it with wire to create loops on both sides of the beads? Instead of a head pin
Hi Christina,
Yes, you can! The original 1-step looper works with 18-gauge to 24-gauge wire. With the thinner gauges of wire, you may need to finish closing the loop manually (with a regular set of jewelry pliers) but 99% of the work is already done: all the loops are the same size, and they are nice and round.
There are 3 sizes now, the original 1.5mm loop and 2 larger loops sizes: http://www.rings-things.com/Products/Wire-Wrapping-and-Looping-Pliers/