Monthly Archives

March 2011

More bottle-cap jewelry designs!

March 15, 2011

Did you catch the bottle-cap jewelry we recently featured? (It’s cute!) It shows off three techniques–packing tape, glass tiles, and epoxy stickers.

Here’s another take: using resin in bottle caps. Over to designer Rita…
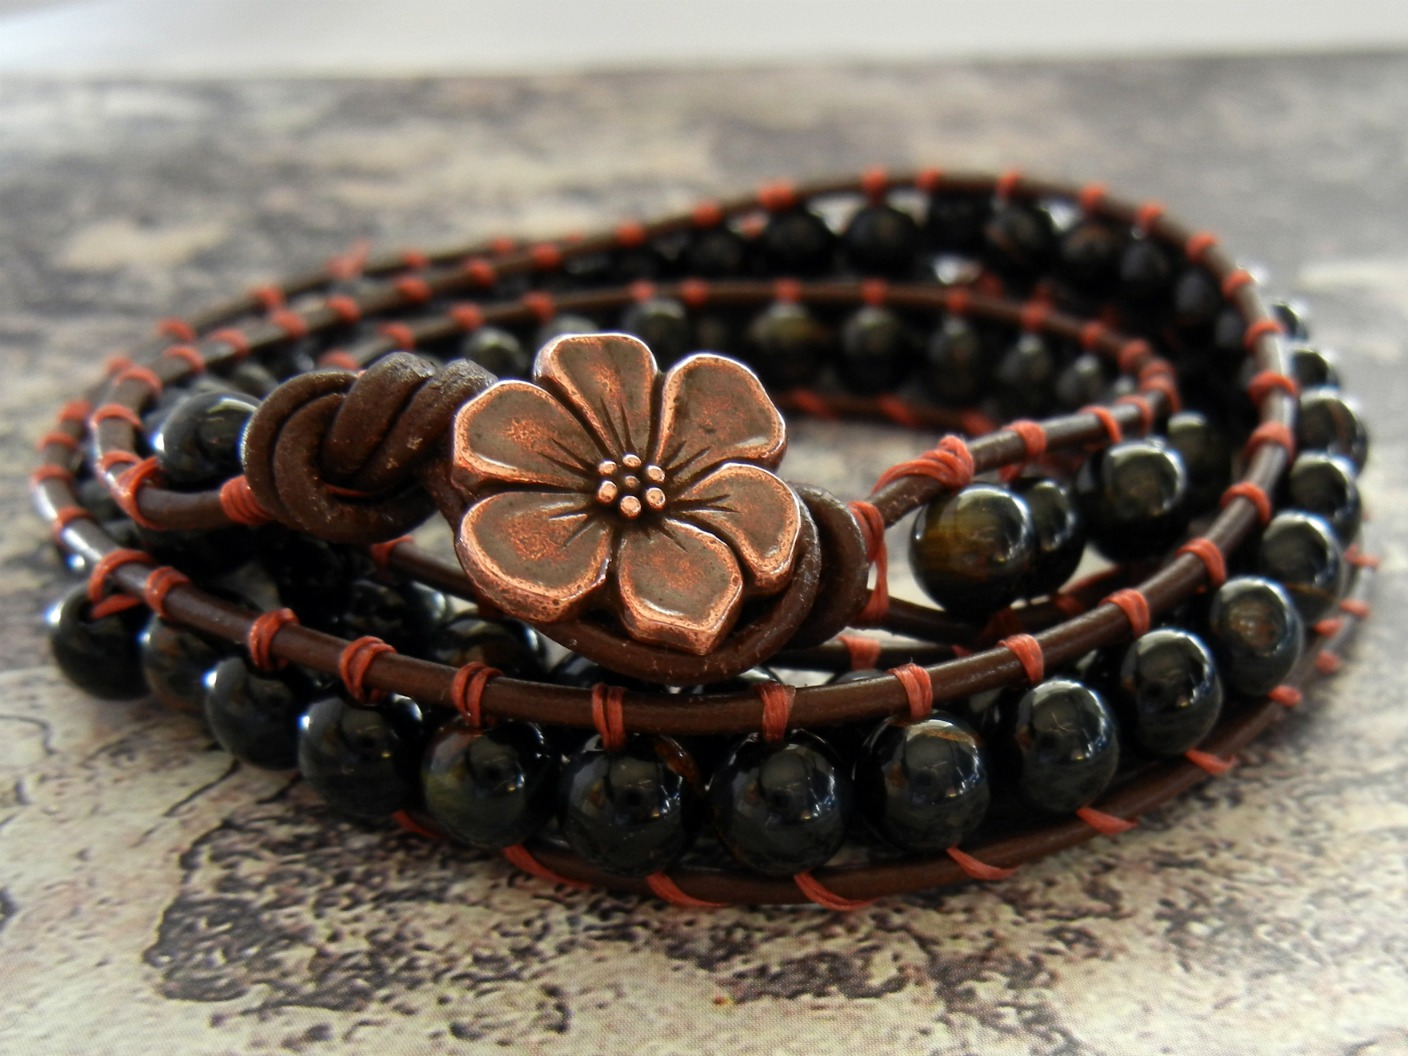
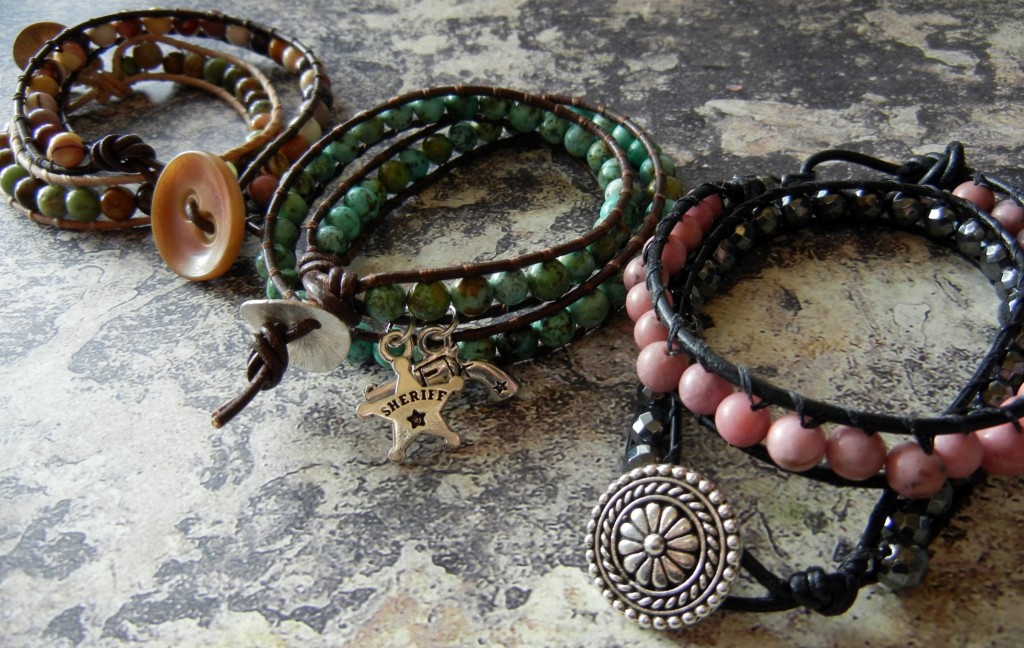
Crowned bracelet

CROWNED bracelet

What you need for the “Crowned” bracelet:

Qty. Stock # Name
3 each #55-075-17-43 Bottle cap, 17mm (chrome)
3 each #55-075-32-43 Bottle cap, 32mm (chrome)
3 each #83-220-25-02 1″ round epoxy stickers, Nostalgic 2
1 each #40-337-9 Bracelet blank, 7.2″, disk and loop, hammered oval (black gunmetal)

Tools and supplies:
3 buttons (artist’s stash)
Magic-Glos UV resin (#82-501-01)
UV Light (#82-593)
Epoxy 330 (#60-230)

Hints:
* Seal buttons inside mini bottle caps first.
* Glue bottle caps to bracelet blank.
* Then apply epoxy stickers.


Milky Way cufflinks

MILKY WAY cufflinks

To make the “Milky Way” cuff links:

Qty. Stock # Name
2 each #55-075-17-43 Bottle cap, 17mm (chrome)
2 each # Cuff link, 10mm pad (white)


Tools and supplies:
Images from scrapbooking paper
Scissors
Clear packing tape
Hypo cement (#
60-250)
Magic-Glos UV resin (#82-501-01)
UV light (#82-593)
Epoxy 330 (#60-230)

Hints:
* Cut image to size.
* Seal with packing tape and cut out.
* Adhere to bottle cap with hypo cement.
* Apply UV resin.
* Attach cufflink findings with epoxy.


How Many Stars clip

HOW MANY STARS clip

Materials Rita suggests for the “How Many Stars” clip:
Qty. Stock # Name
1 #46-881-266-3 Amate Studios™ 26mm bottle cap bezel pendant, silver plate
2 #28-333-89 lampwork glass chili pepper beads, red
12″ #47-036 22-gauge round wire, silver plate (cut two 6″ pieces)
2 #37-167-3 8mm round jump rings, silver plate
1 #30-620-50-3 31x15mm oval swivel clip, silver plate
1 #82-500-08 8oz EasyCast epoxy resin kit

Tools and supplies:
scissors
colored craft paper
Mod Podge®
paintbrush
resin mixing set (#82-599)
antacid tablet (!)
flat-nose pliers (#65-080)

Hints:
* Seal the front and back of paper with Mod Podge to prevent the color from bleeding. Glue this to the bottom of the bezel cup to prevent it from floating.

* Coat the antacid tablet with Mod Podge to prevent it from dissolving in the resin.


3 Bonus Tips!

Tip 1: For additional details about techniques used in these designs, see the technique sheet: Gluing Hints for Metal Findings

Tip 2: View free jewelry-making technique sheets (PDF files) for scads of designs like these!

(You’ll need Adobe Acrobat Reader. You can download it free here.)

Tip 3: …Secret…a whole nother kind of bottle-cap jewelry is coming soon to Ring s & Things’ online store…

"What's the special?": 5-day sale

March 10, 2011

.

.

Update:
See current Sales and Clearance items
— no codes required!

.

.

.

.

5-Day Sale!

Thru Sunday, March 13, 2011: Celebrate the beauty of Mother Nature with 10-20% off laser-cut wooden charms, sale natural-material beads and sturdy hemp twine! 5 days only!
Wood charms 15% Off: Laser-Cut Wood Charms
Use light-weight laser-cut wooden components as is, or finish them with stain or paint. These finely-detailed embellishments offer great versatility. Choose from steampunk gears, delicate flowers & over 100 more shapes! (SALE1C2-15)
Malas 15% Off: Malas & Wooden Beads
Find peace of mind with rosewood, sandalwood & rudraksha malas, plus round wood beads. Use as malas, to make beaded beads or to add texture to a wide variety of jewelry! Some sizes are perfect for making rosaries, too! (SALE1C2-15)
Mother of pearl beads 20% Off: Mother of Pearl Beads
Combine the shimmering beauty of Mother Nature with the classic shapes of geometry for a look that’s pure modern! Sale mother of pearl beads come in stylish, flat and puffed shapes that pep up any design. (SALE1C2-20)
Hemp twine 10% Off: Hemp Twine
Get durable results with hemp twine! Choose from polished Romanian hemp in water-safe colors, organic fair-trade hemp in natural shades, and Hemptique™ spools colored with ecologically-friendly dyes. (SALE1C2-10)
Click here for free projects that feature sale items!

Project Alert: Getting Creative with Hair Sticks

March 9, 2011
Here at Rings & Things, we are always trying to spice up our stock with fun new items.
Ruby Ballerina, a free hair pin design

“Ruby Ballerina” Hair Sticks with Red Sparkly Glass

Recently, we have delved into the enchanting world of hair findings. Our design team was challenged to use some of our new findings to make some unique hair decorations. I was given the task of creating something with our cherry
hair sticks that resemble chopsticks.

I wanted to make something easy, yet whimsical that could cascade through your locks and add a touch of “ooh-la-la” to the ordinary messy bun. I came up with two designs, that could easily be altered to fit your style or match any outfit. Simply pick whatever beads you like! You could go fun and flirty or sophisticated and elegant (think wedding party?). Whatever you decide, this project is easy, affordable and a great way to tackle the winter blues!

Hippie Chic Ballerina Hair Stick, a free jewelry design from Rings & Things

“Hippie Chic Ballerina” Hair Stick with Buddha Head Beads

Make your own Hair Sticks with:

Here are a few more ideas for creating hair findings! Or take a peek at our Jewelry Design Gallery for tons of free project ideas!

“Spring Flowers” Hair Clip by Cindy Morris

Rings & Things' free jewelry design, The Birds bobby pins

“The Birds” Bobby Pins by Jaclyn White

Rings & Things free jewelry design: Blue Bee bobby pin

“The Blue Bee” Bobby Pin by Sondra Barrington

Check out some of our other fun hair findings at Rings & Things and let the creativity begin! We have a great selection of bobby pins, hair combs, barrettes, and hair picks waiting for your personal touch!

Tiffany

Rings & Things Showroom

Design Team


PS: here are some handy links to some other how-to’s in the Rings & Things blog!

How to make wrapped leather bracelets

March 8, 2011


Triple-wrap leather bracelet with blue tigereye beads

Let me begin by stating the obvious – this style of wrapped leather bracelet is EVERYWHERE this season. Everywhere! Even my athletic clothing catalogs – which only have maybe three pieces of jewelry – are featuring this style. Why? Because it is casual yet chic and infinitely customizable! The catalog (which shall remain nameless) priced each bracelet at $120. Needless to say, you can make your own for far, far less using supplies from Rings & Things!

leather wrapped gemstone bracelets
Five different leather wrapped gemstone bracelets designs: green opal, mookaite, African turquoise, hematite and rhodonite

The supply list is pretty short:

  • 4-6mm round beads We used gemstone beads, but glass, crystal beads or pearls would also be lovely. The number you need depends on how many times you want to wrap the bracelet around your wrist. Larger beads work too – but they will start getting heavy on multiple-wrap styles. All the bracelets pictured in this post use 6mm. Our new wrapped bracelet kits use 4mm beads. <– The kits are great, because once you make your first bracelet, you’ll have plenty of thread and needles left over with which to make many more!
  • Leather cord Our examples use Greek leather. Both the 1.5mm and 2mm worked great.
  • Thread Needs to be sturdy and able to pass (doubled) through your beads twice. Pick a color that matches your leather or that provides a pretty contrast. We used earth assortment). We now have tubes with all black or all brown bobbins available too!
  • Button or bead for the clasp. Rings & Things has some pretty buttons from TierraCast.
  • Required tools: needle (size 12 is a good general choice), scissors, work surface with clips or clothespins.
  • Optional tools: needle threader, thread conditioner, glue (GS Hypo Cement, Bead Fix or other fabric-friendly adhesive for extra security on your knots).
Wrapped bracelet made with green opal gemstone beads and natural Greek leather.

The technique:

  1. Choose your bracelet length and cut your leather. The formula is double your finished bracelet length plus extra for making the knots. For single-wrap bracelet, measure your wrist and then triple that number to get the length of leather needed (7″ wrist = 21″ of leather). For a triple-wrap, multiply your wrist by seven (7″ wrist = 49″ leather). It is better to leave your leather too long than to end up with not enough.
  2. Cut a long piece of thread (10-12 feet) and thread your needle. Knot the end of the threads.
Knot the leather and thread together, leaving a loop on the end.

Holding the thread by the knot, let the needle fall to the ground so it is centered on the thread. Fold your piece of leather in half, leaving a loop large enough for your button to fit through. Holding the knot-end of the thread with the leather, tie an overhand knot so that your thread and leather are now connected.

Make sure your button will fit through the loop before you tighten the knot.
  • Attach your piece to a work surface.

    Using binder clips or clothespins, attach your loop to the top of a piece of cardboard. Use a second clip to attach the leather ends to the bottom of your board (leave the thread loose).

  • Starting with your thread in the middle of the two strands of leather, wrap the thread OVER the right strand to the outside, then UNDER the right, OVER the left to the outside, then UNDER the left and OVER the right. It is a simple figure-8 stitch.
  • how to stitch a wrapped leather bracelet
    Over, under, over, under – once you get a rhythm going, the bracelet is super easy to make!

    Do this 5-6 times, pulling the thread tight around the leather to form a binding. (The pattern could go either way, but since I’m right-handed I’m going to describe it this way. Reverse it if needed!) Here is a close-up of the lashing:

    A few stitches without beads secures the thread nicely on the leather.
  • Now you are ready to start adding beads. After your thread has passed UNDER the left leather, add a bead. Hold the bead between the two strands of leather, and stitch the thread OVER the right, back UNDER the right, THROUGH the bead hole again and OVER the left. Bring the thread UNDER the left and add another bead in the middle. Repeat many many times! Keep the beads pulled in snugly against the leather. Pay attention so that your stitches all face the same way. If your thread seems to snag a lot, use a bit of thread conditioner or beeswax on it.
  • Adding the first bead to a wrapped bracelet – but really I’m posting this picture to show off Jaci’s manicure!
    A work in progress. See how the beads line up inside the leather?
  • To finish the bracelet, form several stitches without beads, just like you did in step 5. Now you are ready to attach your button or bead. Ideally, you’ll have enough leather left to tie on a button with a nice knot on the back and trim the ends.
  • button end for wrapped leather bracelet
    Long tails makes it easy to tie on a button closure.
    If your button has a small loop, you might need to miter (angle) the leather end and pull it through with pliers.
    Buttons, disk beads and crimp ends can all be used to finish the bracelet ends.

    If somehow you come up short, all is not lost. You can tie a disk bead onto just one strand of the leather (use glue to enforce your knot), like on the 2nd bracelet from the left. Or if your ends are really short, use a hook-end crimp, as shown on the pink bracelet on the right.

  • If desired, add a touch of glue to the knots to ensure the thread is gripped securely by the leather. Trim ends as needed.
  • Other design options:

    • String your button or bead clasp first, then tie a series of knots on the end to make the bracelet length adjustable.
    • Use jump rings to attach a couple of charms, like on Mollie’s Belle Star bracelet.
    • Leave the leather tails long and add beads or decorative knots.
    • Substitute a different type of cord for the leather, as in Tracy’s rattail and dragon blood jasper design:
    wrapped gemstone bracelet with rattail instead of leather

    Have fun creating your own wrapped bracelets! You’ll find it is quite addictive once you start. Please feel free to post questions – I will do my best to answer! ~ Cindy


    Need supplies? Rings & Things ships around the world! The most popular wrapped leather bracelet supplies are:


    Q: “How do you start a new thread in the middle of the bracelet?”

    (answers selected from replies to blog comments)

    A: It’s best if you can avoid running out of thread (start with 10-12 feet to avoid running out). But if you do, start a few beads back and go through them again. This means you’ll have to go through some of your beads 4x, which (depending on your beads and cord) might be impossible. Other problems are that your bracelet will be weaker than if you were able to use 1 continuous thread, and you’ll be able to see the section that has twice as much cord as the rest of the bracelet.

    A2: Get really good at hiding knots in your beads. =)

    A3: If you’re down to just a tiny bit of thread, it is going to be hard to tie the ends onto new strands, but if you realize you’re not going to make it and cut off the needle, rethread and knot the strands together, you can probably pull the knot inside of a bead. I hope this makes sense – basically, you’re not “starting anew” but pausing, adding on some extra thread, and picking up right where you left off. 🙂

    www.rings-things.com

    Edited December 2021 to update links.

    Pop the Top on Creativity with Bottle Caps!

    March 4, 2011
    Creativity’s A-popping with Bottle Caps!
    How about some easy, custom mixed-media jewelry? Just pop images into these bottle caps (aka bottle crowns), seal, and glue the cap to a jewelry blank of your choice. (Pendants, pins, rings, bobby pins, cuff links, belt buckles…) These bottle caps are good to go: they have no pesky rubber lining! Choose from 4 sizes & 16 colors, plus a unique flower-shaped cap!
    Pop the top on creativity with bottle caps!

    Jewelry Bottle Caps

    Jewelry Inspirations:

    some ways to use bottle caps…

    Give peace & bottle caps a chance with this adorable pin design.
    “Flower Power” Pin
    Make trendy belt buckles with our super jumbo bottle crowns.
    “Blue Rabbit” Belt Buckle
    Hello Kitty is always a favorite, and so is this earrings design!
    “Meow” Earrings


    And the Early-Bird Winner Is …

    March 3, 2011
    Creativity’s A-popping with Bottle Caps!
    How about some easy, custom mixed-media jewelry? Just pop images into these bottle caps (aka bottle crowns), seal, and glue the cap to a jewelry blank of your choice. (Pendants, pins, rings, bobby pins, cuff links, belt buckles…) These bottle caps are good to go: they have no pesky rubber lining! Choose from 4 sizes & 16 colors, plus a unique flower-shaped cap!
    Pop the top on creativity with bottle caps!

    Jewelry Bottle Caps

    Jewelry Inspirations:

    some ways to use bottle caps…

    Give peace & bottle caps a chance with this adorable pin design.
    “Flower Power” Pin
    Make trendy belt buckles with our super jumbo bottle crowns.
    “Blue Rabbit” Belt Buckle
    Hello Kitty is always a favorite, and so is this earrings design!
    “Meow” Earrings


    Spring BeadTour prevue

    March 2, 2011

    The first warm hints of springtime are dawning.
    Once again comes the promise of new…beads!
    Enjoy our spring BeadTour preview–
    and we’ll see you at our bead shows, March 6 through June 30!

    Manmade Red Rainbow Calsilica beads


    Birdseye Rhyolite beads


    Cubic zirconia (CZ) beads


    Peridot beads and Black Silver Leaf beads


    Rhodocrosite beads, Rose Snowflake Obsidian beads, and more manmade Red Rainbow Calsilica beads


    Cape Amethyst beads, Lapis beads, and Aquamarine beads


    Have you been to our popular BeadTour bead shows yet?
    We come to dozens of cities across the USA, with thousands of strands of new beads at 15% off wholesale prices!
    GET INVITED
    🙂